
This article explains enabling or disabling your “Search history” on your local Windows 11 PC.
Local search history in Windows refers to recent search queries performed on your device using the Settings Search Helper.
When you search for files, apps, or settings using Search Highlights, your device keeps a record of your recent searches, which can help improve your search experience by providing faster and more accurate results based on your search history.
By default, Windows saves recent search history locally on the device, but you can enable or disable this feature based on your preferences.
When one turns on cloud content search, Windows saves recent search history locally on the device by default, which helps users find things faster. Things that you search for previously may rank higher in the search results using this feature.
How to enable or disable search history in Windows 11
As mentioned, users can turn on or off storing local search history on Windows 11.
Here’s how to turn it on or off.
First, open the Windows Settings app.
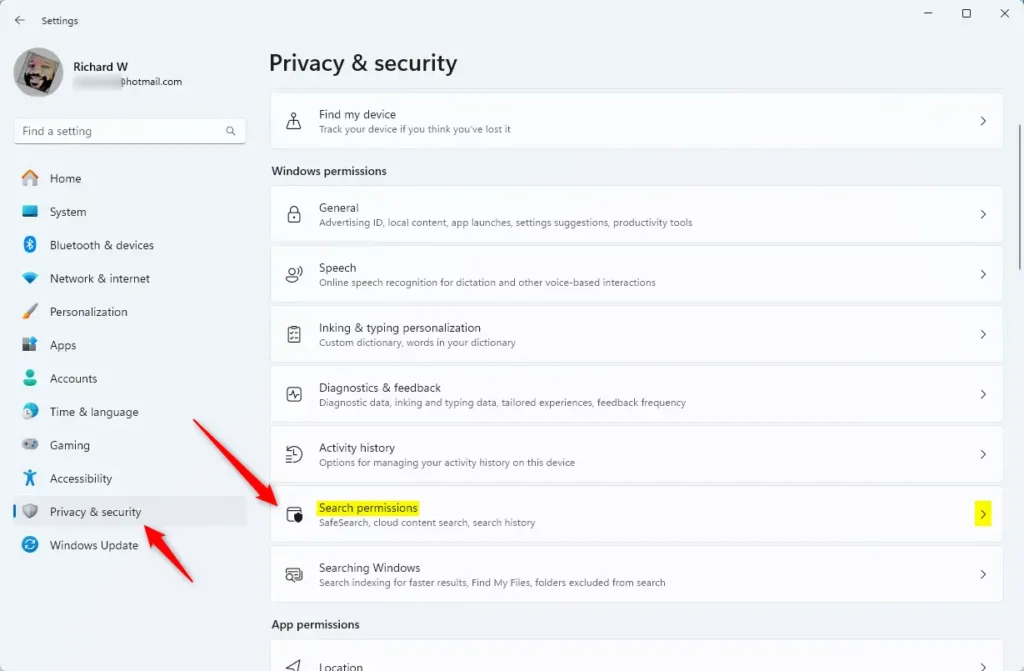
Then, select Privacy & security on the left and the Search permissions tile on the right to expand it.
Next, toggle the “Search history on this device” switch button under “History” to enable or disable storing your local search history.
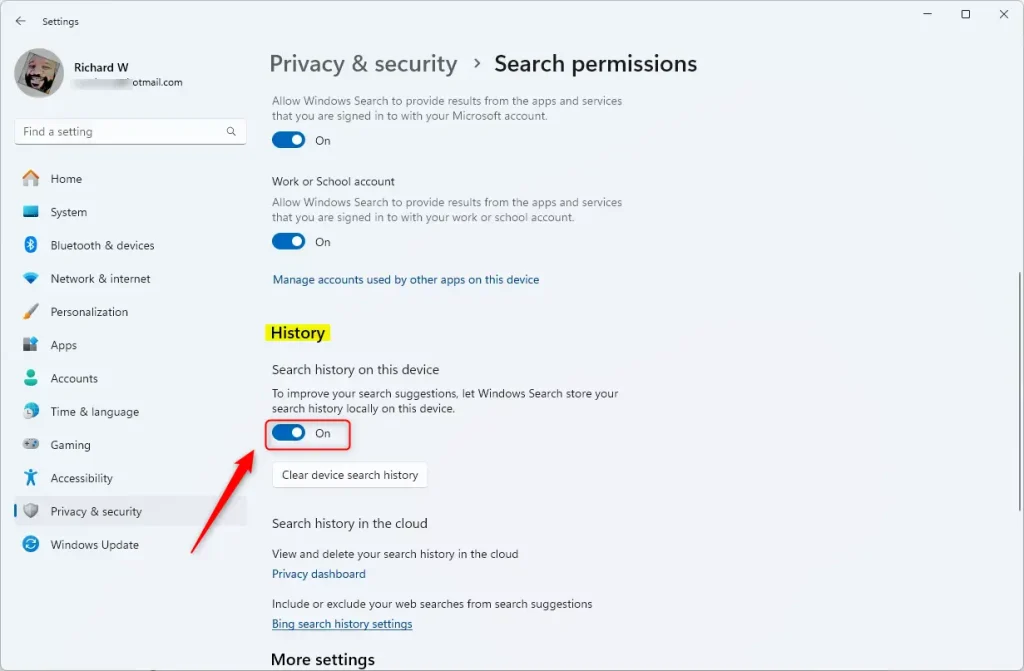
Exit the Settings app when done.
Turn on or off Search history using the Windows Registry Editor
Yet another way to enable or disable local search history is to use the Windows Registry editor.
First, open the Windows Registry and navigate to the folder key path below.
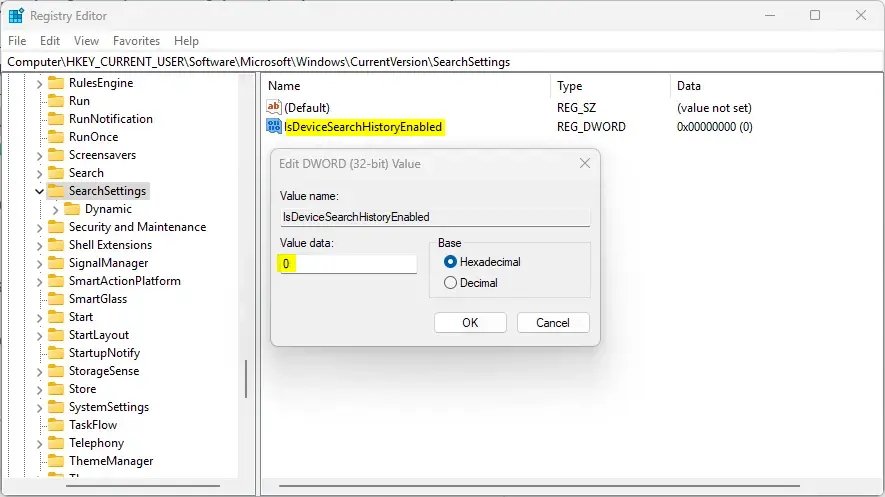
Computer\HKEY_CURRENT_USER\Software\Microsoft\Windows\CurrentVersion\SearchSettings
Next, double-click the IsDeviceSearchHistoryEnabled (REG_DWORD) name on tSearchSettings’gs’ right pane to open it.
Then, enter a value 1 to turn on storing search history on the local device for all users.
Enter 0 to disable storing search history on the local device for all users.
If you do not see the “IsDeviceSearchHistoryEnabed” item, right-click a blank area and create a new DWORD (32-bit) registry item.
Then, enter the name “IsDeviceSearchHistoryEnabed” and the value you want.
Save your changes and restart your computer.
That should do it!
Conclusion:
- Enabling or disabling local search history in Windows 11 can enhance privacy and control over personal data.
- The process involves using the Windows Settings app to toggle the search history switch under “Privacy & Security” and the Windows Registry Editor to manually adjust the search history settings.
- Users can decide whether to let Windows save recent search history locally on the device based on their preferences and privacy concerns.


Leave a Reply