

This post shows students and new users how to turn clipboard history on or off when using Windows 11.
Clipboard history is a feature in Windows that allows you to access items you have copied to your Clipboard in the past. With clipboard history enabled you can easily access and paste items you may have copied earlier, making it easier to use them again without having to recopy them.
Enabling or disabling clipboard history in Windows allows you to control whether your copied items are saved. By default, Windows saves your copied items to the Clipboard, but enabling clipboard history allows you to access a history of your copied items and paste them again later.
This can be helpful if you frequently copy and paste the same items, saving time and effort. On the other hand, disabling clipboard history can help protect your privacy by preventing others from seeing what you’ve copied.
It can also prevent sensitive information from being saved on your device. Ultimately, it’s up to you to decide whether to enable or disable clipboard history based on your needs and preferences.
How to enable clipboard history in Windows 11
Again, Windows allows you to copy and paste content by default. However, to improve your clipboard experience, you may want to enable clipboard history to enable other unavailable features with the basic coping and pasting content.
To enable clipboard history, use these steps.
First, open the Windows Settings app.
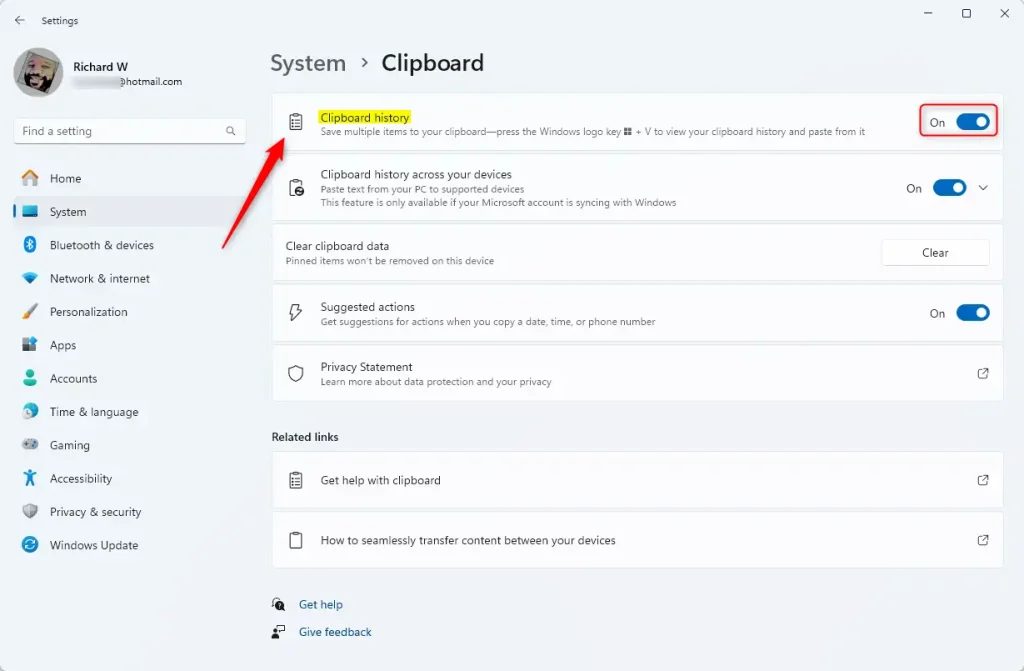
Then, select System on the left and Clipboard tile on the right to expand it.

Next, select the “Clipboard history” tile. Then, toggle the switch button to the On position to enable it.
To disable it, toggle the button to the Off position.
Exit the Settings app when you’re done.
Enable or disable clipboard history using group policy
Another way to disable or enable clipboard history is to use the Local Group Policy Editor.
First, open the Local Group Policy Editor (gpedit.msc). (Search for “Edit group policy”) on the Start menu.
Then, navigate the folders below:
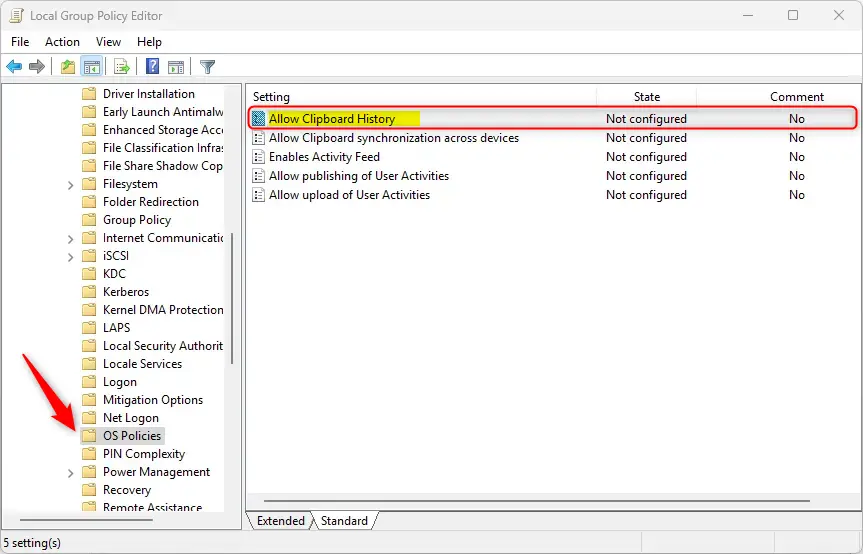
Computer Configuration > Administrative Templates > System > OS Policies
In the Group Policy details pane on the right, locate and double-click the “Allow Clipboard History” settings.
On the “Allow Clipboard History” window, set the option to Not Configure, Enabled, or Disabled.
- Not Configured (default)
- Enabled – History of Clipboard contents are allowed to be stored.
- Disabled – History of Clipboard contents are not allowed to be stored.
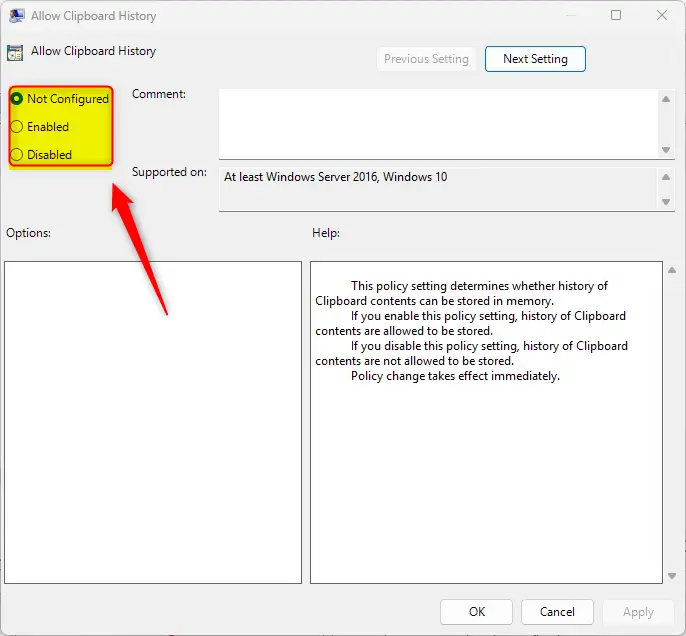
Click OK to save your changes. You may have to reboot your device for the settings to apply.
Turn on or off clipboard history using the Windows Registry Editor
Yet another way to disable clipboard history is to use the Windows Registry editor.
First, open the Windows Registry and navigate to the folder key path below.
Disable or enable for current user:
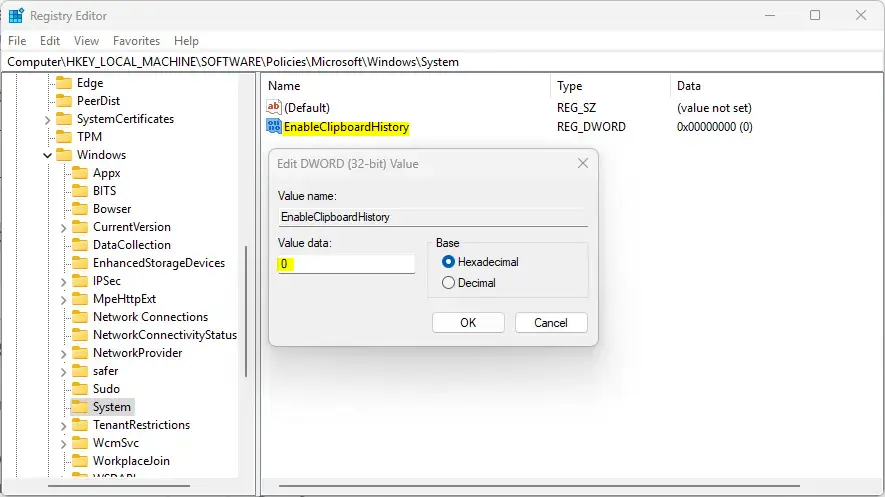
ComputerHKEY_LOCAL_MACHINESOFTWAREPoliciesMicrosoftWindowsSystem
Next, double-click the AllowClipboardHistory (REG_DWORD) name on the System key’s right pane to open it.
Then, enter a value 0 to disable the Clipboard history.
If you do not see the “AllowClipboardHistory” item, right-click a blank area and create a new DWORD (32-bit) registry item.
Then, enter the name “AllowClipboardHistory” and enter a value 0
To restore the default behavior and allow clipboard history, delete the “AllowClipboardHistory” name created above.
Save your changes and restart your computer.
How to enable clipboard history using keyboard shortcuts
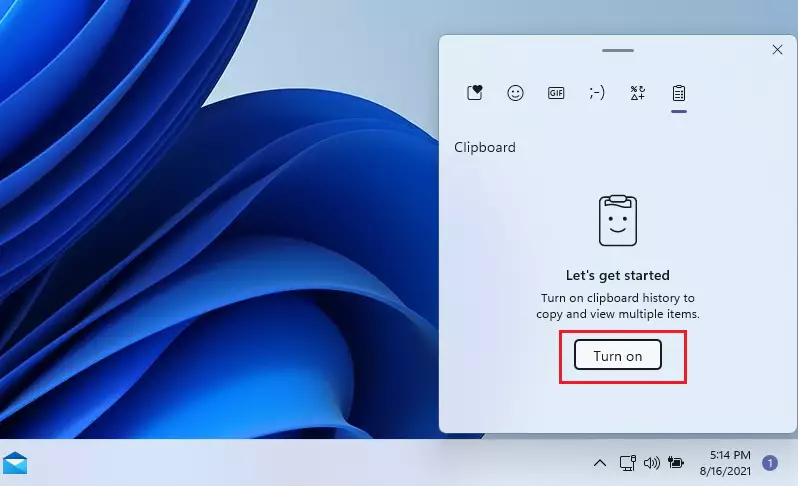
The same steps above can be done quickly using Windows shortcuts. To turn clipboard history on or off using the shortcuts, press the keys below:
Windows logo key + V
That will show you a pop-up window where you can enable it
When clipboard history is enabled, you can use the same Windows key + V shortcuts to view items in your history.
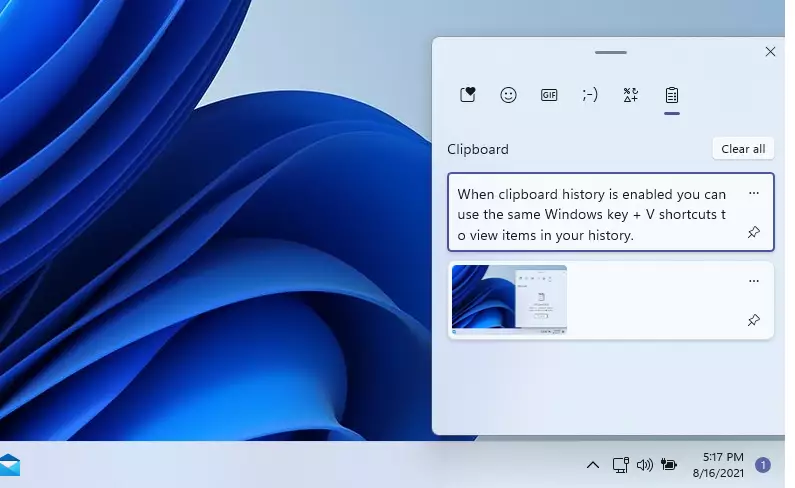
Remember, all items in the history will be cleared when you reboot our computer. You must pin them there to keep items in history and survive a reboot.
That should do it!
Conclusion:
In summary, managing clipboard history in Windows 11 can enhance your productivity and safeguard your privacy. Here are the key takeaways:
- Clipboard history allows easy access to previously copied items, streamlining the copying and pasting process.
- You can enable or disable clipboard history through the Windows Settings, Local Group Policy Editor, or Windows Registry Editor, providing flexibility based on your needs.
- Keyboard shortcuts, specifically Windows logo key + V, offer a quick way to access and manage clipboard history.
- Remember that clipboard items will be cleared upon reboot unless pinned to retain them between sessions.
- Ultimately, the choice to use clipboard history depends on your workflow and privacy preferences.


Leave a Reply