Do you want your Windows 11 PC to find and share files with other devices on your home or work network? This guide will show you simple steps to turn on Network Discovery and File Sharing.
What is Network Discovery?
Network Discovery is a feature that helps your computer see and connect to other devices on the same network. For example, it lets you find other computers, printers, or shared folders on your home Wi-Fi.
Windows turns on Network Discovery automatically when you connect to a Private network (like your home Wi-Fi). But on Public networks (like in cafes or airports), it stays off to keep your PC safe.
How to Enable Network Discovery in Windows 11 (Using Settings)
If your computer doesn’t show other devices on your network, follow these easy steps to turn on Network Discovery:
- Open Settings: Click the Start menu (Windows icon) and select Settings. Or press Windows key + I on your keyboard.
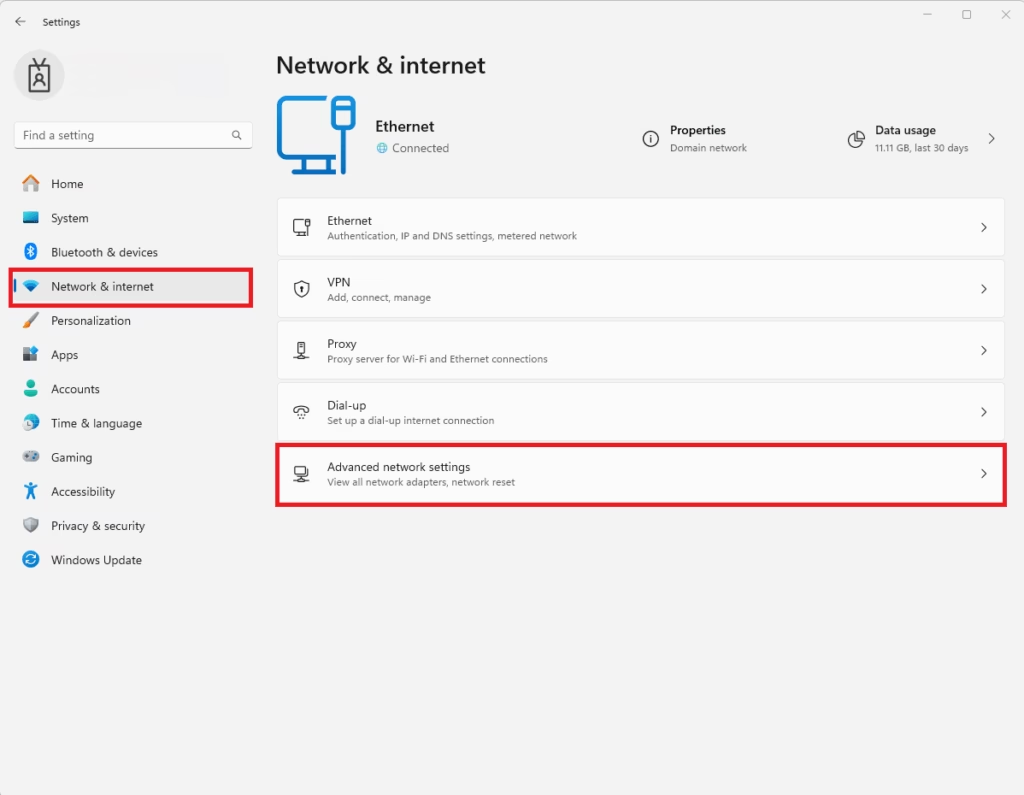
- In Settings, click Network & Internet on the left side.
- Scroll down and click on Advanced network settings.
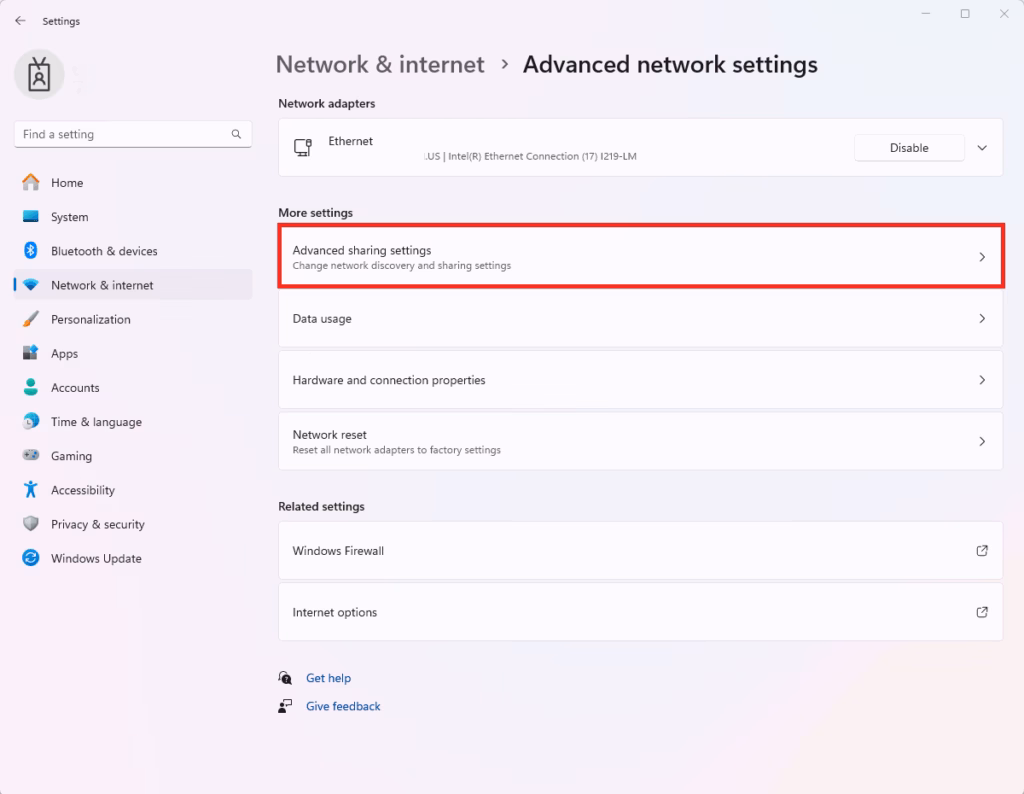
- Find and click Advanced sharing settings.
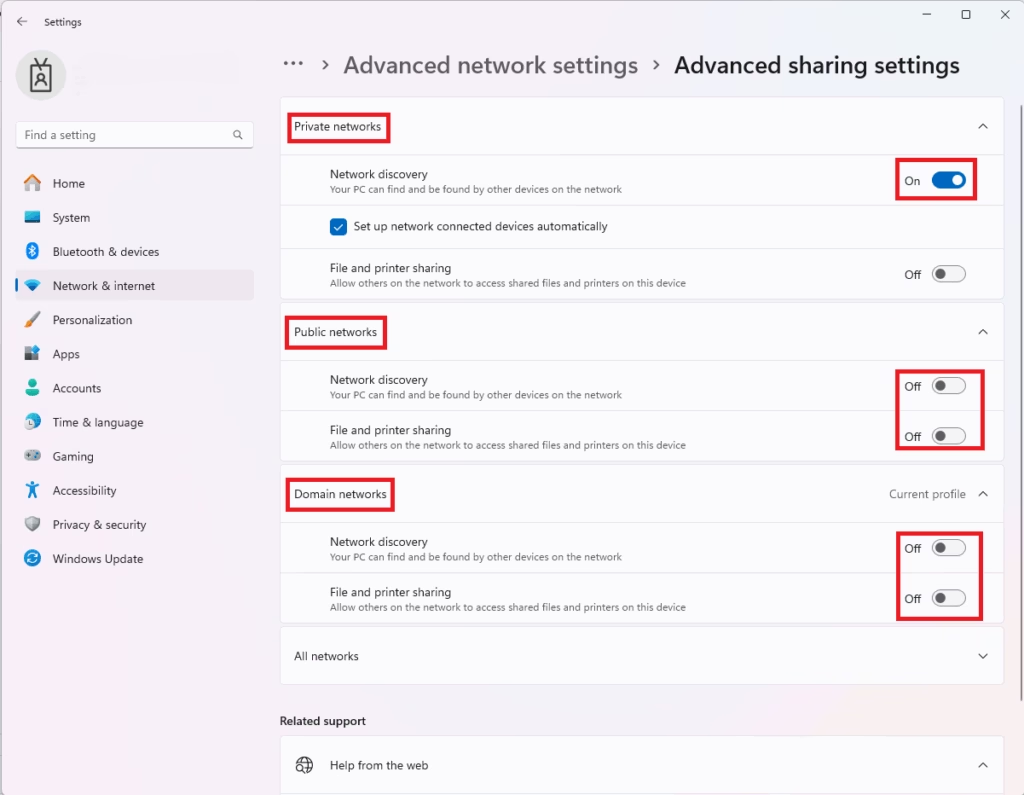
- Here, look at your network profiles (Private and Public). For the one you use (usually Private), click to expand it.
- Turn on the switches for:
– Network discovery
– File and printer sharing
- Close Settings when done.
Enable Network Discovery Using the Control Panel
You can also turn on Network Discovery using the Control Panel:
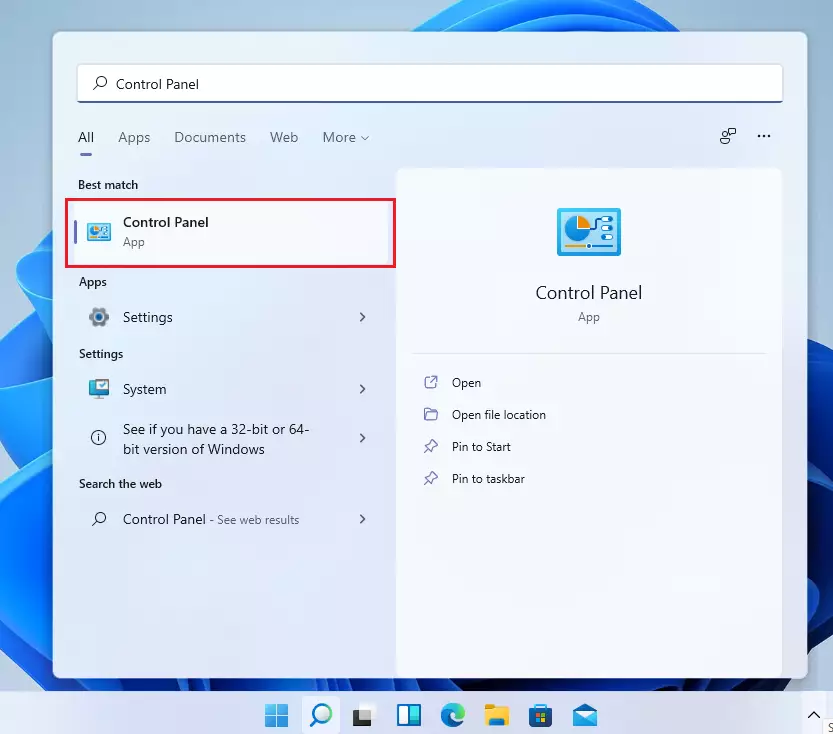
- Click Start and type Control Panel, then open it.
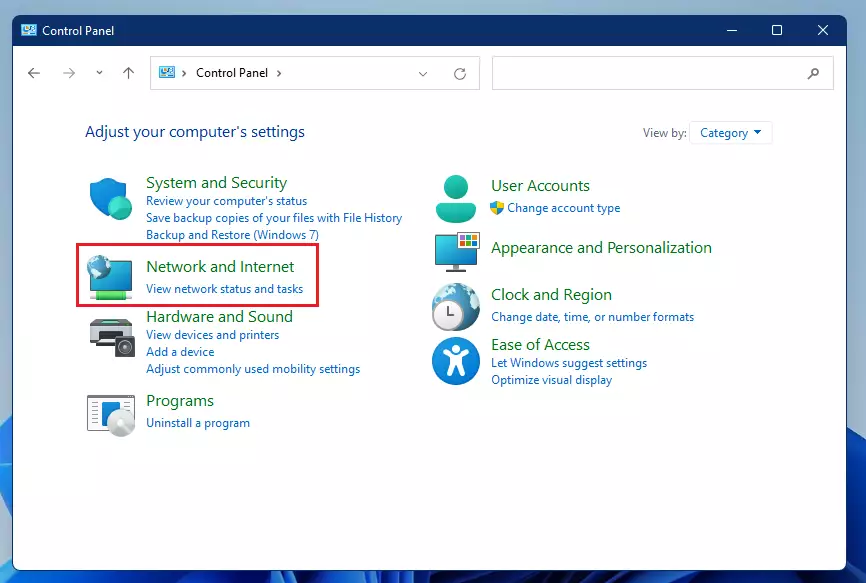
- Click on Network and Internet.
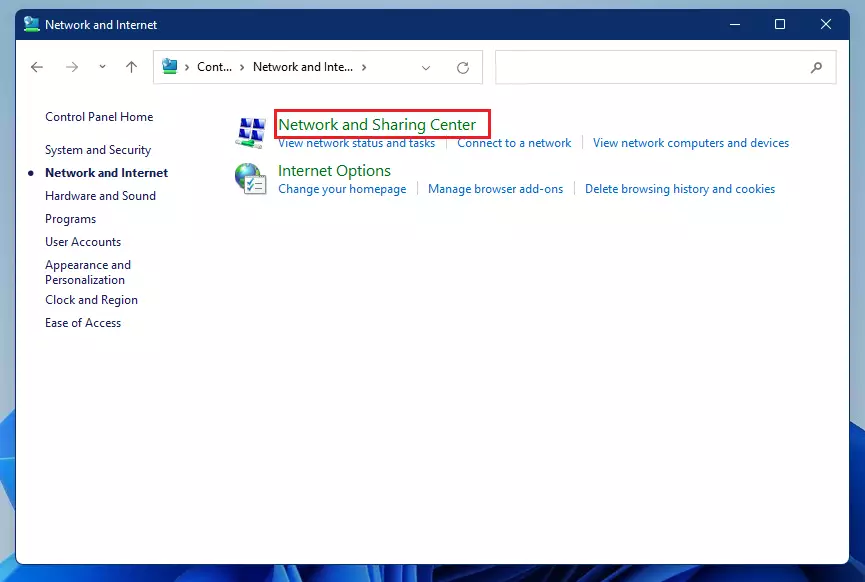
- Next, select Network and Sharing Center.
- On the left side, click Change advanced sharing settings.
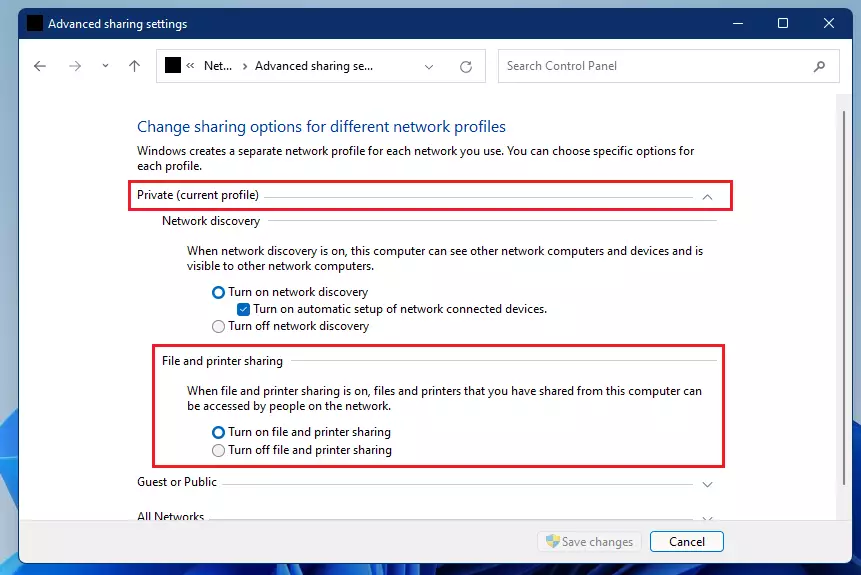
- Expand the Private and Guest or Public network profiles.
- Turn on Network discovery and File and printer sharing for each profile you want.
- Click Save changes at the bottom.

Turn on Network Discovery and File Sharing Using Command Prompt
If you like using commands, you can enable these features quickly by running Command Prompt as an administrator:
netsh advfirewall firewall set rule group="File and Printer Sharing" new enable=Yes
netsh advfirewall firewall set rule group="Network Discovery" new enable=Yes
How to open Command Prompt as admin:
- Click the Start menu, type cmd or Command Prompt.
- Right-click on Command Prompt and choose Run as administrator.
- Copy and paste the commands above and press Enter after each.
Extra Tip: Enable SMB 1.0 / CIFS File Sharing (If Needed)
Some older devices or programs use a feature called SMB 1.0 / CIFS for file sharing. You might need to turn this on if you have trouble sharing files.
To enable it:
- Open Control Panel.
- Go to Programs and Features.
- Click Turn Windows features on or off on the left.
- Find and check SMB 1.0/CIFS File Sharing Support.
- Click OK and restart your computer if asked.
Learn more about turning Windows features on or off here.
Summary
- Network Discovery helps your PC find and connect to other devices on your network.
- You can turn it on through Windows Settings, Control Panel, or Command Prompt.
- Always use Network Discovery only on trusted networks (like at home).
- Enable extra features like SMB 1.0 if you use older devices or software.
- Once enabled, sharing files, folders, and printers with your other devices becomes easy and fast.
If you follow these simple steps, your Windows 11 computer will be ready for easy sharing and networking!


Leave a Reply