
This article explains how to turn “Enable incoming calls” on or off in the Signal app on Windows 11.
Signal is a cross-platform popular messaging app. It allows users to send and receive encrypted messages, make voice and video calls, and share files from their devices, including computers.
When you install and set up the Signal Desktop app, you can choose to have it open automatically when you log in to your computer. The app also allows you to turn on or off call relay through Signals’ servers to avoid revealing your IP address, turn disappearing messages on or off, and more.
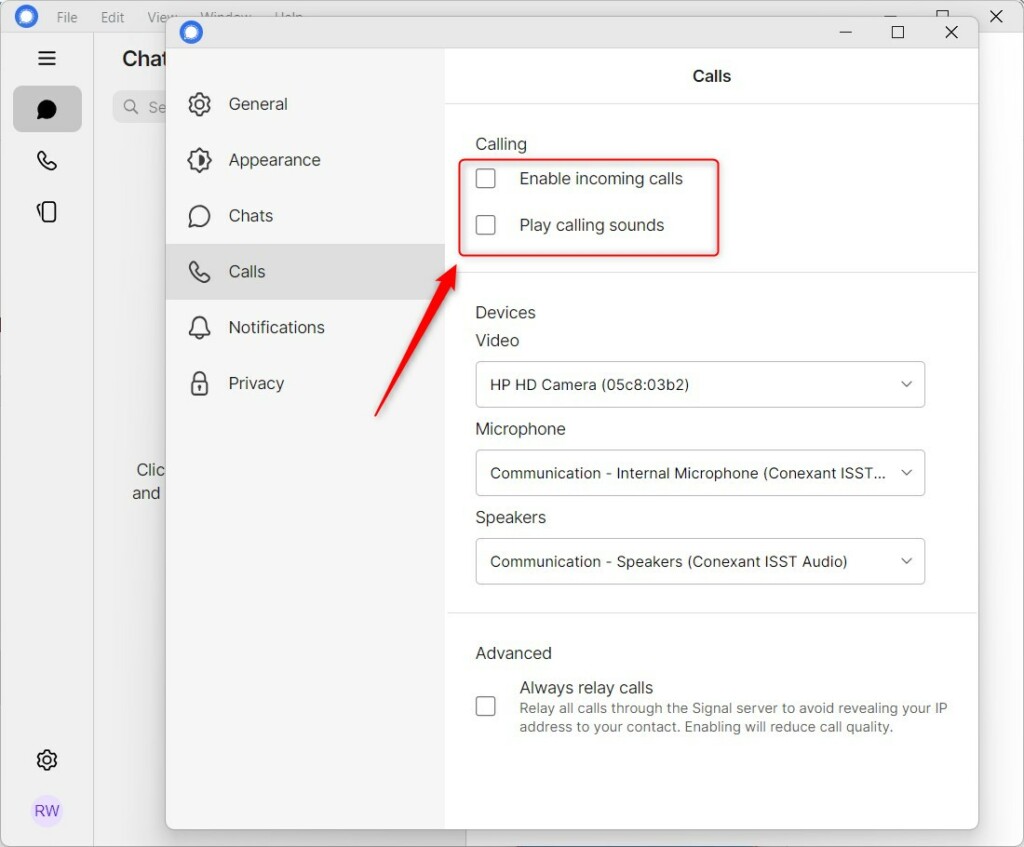
When you use the desktop version, you can turn “Enable incoming calls” on or off to stop a device from accepting calls.
You may want to turn “Enable incoming calls” on or off in Signal for various reasons. For example, if you’re in a meeting, you may want to turn off incoming calls to avoid distractions. Or, if you’re not available to take calls, you can turn off incoming calls to avoid unnecessary interruptions.
Additionally, turning off incoming calls can help conserve battery life on your device. On the other hand, turning on incoming calls can ensure you don’t miss any important calls from your contacts.
Turn “Enable incoming calls” on or off in Signal
As mentioned above, users can turn “incoming calls” on or off in the desktop version of Signal. You can turn off this feature if you do not want to accept incoming calls on your Windows device.
Here’s how to do it.
First, launch the app by clicking the Start menu and selecting it on the All Apps list.
You can also launch the app from the Taskbar or Taskbar overflow.
When the app opens, click File and select Preferences ( CTRL + , ) on the menu. You can also get the Preferences window by clicking the Settings (gear) button at the bottom left.

On the Preferences window, select Chats on the left menu. On the right, under Calling, check the box next to “Enable incoming calls” to accept calls on the device.
Uncheck the box if you do not want to accept calls on the device.
That should do it!
Conclusion:
- In this article, you learned how to effectively manage incoming calls in the Signal app on Windows 11 by enabling or disabling the “Enable incoming calls” feature.
- By following the outlined steps, you can customize your call preferences based on your availability and the need to minimize distractions.
- Feel free to use the provided instructions and share any feedback or additional insights in the comments below.

Leave a Reply