How to Set Up Voice Isolation in Voice Access on Windows 11
Voice Isolation on Windows 11 is a feature that significantly improves Voice Access’s ability to hear your commands by filtering out background noise and other voices.
Voice Access itself lets you control your PC and type using only your voice, which is fantastic for accessibility. It works offline using your computer’s built-in speech recognition capabilities. Introduced in Windows 11, Voice Isolation acts like a noise-canceling microphone for your PC, ensuring Voice Access prioritizes your speech. This is especially useful if you’re working in a busy environment or a home with distractions.
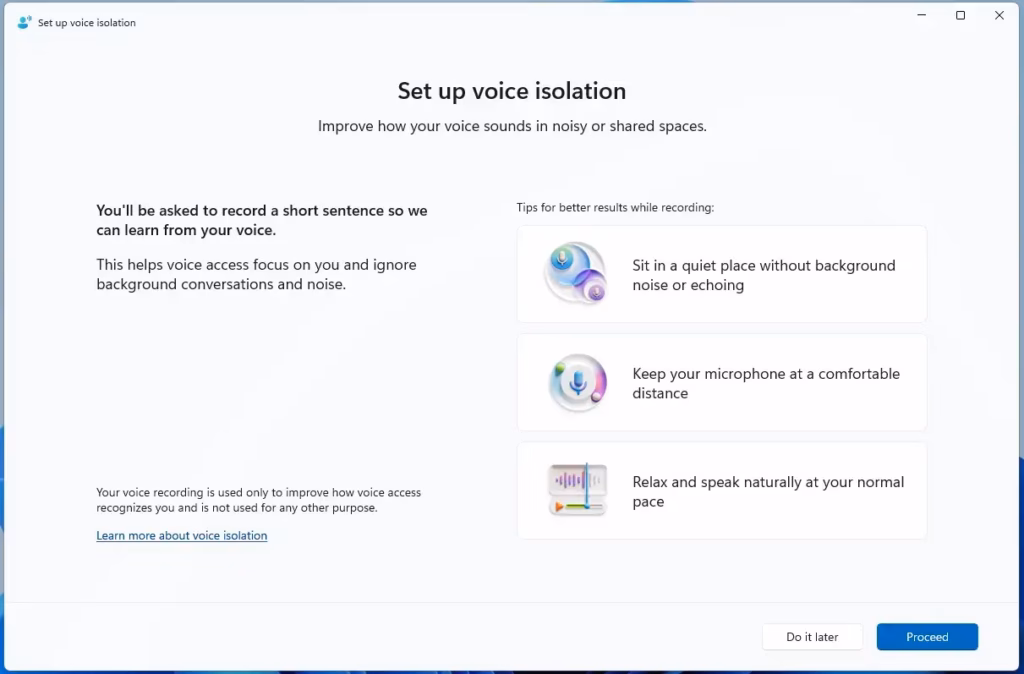
To set it up, you’ll need to read a short passage aloud so Voice Access can learn to distinguish your voice, typically requiring about 15 minutes of setup.
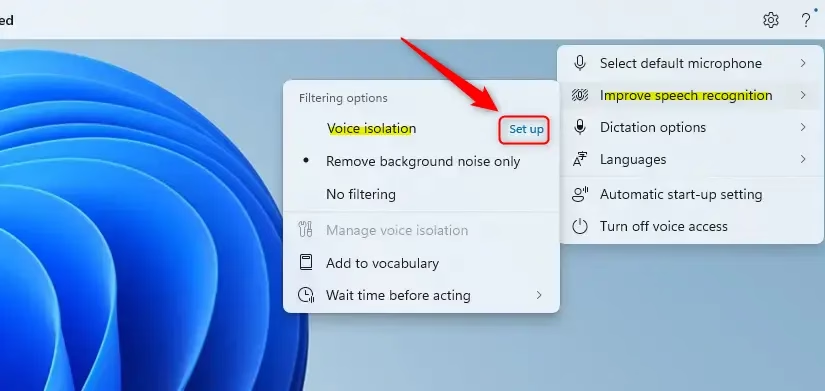
Voice Access has three ways to understand your speech. You can find these in Voice Access settings under “Improve speech recognition” (this helps Voice Access understand you better):
- Voice Isolation: This blocks out other voices and background noise. You’ll need to set it up once by reading something aloud.
- Remove background noise only: This only blocks sounds that aren’t speech, like typing or a door closing. No extra setup is needed for this.
- No filtering: This uses your microphone directly without any changes.
Setting up Voice Isolation is a quick process. You’ll choose it from a menu and then follow a few steps. This involves reading a short paragraph aloud so Voice Access can learn your voice. It takes about a minute, and your voice data stays on your computer.
Here’s How to Set It Up:
- Turn on Voice Access.
- Follow the steps below to set up Voice Isolation.
- Click the Settings (gear) icon on the right side of the Voice Access toolbar at the top of your screen.
- Click Improve speech recognition from the menu.
- Click Voice isolation Set up from the menu. If you see “Set up” next to “Voice isolation,” it means it’s ready to be configured. If you don’t see “Set up,” it’s already done. You can click Manage voice isolation if you want to do the setup again.
- Click Proceed.
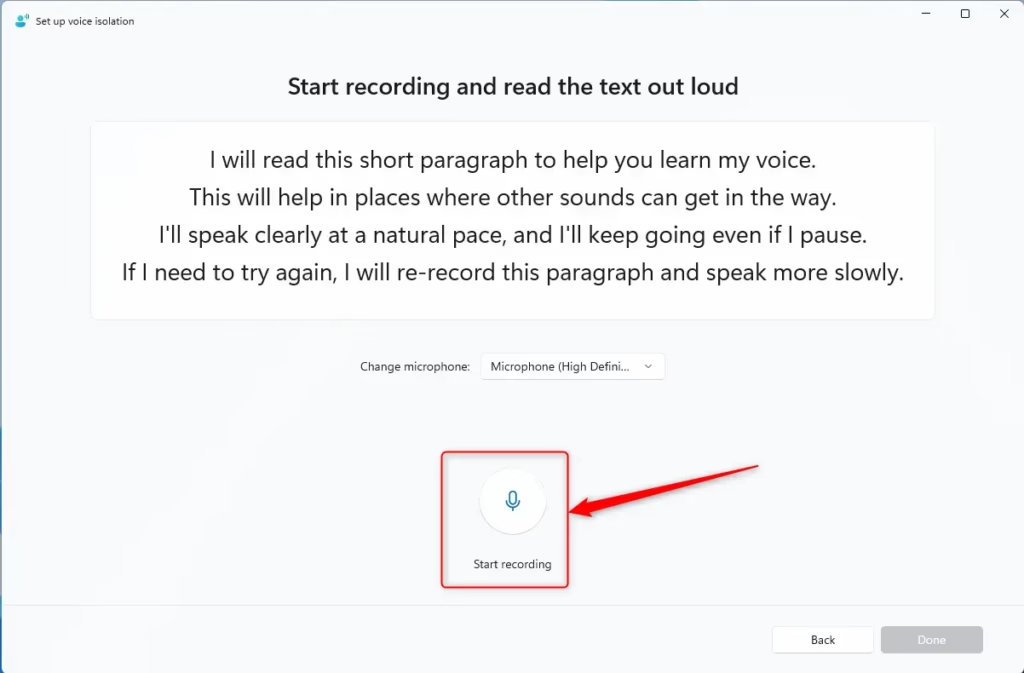
- If you need to, select your microphone. Then, click Start recording. Make sure you are in a quiet place when you do this.
- Read the text out loud in your normal voice and at your normal speed. When you are finished, click Stop recording.
That’s it! You’ve set up Voice Isolation.
Why Set Up Voice Isolation?
You set up Voice Isolation so that Voice Access can better understand you. It helps your computer focus on your voice. This means it can ignore other sounds and voices around you.
What Happens When Done?
When you finish setting up Voice Isolation, Voice Access will be able to filter out background noise and other people’s voices. This makes it more accurate when it listens to your commands. It helps Voice Access understand what you want your computer to do, even in noisy environments.
Reference:
https://learn.microsoft.com/en-us/windows-insider/release-notes/beta/preview-build-26220-8491
Summary
Voice Isolation is a feature in Windows 11’s Voice Access that improves speech recognition. It filters out background noise and other voices, allowing Voice Access to better understand your commands. The setup process involves reading a short paragraph aloud, which takes about a minute and is done privately on your device.
Was this guide helpful?
No comments yet — be the first to share your thoughts!