How to Set BitLocker to Unlock Your Windows 11 PC Automatically
You can set BitLocker to automatically unlock your Windows 11 PC using its TPM chip.
BitLocker is a Windows security feature that encrypts your entire drive to protect your data from unauthorized access. It acts like a digital lock for your system’s storage.
Typically, BitLocker leverages the Trusted Platform Module (TPM) chip, a hardware security component found in most modern PCs, to enable automatic unlocking upon startup. This eliminates the need for manual input, like a PIN or USB key, every time you boot up.
If your Windows 11 system currently requires a USB drive and PIN for BitLocker to unlock, you can reconfigure it to use the TPM for seamless, automatic access.
To enable automatic BitLocker unlocking on Windows 11, open Control Panel, navigate to BitLocker Drive Encryption, and select “Let BitLocker automatically unlock my drive.” This uses your PC’s TPM chip for seamless startup access.
Steps to Turn Off USB and PIN Requirements and Enable Auto Unlock
- Open Control Panel: Click the Start button. Type
Control Panel. Click it from the list. Learn more about opening Control Panel - Find BitLocker: In Control Panel, click on System and Security. Then find and click BitLocker Drive Encryption.
- Locate your drive: Find your main Windows drive (usually called “OS Drive” or “C:”). Click the link that says “Change how drive is unlocked at startup.”
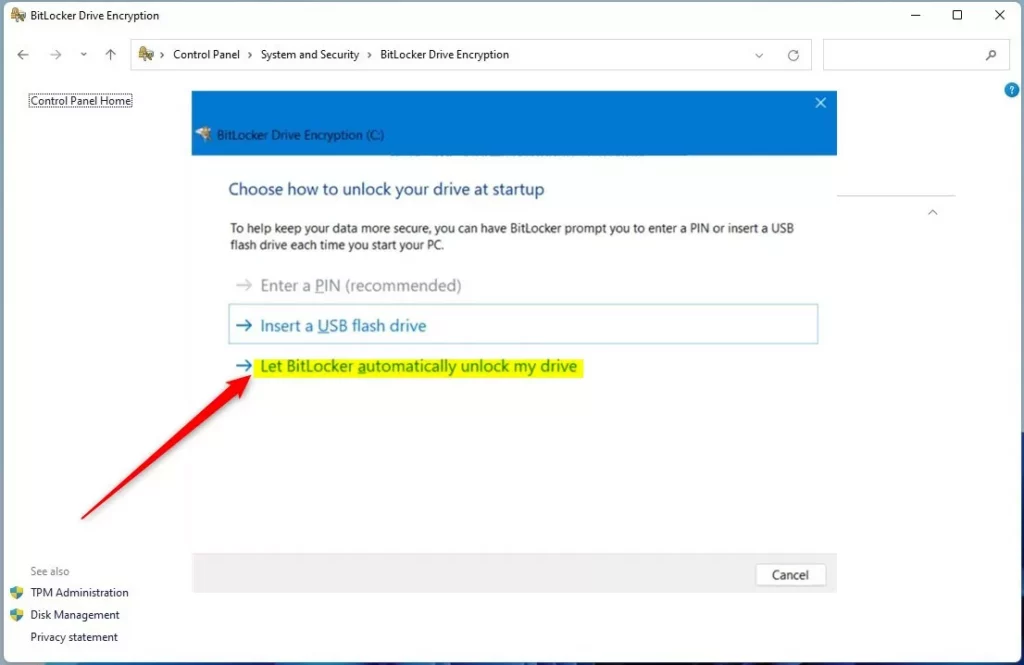
windows 11 change how dirve is unlocked at startup - Choose automatic unlock: On the next page, click the option that says “Let BitLocker automatically unlock my drive.”
windows 11 let bitlocker automatically unlock my drive link - Save your changes: Click “Finish” to save what you just did.
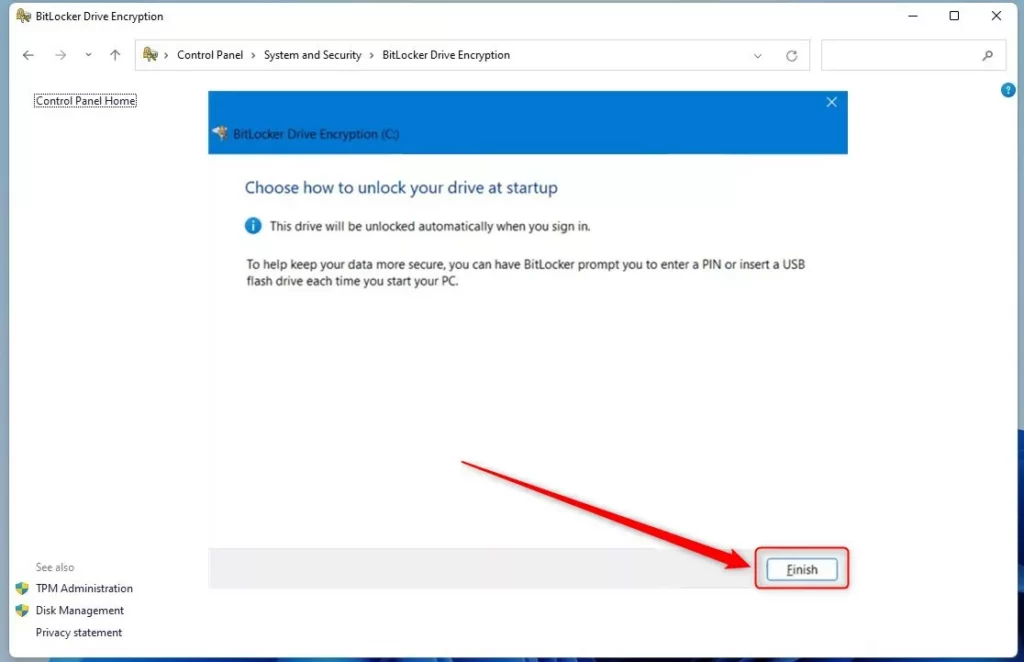
windows 11 let bitlocker automatically unlock my drive finish
You can set up BitLocker auto unlock by changing a few settings in the Control Panel to skip the USB and PIN prompts when you start your PC.
Why Use BitLocker Auto Unlock?
- Your files stay encrypted and safe on your drive.
- TPM checks that your PC hasn’t been tampered with before unlocking it.
- Auto unlock makes your computer start up faster and easier.
- You can still add extra security later if you want to, like a PIN or USB key requirement.
Using BitLocker auto unlock means your files stay encrypted and safe, while your PC still starts up faster and easier without needing a USB or PIN every time.
Summary
BitLocker auto unlock is a Windows 11 feature that lets your computer start up faster by using its built-in security chip instead of requiring a USB drive or PIN each time.
How do I turn off BitLocker auto unlock?
You must remove automatic unlocking keys before you can disable BitLocker by using the Disable-BitLocker cmdlet. You can use the Clear-BitLockerAutoUnlock cmdlet to remove keys for all the volumes configured to use automatic unlocking instead of just specified volumes.
Was this guide helpful?

About the Author
Richard
Tech Writer, IT Professional
Richard, a writer for Geek Rewind, is a tech enthusiast who loves breaking down complex IT topics into simple, easy-to-understand ideas. With years of hands-on experience in system administration and enterprise IT operations, he’s developed a knack for offering practical tips and solutions. Richard aims to make technology more accessible and actionable. He's deeply committed to the Geek Rewind community, always ready to answer questions and engage in discussions.


No comments yet — be the first to share your thoughts!