How to Turn On BitLocker for Your Windows 11 Operating System Drive
Open File Explorer, right-click your C: drive, and select “Turn on BitLocker.” Choose your unlock method, back up your recovery key, select encryption settings, and run the system check. BitLocker will then encrypt your drive.
What is BitLocker?
BitLocker is a security tool built into Windows 11 that locks down your main drive, like your C: drive, using encryption. This helps keep your files safe from people who shouldn’t see them if your computer is lost or stolen.
Why use BitLocker? It protects your files from being stolen or viewed by others if your computer goes missing.
What happens when you turn it on? Any new files you save on the locked drive are automatically protected. If you copy those files to another device that doesn’t have BitLocker, they’ll unlock so you can use them normally.
BitLocker also checks your computer every time it starts up. If it notices something strange, like changes to your computer’s basic software, it will lock the drive. You’ll need to enter a special recovery key to unlock it.
You can choose how to unlock your drive when you start your computer:
- Enter a PIN code
- Insert a USB flash drive
- Use a special chip inside your computer called TPM (Trusted Platform Module)
Note: BitLocker turns on automatically on some tablets or 2-in-1 devices that support Modern Standby.
Before You Start
- You must be signed in as an administrator (someone who can make changes to the computer)
- BitLocker is only available in Windows 11 Pro, Enterprise, and Education editions
Step-by-Step Guide to Turn On BitLocker
Step 1Open File Explorer
Press Win + E on your keyboard to open File Explorer. Click on This PC.
Step 2Find Your Operating System Drive
This is usually the C: drive. Right-click it and select Turn on BitLocker.
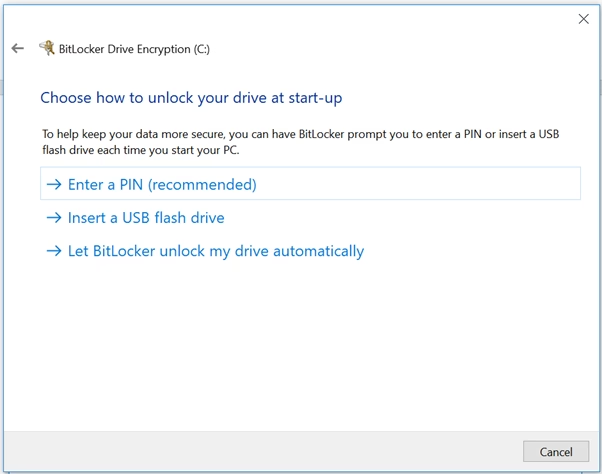
Step 3Choose How to Unlock Your Drive at Startup
When you turn on BitLocker, you’ll pick a way to unlock your drive every time your computer starts. You can set up a PIN number, use a USB flash drive, or let BitLocker unlock automatically if your computer has a TPM chip.
- Enter a PIN: You’ll type a 6 to 20 digit number each time your PC starts
- Insert a USB flash drive: BitLocker will unlock your drive automatically when this USB is plugged in
- Automatically with TPM: BitLocker will unlock your drive without any action needed from you
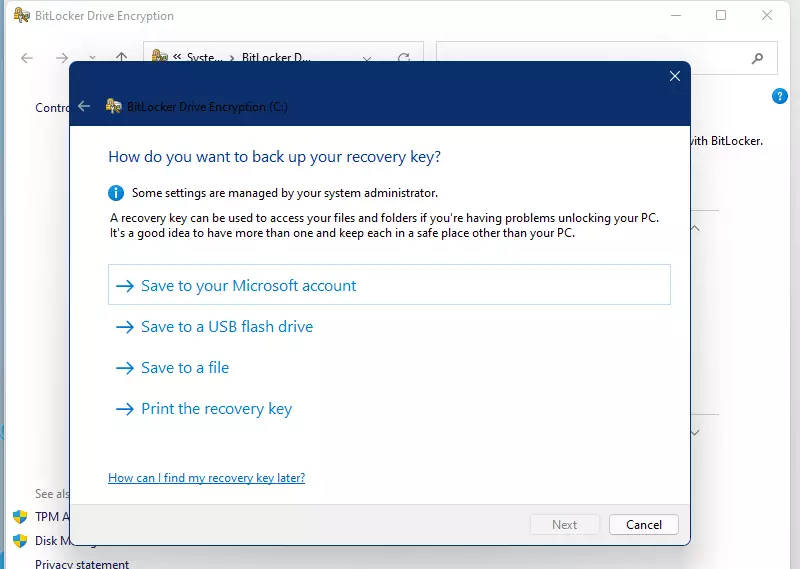
Step 4Back Up Your Recovery Key
It’s really important to back up your BitLocker recovery key because you’ll need it to get into your files if you forget your PIN or lose your USB drive. You can save this key to your Microsoft account, to a file, or print it out.
You can save your recovery key in one or more of these ways:
- Microsoft Account: Save it online by signing in with your Microsoft account. You can find your key later at https://account.microsoft.com/devices/recoverykey
- Save to a file: Save the key as a text file on another USB or drive
- Print it: Print the recovery key and keep it somewhere safe
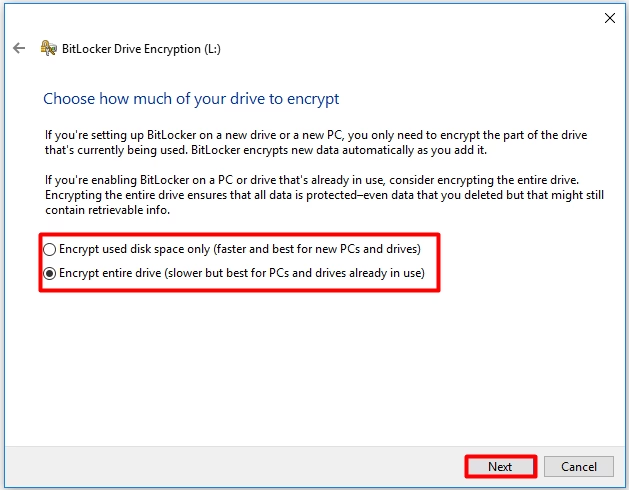
Step 5Choose How Much of Your Drive to Encrypt
Select one of these:
- Encrypt used disk space only: Faster option. Good if your PC is new or mostly empty
- Encrypt entire drive: Recommended for the best protection
Step 6Choose Encryption Mode
If available, choose one of these:
- New encryption mode: Best for Windows 10 or 11 devices
- Compatible mode: Use this if you want to use the drive on older Windows versions

Step 7Run BitLocker System Check
Ensure the ‘Run BitLocker system check’ box is checked; this is a good idea. Click Continue and then Restart now when prompted.
⚠️ Flag: Admin privileges required
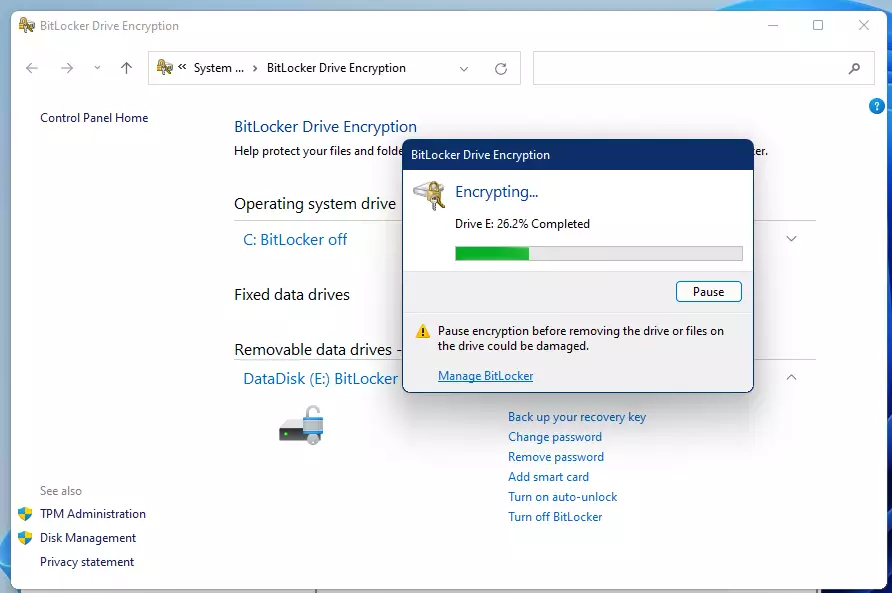
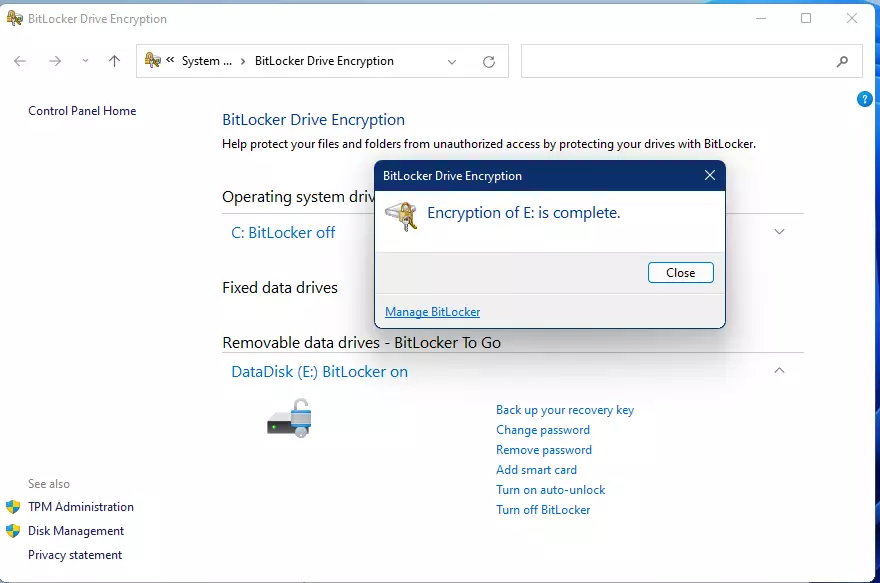
Step 8Encryption Starts
After restarting, BitLocker will begin encrypting your drive. This might take some time depending on how large your drive is and how much data you have.
Step 9Finish
When encryption is done, click Close.
Summary
- BitLocker protects your files by locking your main drive with encryption
- You need to be an administrator and use Windows 11 Pro, Enterprise, or Education editions
- You can unlock your drive with a PIN, USB key, or automatically with TPM
- Always back up your recovery key safely to avoid losing access to your drive
- Follow these simple steps to turn on BitLocker and keep your data safe
BitLocker is a Windows 11 feature that encrypts your main drive to protect your files, and you can turn it on using a PIN, USB drive, or TPM. Remember to always back up your recovery key so you don’t lose access to your data.
Why is BitLocker not showing in 🪟 Windows 11?
Just a heads-up: BitLocker Drive Encryption only works on devices running Windows Pro, Enterprise, or Education editions. You won’t find it on Windows Home edition. If you don’t see ‘Manage BitLocker’ listed, it’s likely because you’re on the wrong Windows version.
Does 🪟 Windows 11 automatically activate BitLocker?
By making BitLocker a default feature, Microsoft is essentially giving every Windows 11 user a free, robust security system for their digital life. It’s like having a high-security lock automatically installed on your front door.
Was this guide helpful?

About the Author
Richard
Tech Writer, IT Professional
Richard, a writer for Geek Rewind, is a tech enthusiast who loves breaking down complex IT topics into simple, easy-to-understand ideas. With years of hands-on experience in system administration and enterprise IT operations, he’s developed a knack for offering practical tips and solutions. Richard aims to make technology more accessible and actionable. He's deeply committed to the Geek Rewind community, always ready to answer questions and engage in discussions.
📚 Related Tutorials


No comments yet — be the first to share your thoughts!