How to Set a Default Printer in Windows 11
You set a default printer in Windows 11 to designate your primary printing device, so it’s automatically chosen whenever you print.
This means you won’t waste time selecting the correct printer from the list every single time you need to print a document. Windows 11 actually tries to manage printers for you by default, but you can easily take control.
For instance, if you have both a high-volume laser printer for work and a compact photo printer at home, setting your most used one as the default ensures you send jobs to the right machine without thinking.
Open Settings, then go to Bluetooth & devices > Printers & scanners. Turn off “Let Windows manage my default printer,” select your desired printer from the list, and click “Set as default.
Why Change Your Default Printer?
You might want to change your default printer in Windows 11 because the automatic setting can cause confusion.
By setting your default printer yourself, you make sure your computer always sends print jobs to the right printer.
How to Set Your Default Printer in 🪟 Windows 11
Step 1 Open Settings
You can open the Settings window in a couple of ways. Either press Windows key + I on your keyboard, or click the Start button (that’s the Windows logo on the bottom left) and then select Settings.
Step 2Go to Printers Settings
In the Settings window, click on Bluetooth & devices from the menu on the left. Then, on the right side of the window, click Printers & scanners.
Step 3Turn Off Automatic Default Printer Management
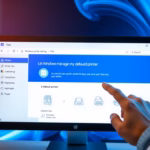
Look for the option called Let Windows manage my default printer. Switch the button to Off. This prevents Windows from automatically updating your default printer.
Step 4Pick Your Default Printer
Now, from the list of printers, click the printer you want to use as your default. Click the Set as default button.
Step 5Close Settings
Once done, you can close Settings. Your chosen printer will now be the default printer.
Summary
- Windows 11 tries to pick your last used printer as default. This can cause printing to the wrong device.
- Turning off Let Windows manage my default printer gives you control.
- Set the printer you want as default manually for a smooth printing experience.
- Knowing how to adjust printer settings helps avoid printing mistakes and saves time.
Setting your default printer in Windows 11 manually ensures your print jobs always go to the right place, avoiding confusion caused by the automatic setting.
Should I let 🪟 Windows 11 manage my default printer?
Click on settings. From the left side click on Bluetooth and devices; on the right side click on printers and scanners.
Was this guide helpful?

About the Author
Richard
Tech Writer, IT Professional
Richard, a writer for Geek Rewind, is a tech enthusiast who loves breaking down complex IT topics into simple, easy-to-understand ideas. With years of hands-on experience in system administration and enterprise IT operations, he’s developed a knack for offering practical tips and solutions. Richard aims to make technology more accessible and actionable. He's deeply committed to the Geek Rewind community, always ready to answer questions and engage in discussions.


No comments yet — be the first to share your thoughts!