
This tutorial shows you how to pick your favorite Windows Hello camera for facial recognition on your Windows 11 account.
What is Windows Hello?
Windows Hello is a fast and secure way to unlock your Windows 11 device. Instead of typing a password, you can use your face, fingerprint, or a PIN. It’s more personal and safer because your PIN only works on your device. Microsoft backs it up so you can recover it if needed.
Why Choose Your Preferred Camera?
If your computer has multiple cameras that work with Windows Hello, you can now pick which one you want to use. This is helpful if one camera works better than another for your face recognition.
You can use your PC’s built-in infrared camera or connect an external infrared camera for facial recognition sign-in.
How to Select Your Preferred Windows Hello Camera
- Open Settings by pressing
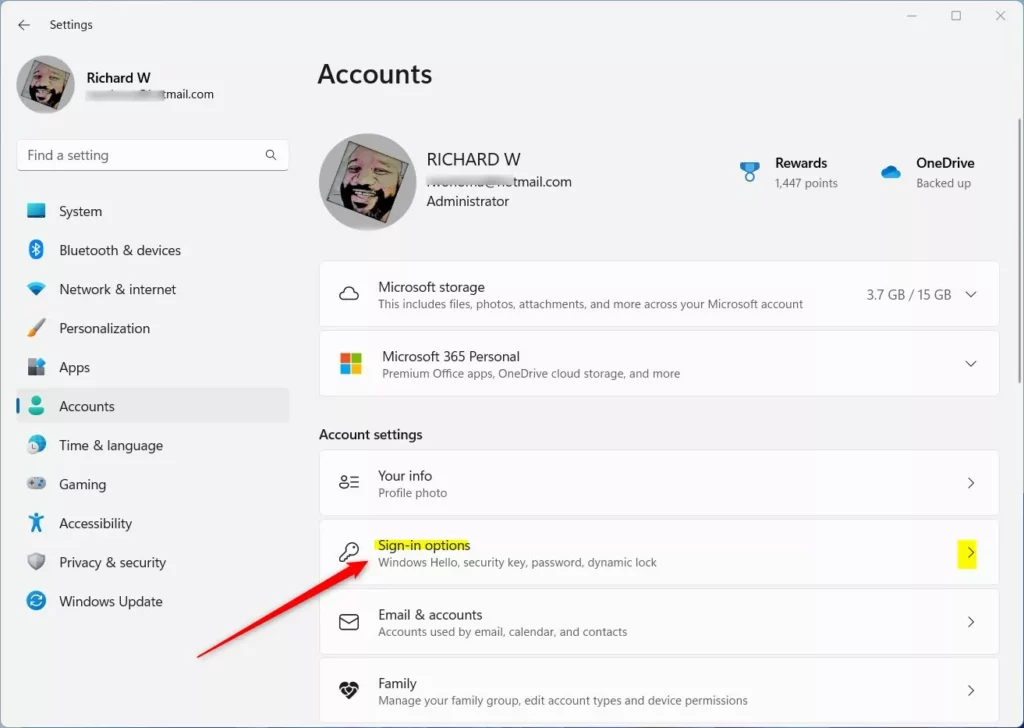
Win+I. - Click Accounts on the left side. Then click Sign-in options on the right side.
- Open Sign-in options settings
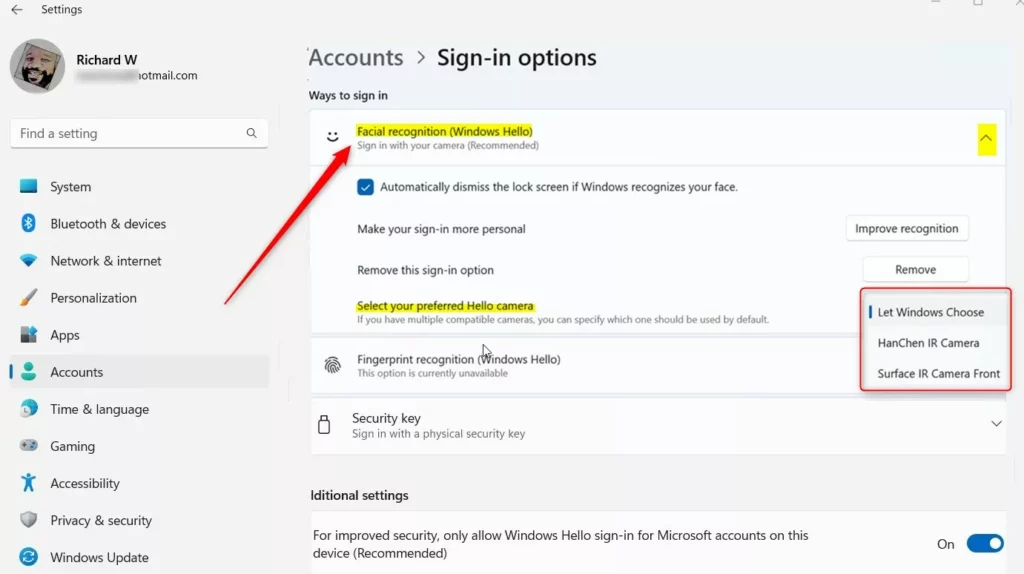
- Under Ways to sign in, click Facial recognition (Windows Hello) to open it.
- Select your preferred camera from the drop-down menu.
Let Windows Choose is the default setting.
- You can close Settings now if you want.
Done! Your preferred camera is now set.
Summary
Windows Hello makes signing into your PC easier and more secure using facial recognition, fingerprints, or a PIN. If you have multiple cameras on your Windows 11 device, you can now choose which camera to use for facial recognition. Just open Settings, go to Accounts and Sign-in options, expand Facial recognition (Windows Hello), and pick your preferred camera from the drop-down menu. The default setting is “Let Windows Choose,” but you can change it anytime.

Leave a Reply