

This article explains how to restore the Windows Classic Start Menu in Windows 11.
Windows 11 features a new Start menu with live tiles that provide shortcuts to apps, settings, and files. This updated Start menu presents a refreshing and modern look. However, not everyone shares this positive view.
If you wish to revert to the Windows classic menu, similar to Windows 10, follow the steps below to restore it in Windows 11.
Windows 11 is a significant release of the Windows NT operating system developed by Microsoft. It serves as the successor to Windows 10 and is expected to be released later this year.
To begin restoring the classic Windows menu in Windows 11, follow the steps below:
First, search for regedit from the search box. Select Registry Editor from the search results as shown below.

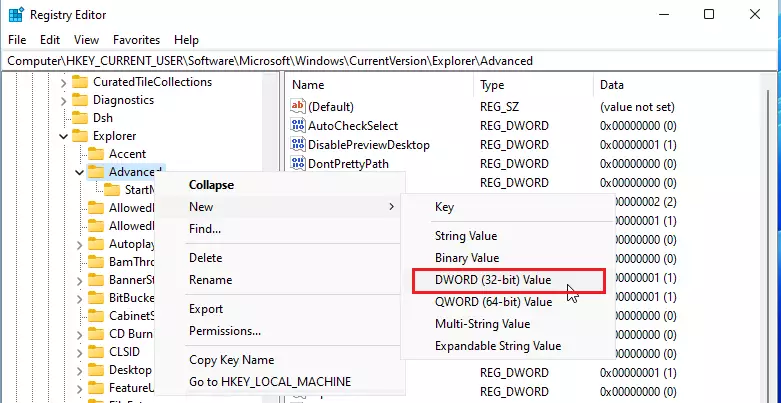
When the registry editor opens, browse the path below:
HKEY_CURRENT_USER\Software\Microsoft\Windows\CurrentVersion\Explorer\Advanced
Modify the DWORD named:
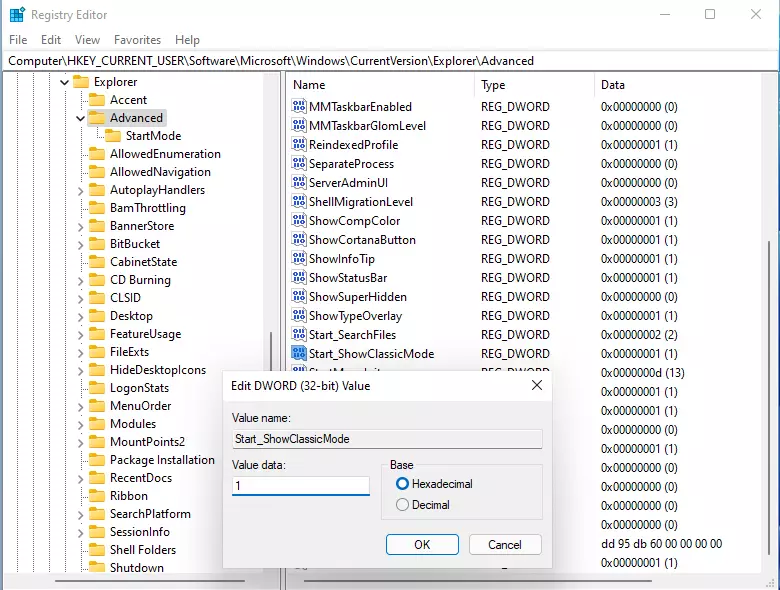
Start_ShowClassicMode
If you don’t see it, create a new DWORD (32-bit) Value and name it Start_ShowClassicMode
Then set the data value to:
0 or <delete> = Default Start Menu
1 = Classic Start Menu
Restart and you should see the Windows classic menu restored.
That should do it!
Conclusion:
- Restoring the Windows Classic Start Menu in Windows 11 is a simple process.
- Using the Registry Editor allows users to customize their experience according to personal preferences.
- By modifying the Start_ShowClassicMode DWORD, users can switch between the new and classic start menus.
- A system restart is necessary for changes to take effect.
- This tutorial provides a quick and effective way for those who prefer the familiar layout of Windows 10.

Leave a Reply