
This post explains how to reset the audio settings to the defaults in Windows 11.
Windows allows users to set multiple audio settings. You can turn on or off audio enhancements, enable enhanced or mono audio, and many other features.
All audio settings and features in Windows enhance your computer’s sound. Many of these settings will significantly improve your listening experience.
If your Windows audio playback settings aren’t working as expected, you can reset them to their default values.
Here’s how to do it in Windows 11.
If Windows audio settings have been changed but aren’t functioning as expected, you can reset the audio settings to defaults, including volume levels, advanced settings, and driver options.
To do that, first open the Windows Settings app.
You can do that by clicking on the Start menu and selecting the Settings app. Or press the keyboard shortcuts (Windows + I) to launch the Settings app.
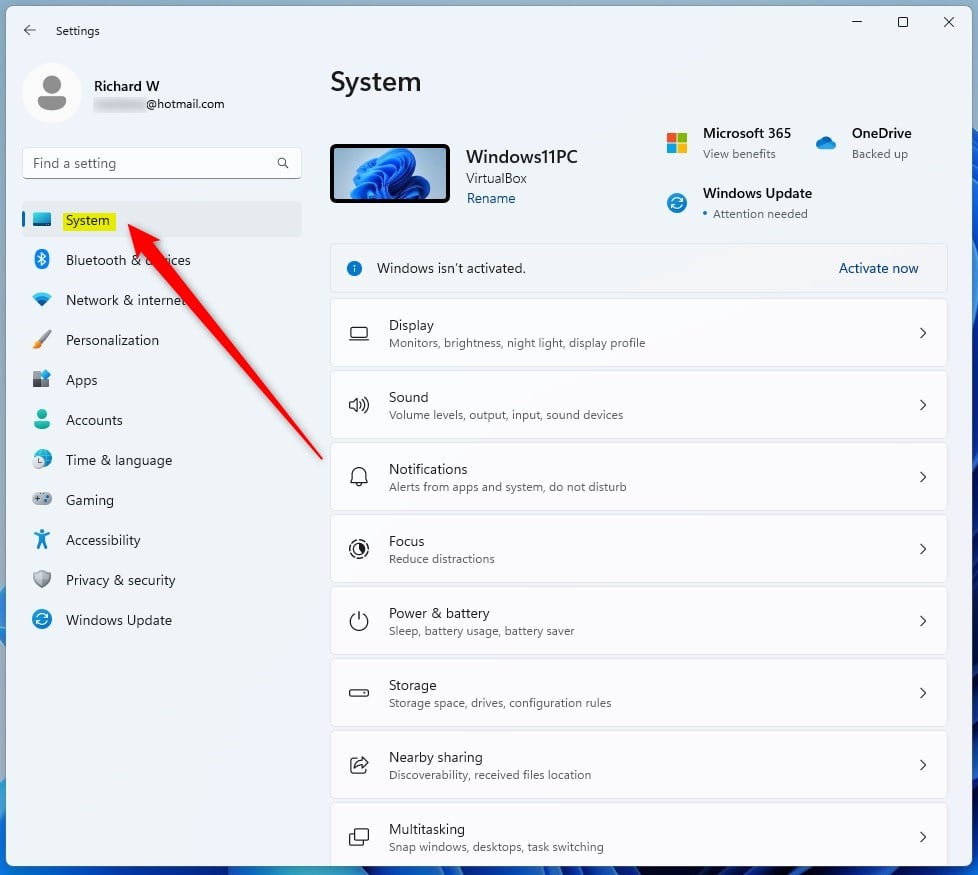
When the Settings app opens, click the System button on the left.
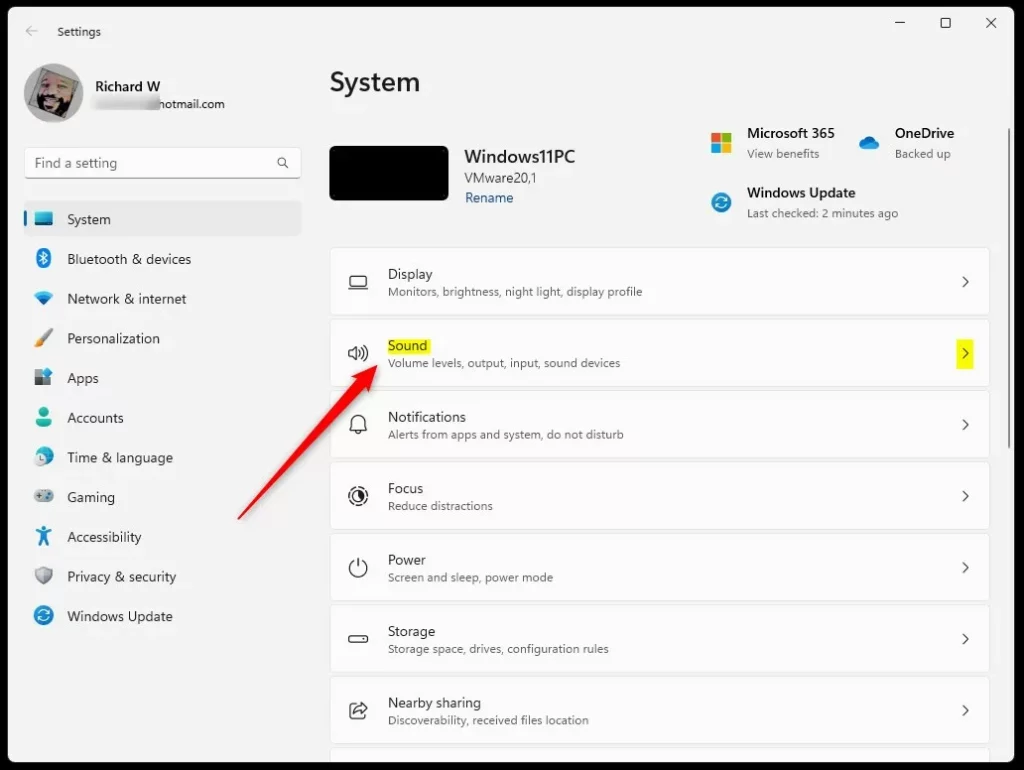
On the right, select the Sound tile to expand.
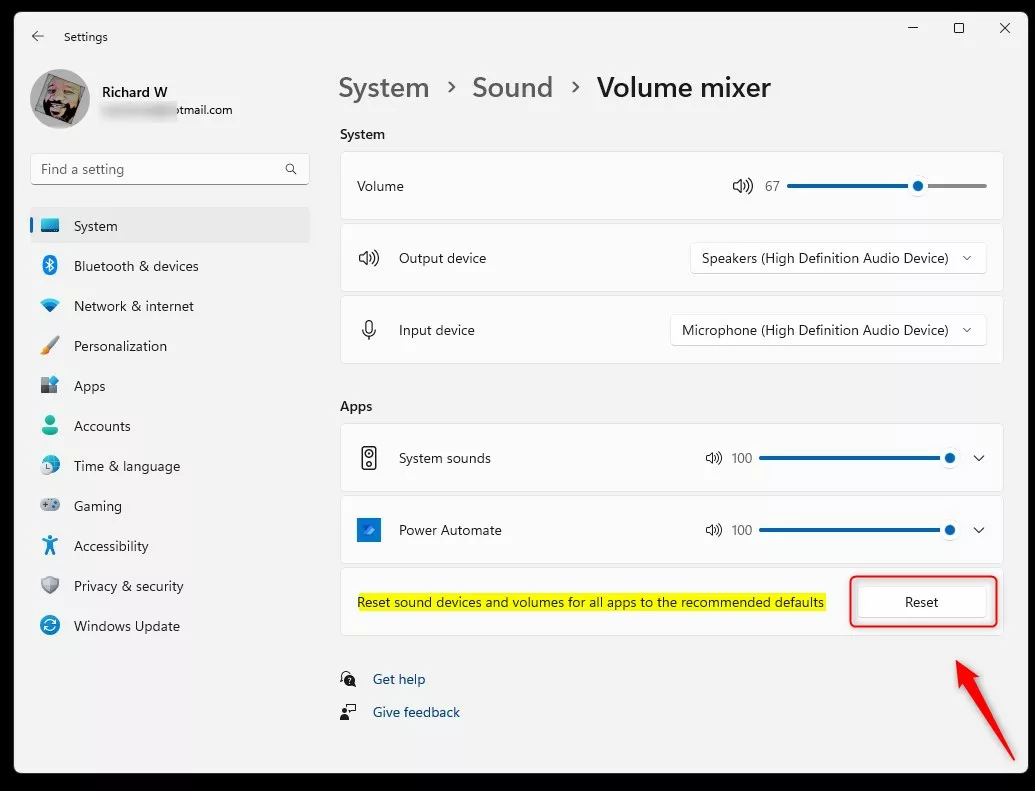
On the System -> Sound settings panel, under Advanced, select the Volume mixer tile to expand.
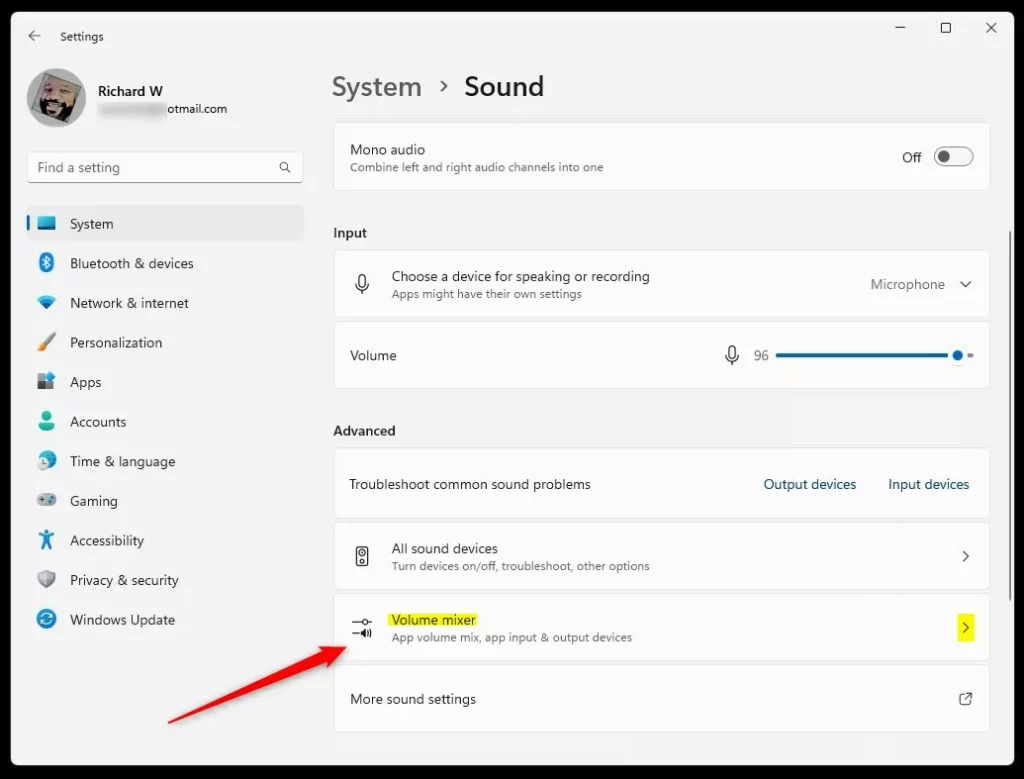
On the System -> Sound -> Volume mixer settings panel, click the Reset button to reset all apps’ sound devices and volume to the recommended defaults.
Reset the advanced audio settings
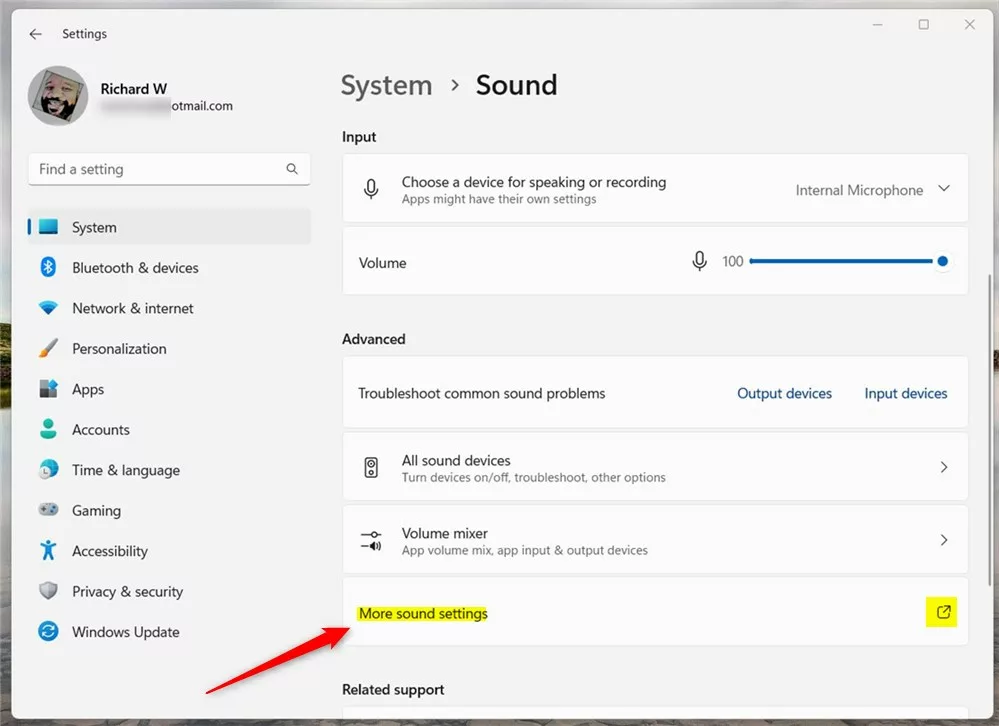
After resetting the Sound devices and volumes, return to the Windows Settings app and select System -> Sound tile to expand.
On the Sound settings panel, select “More sound settings” link under Advanced.
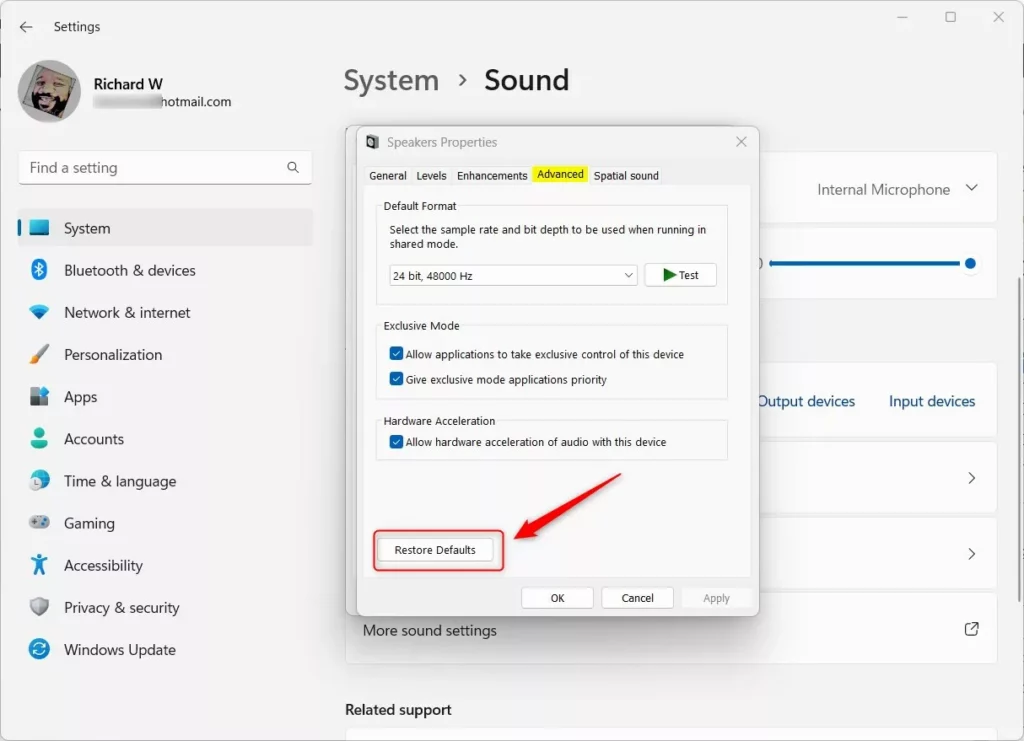
On the pop-up window of the playback devices, select the Speakers on the left, then click the Properties button.

When the Speakers Properties window opens, select the Advanced tab and click the Restore Defaults button to reset the audio devices.
Update the sound device drivers
Another way to reset or restore your computer audio device settings is to update or reinstall the audio drivers for your device.
Read the post below to learn how to update device drivers in Windows 11.
Update device drivers in Windows 11
That should do it!
Conclusion:
- Resetting your Windows 11 audio settings can help resolve issues with sound playback and overall audio performance.
- Following the steps outlined above, you can reset the audio settings to their defaults, including volume, advanced settings, and drivers.
- Additionally, updating or reinstalling audio device drivers can restore the audio settings to their optimal state.
- If you encounter any errors or have additional insights to share, please contribute through the comment section below the post.

Leave a Reply to Learn how to access the Settings app in Windows 11 - Geek Rewind Cancel reply