How to Optimize Storage Pools in Windows 11
You optimize a Windows 11 storage pool by managing its drives, spaces, and repair settings for better performance and reliability.
A storage pool in Windows 11 combines multiple physical drives into a single, flexible virtual drive, simplifying storage management and protecting your data.
This feature allows you to scale your storage capacity easily and recover from drive failures.
For instance, you can check the health of your pool by looking at the “Storage Spaces” control panel, ensuring all attached drives are functioning correctly.
You can proactively manage your pool by adding or removing drives, or by creating new storage spaces with different resiliency settings, like mirroring or parity.
Navigate to Settings > System > Storage > Advanced storage settings > Storage Spaces. Expand your storage pool and click the Optimize button. This balances data across all drives for better performance and capacity.
Why Optimize Your Storage Pool?
Optimizing your storage pool in Windows 11 helps spread your data evenly across all the drives you’ve added.
Optimizing the storage pool spreads your data across all drives. This makes the best use of their space. It also improves performance and reduces the risk of data loss.
This balances storage use across all drives in the pool. This is especially useful if you added new drives.
What Happens When You Optimize?
When you optimize, the system distributes data evenly. All drives work together better. Your storage works faster and more efficiently.
How to Optimize Storage Pool Using Settings
You can easily optimize your storage pool using the Windows 11 Settings app by opening it and going to System, then Storage, and finally Storage Spaces.
- Open the Settings app. Click the Start menu and select Settings. Or press Windows key + I to launch Settings app.
- When Settings opens, click the System button on the left.
Windows 11 System button in Settings - Select the Storage tile on the right to expand it.
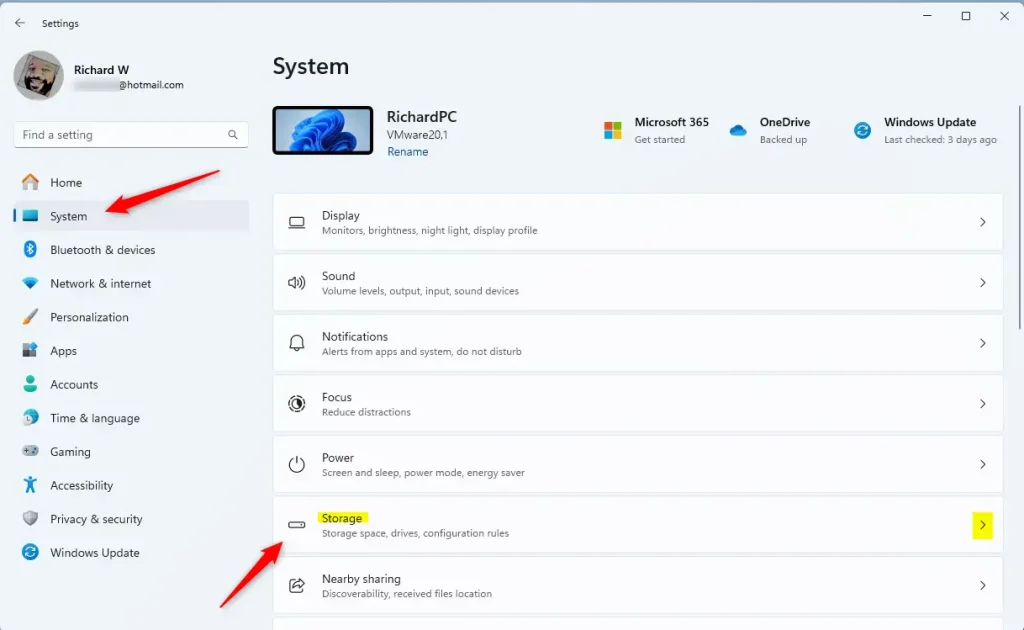
Windows 11 Storage tile in Settings app - On the System -> Storage page, select and expand the “Advanced storage settings” tile. Then click the “Storage Spaces” tile to expand it.
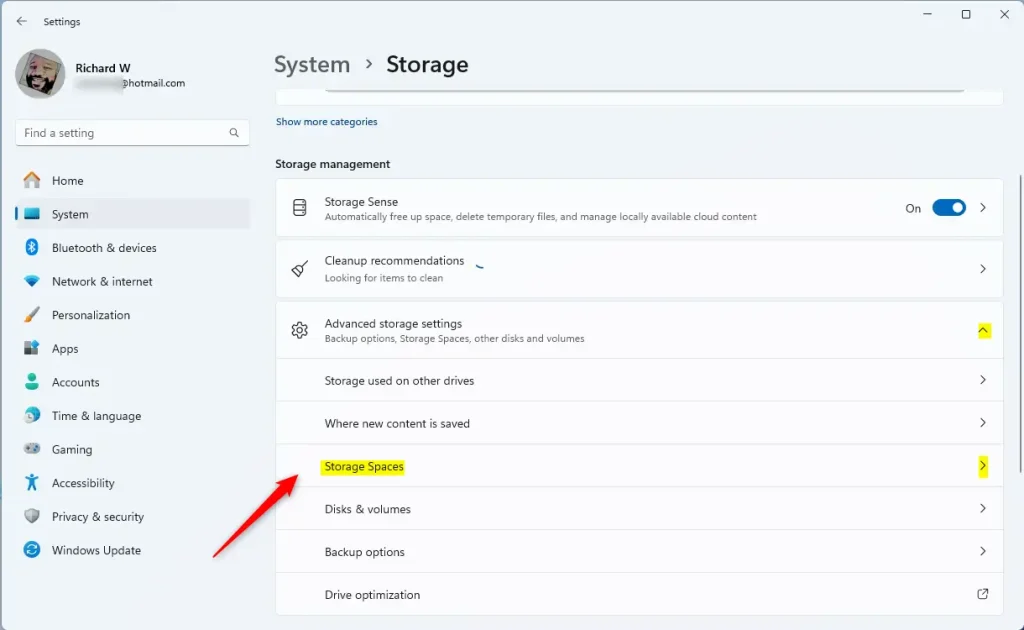
Windows 11 Storage Spaces tile in Settings app - Select the “Storage pool” tile to expand it.
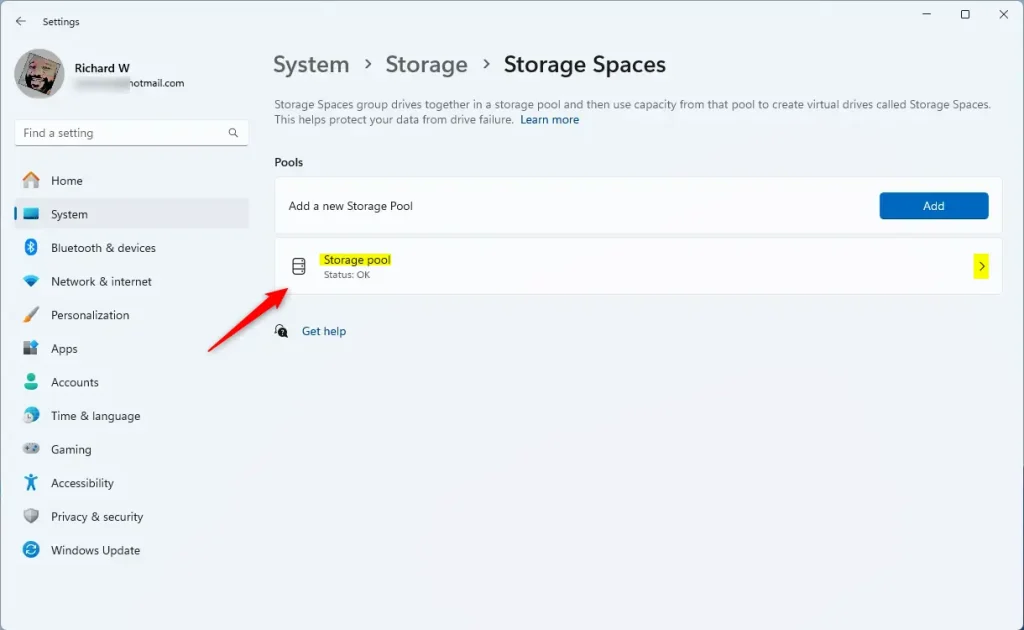
Windows 11 storage pool tile - On the Storage pool status page, click the “Optimize” button.
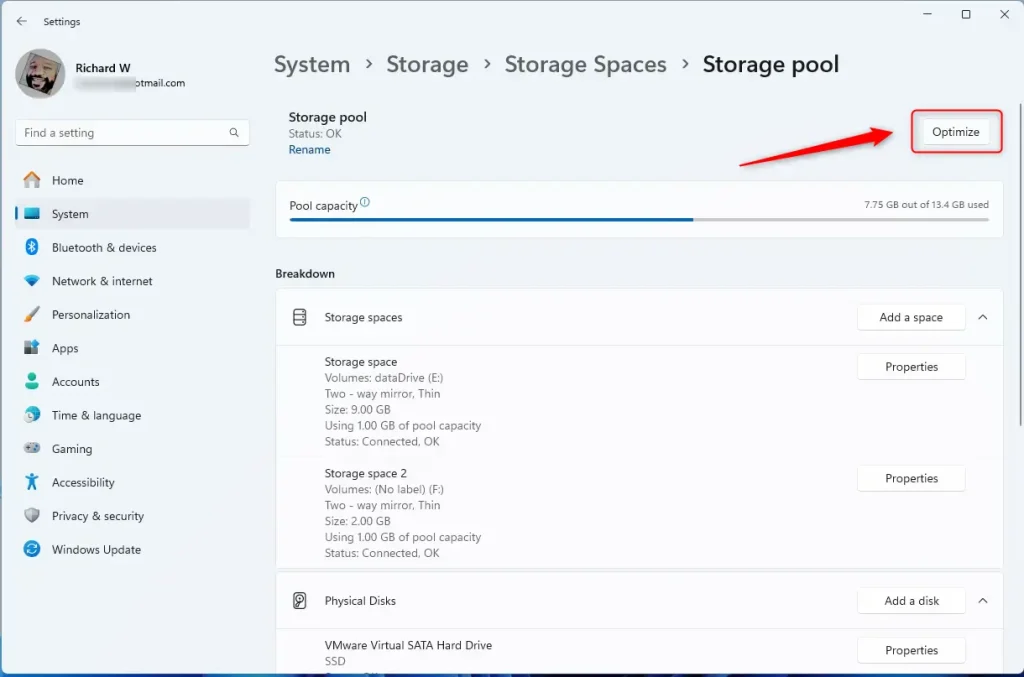
Storage pool optimize button - Wait for the optimization to complete. Then close the Settings app.
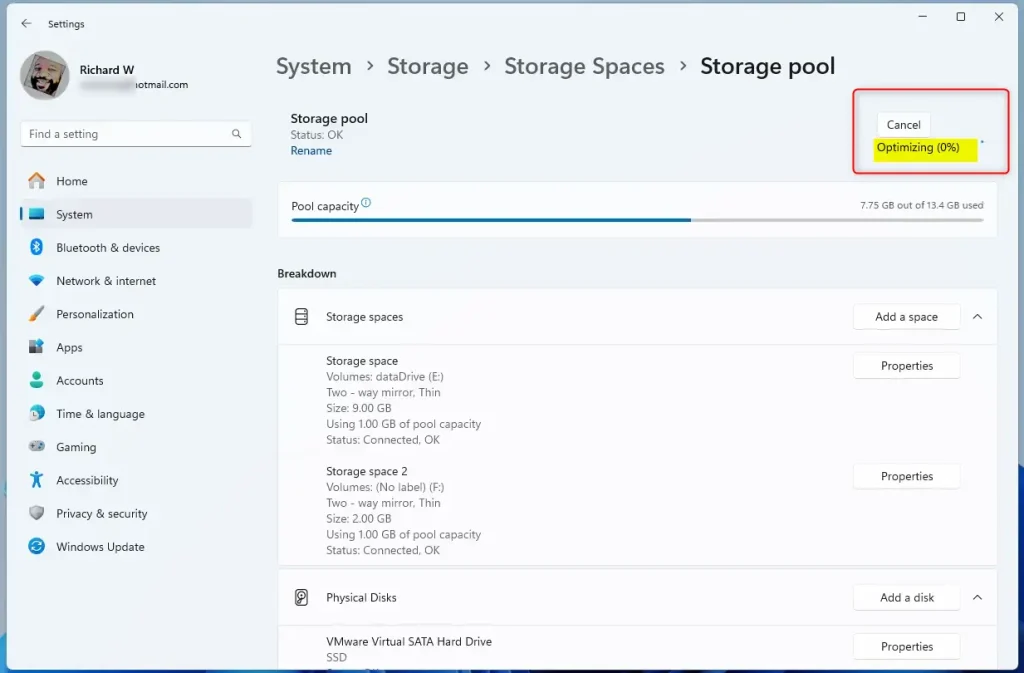
Storage pool optimize status
How to Optimize Storage Pool Using PowerShell
If you prefer using commands, you can optimize your storage pool in Windows 11 with PowerShell by opening it as an administrator and using specific commands.
- [ADMIN REQUIRED] Open PowerShell in Windows Terminal as administrator.
- Use the command below to list all storage pools on your machine.
Get-StoragePool - Then optimize the storage pool using the command format below.
Optimize-StoragePool -FriendlyName "Storage pool name" - For example, to optimize a storage pool named “Storage pool,” run this command:
Optimize-StoragePool -FriendlyName "Storage pool" - That is all you need to do!
Summary
Optimizing your storage pool in Storage Spaces improves performance and reduces the risk of data loss. You can optimize using the Windows Settings app or PowerShell in Windows Terminal. By spreading data evenly across all drives, you can balance storage usage and maximize your drive capacity.
What is a storage pool in 🪟 Windows 11?
Windows Storage Spaces lets you combine multiple drives into a single storage pool to protect data from drive failures and expand storage over time. You can create virtual drives—called storage spaces—from the pool and choose resiliency options such as mirroring to keep data available if a drive fails.
What does a storage pool do?
A storage pool is a collection of one or more drives that can be protected by RAID. Different RAID types offer different levels of data protection.
What happens if I optimize my C drive?
Disk optimization enhances performance by rearranging fragmented data, making it quicker for the system to access files. This means less time spent waiting for programs to load or files to open.
Was this guide helpful?

About the Author
Richard
Tech Writer, IT Professional
Richard, a writer for Geek Rewind, is a tech enthusiast who loves breaking down complex IT topics into simple, easy-to-understand ideas. With years of hands-on experience in system administration and enterprise IT operations, he’s developed a knack for offering practical tips and solutions. Richard aims to make technology more accessible and actionable. He's deeply committed to the Geek Rewind community, always ready to answer questions and engage in discussions.


[…] physical disk drives to a Storage pool, add a Storage space to an existing Storage pool, optimize a storage pool, rename a physical disk in a Storage pool, connect or disconnect storage spaces, and […]