
If your Windows 11 device has a SIM card or eSIM, it can connect to the internet using cellular data. Just like your phone does. This means you can use the internet when you’re away from Wi-Fi.
But be careful. Data roaming can cause extra charges. This happens when you’re connected to a network outside your usual mobile provider.
In this guide, you’ll learn how to turn data roaming on or off. You can avoid unexpected bills or keep using the internet when roaming works for you.
What is Data Roaming?
Data roaming means your device uses a network that isn’t your mobile provider’s usual network. This can happen if you’re traveling. Or if you’re in a place where your provider doesn’t have coverage.
Why does this matter? Turning data roaming off helps avoid extra costs. Turning it on lets you stay connected when you’re outside your provider’s area.
How to Turn Data Roaming On or Off in Windows 11
Follow these easy steps to change your data roaming settings:
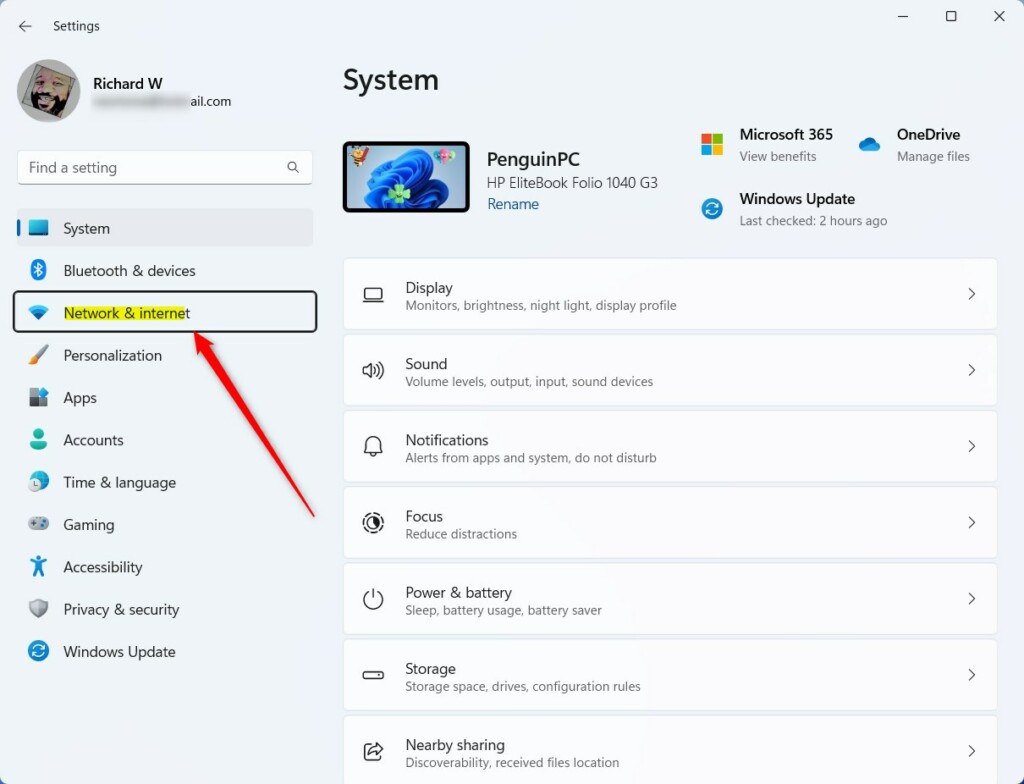
- Open Settings: Click the Start menu button (the Windows icon) and select Settings. Or press
Windows key + Ion your keyboard. - Go to Network & Internet: In the Settings window, click Network & internet on the left side.
- Select Cellular: On the right side, click the Cellular option.
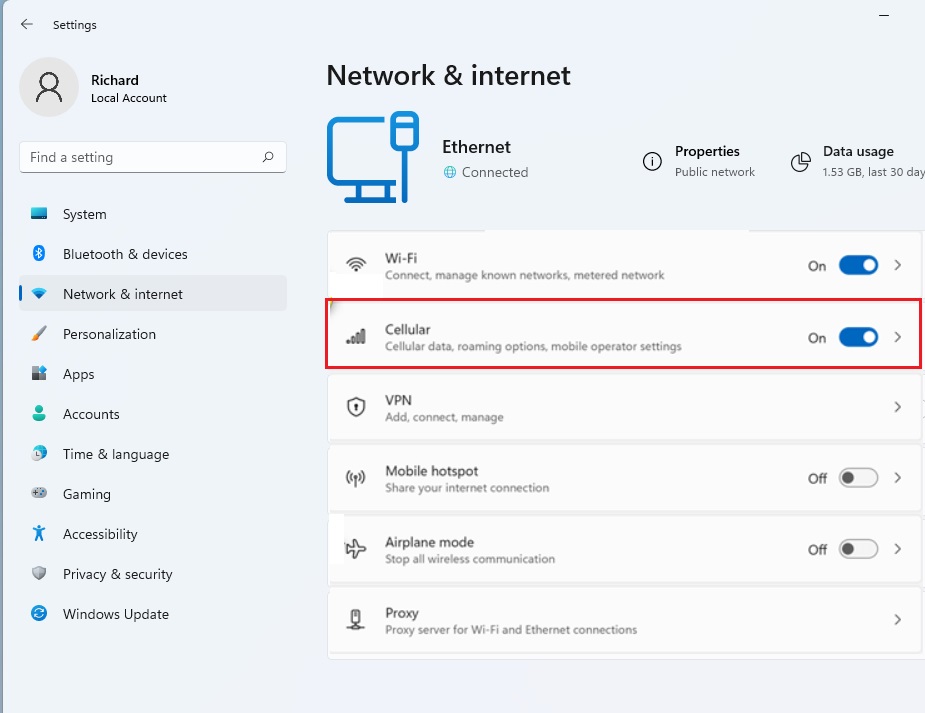
- Click Data roaming options: In the Cellular menu, find and click Data roaming options.
- Turn roaming on or off: Choose Don’t roam to turn roaming off. Or enable it if you want to use data while roaming.
- Close Settings: Your changes save automatically. You can now close the Settings app.
How to Change Data Roaming Using the Registry Editor (For Advanced Users)
If you want to control data roaming using a more advanced method, you can use the Registry Editor. Be careful. Changing the registry can affect your PC if done wrong.
Here’s how:
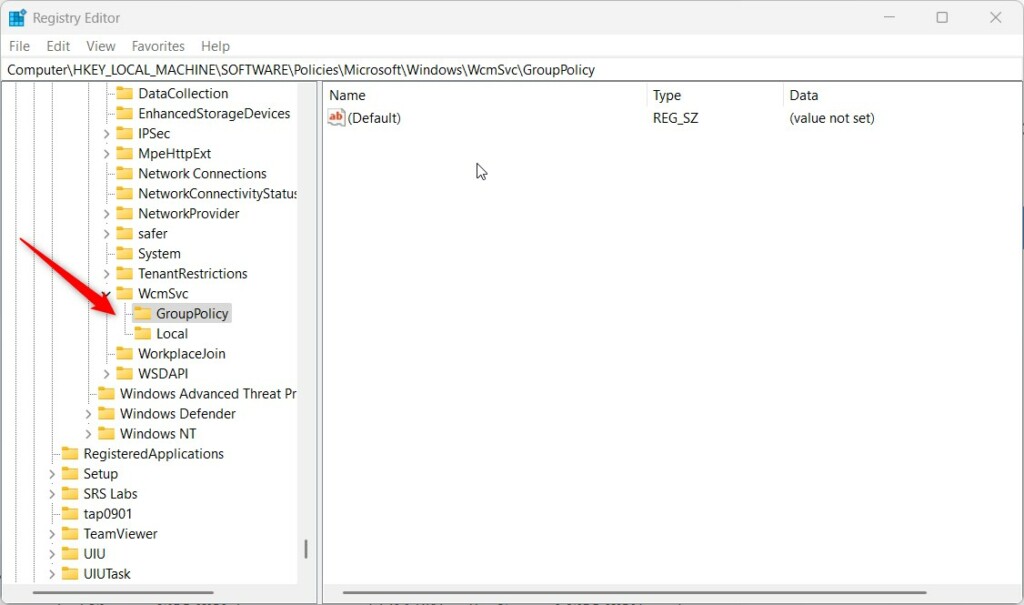
- ⚠️ REQUIRES ADMIN PRIVILEGES: Open the Registry Editor by typing
regeditin the Start menu search and pressing Enter. - Navigate to this folder:
HKEY_LOCAL_MACHINE\SOFTWARE\Policies\Microsoft\Windows\WcmSvc\GroupPolicy - If GroupPolicy doesn’t exist, right-click
WcmSvc→ New → Key. Name itGroupPolicy. - Inside GroupPolicy, right-click the right side → New → String Value.
- Name the new string
fBlockRoaming. - Double-click
fBlockRoamingand set the value:1= Data roaming is turned off.- Delete the
fBlockRoamingentry to allow data roaming.
- Restart your computer to apply changes.
Change Data Roaming Using Local Group Policy Editor (For Windows 11 Pro and Above)
If you have Windows 11 Pro or higher, you can also use the Local Group Policy Editor:
- ⚠️ REQUIRES ADMIN PRIVILEGES: Open the Start menu. Type
Edit group policyand select it. 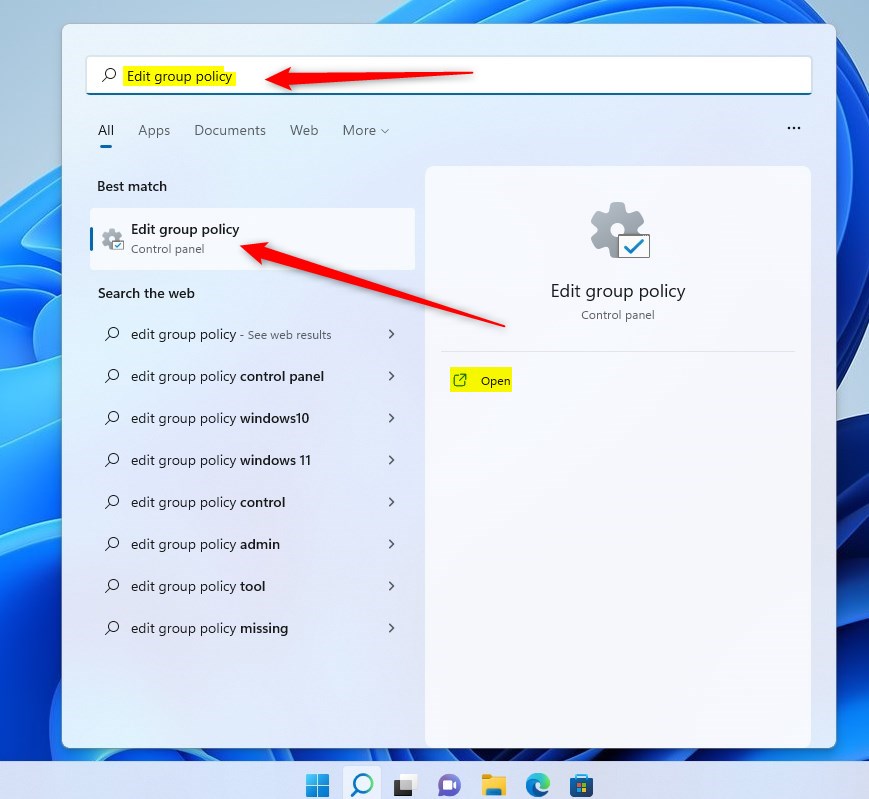
- In the left pane, go to:
Computer Configuration > Administrative Templates > Network > Windows Connection Manager - In the right pane, double-click
Prohibit connection to roaming Mobile Broadband networks. 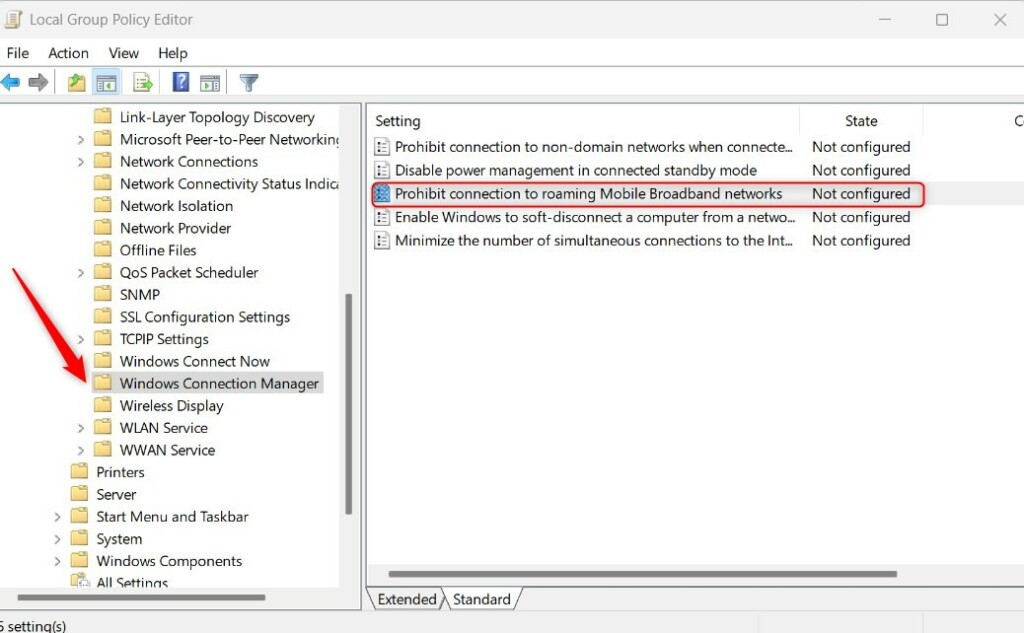
- Choose one of these options:
- Not Configured or Disabled: Data roaming is allowed.
- Enabled: Blocks all connections to roaming networks.
- Click OK. Then close the Local Group Policy Editor.
Need More Help?
For official Microsoft info, visit their support page: Cellular settings in Windows.
Summary
You can control data roaming on your Windows 11 device. This helps you avoid extra charges or stay connected while traveling.
The easiest way is through the Settings app. Go to Network & internet → Cellular → Data roaming options.
Advanced users can change settings using the Registry Editor or Local Group Policy Editor.
Always be careful when using Registry or Group Policy Editor. Consider backing up your system first.
If you found this helpful, feel free to share your experience or ask questions below!
Leave a Reply