How to Install phpMyAdmin on Windows 11 with WSL


phpMyAdmin on Windows 11 with WSL lets you manage MySQL and MariaDB databases from your web browser instead of the command line. It is a free tool with a simple interface for creating databases, running SQL queries and managing user accounts.
WSL2 (Windows Subsystem for Linux version 2) runs the database server inside a real Linux environment on your Windows 11 PC. You get fast file and network performance and full Linux compatibility, with no separate virtual machine to manage.
Here is the short version. It assumes WSL, Ubuntu, Apache, MariaDB and PHP are already installed. The sections after it cover each of those in order.
- Open your Linux terminal in WSL and type
sudo apt install phpmyadmin. Enter your Linux password if asked. - When the installer asks you to choose a web server, select
apache2. In this screen, move with the arrow keys, press the Spacebar to put a star next to the option, then press Enter. If you only press Enter, nothing is selected and Apache is not configured. - When asked about configuring the database with dbconfig-common, select
Yes. - Enter and confirm a password for phpMyAdmin to connect to your database, then select OK. If you leave the password blank, the installer generates a random one for you.
- After installation, restart Apache by running
sudo service apache2 restart. - Open your web browser and go to
http://localhost/phpmyadmin. The phpMyAdmin login page should appear.
Install WSL by running `wsl –install` in an administrator Command Prompt, then install a Linux distribution like Ubuntu using `wsl –install -d ubuntu-20.04`. Finally, set up a web server and the phpMyAdmin package within your Linux environment.
Install Windows Subsystem for Linux in 🪟 Windows 11
Windows Subsystem for Linux (WSL) lets you run Linux software directly on Windows 11 without a separate virtual machine. To install it , open Command Prompt as an administrator, type wsl –install, and press Enter. Windows downloads and sets up the default Linux environment (Ubuntu) for you.
You need Windows 11 with virtualization turned on. Most PCs ship with it enabled. If the install complains about virtualization, enable it in your BIOS/UEFI settings and try again.
- Click Start and type cmd.
- Right-click the Command Prompt app in the results and choose Run as administrator.
- Click Yes if User Account Control asks for permission.
A Command Prompt window with “Administrator” in its title bar should now be open. Windows Terminal or PowerShell opened as administrator also works.
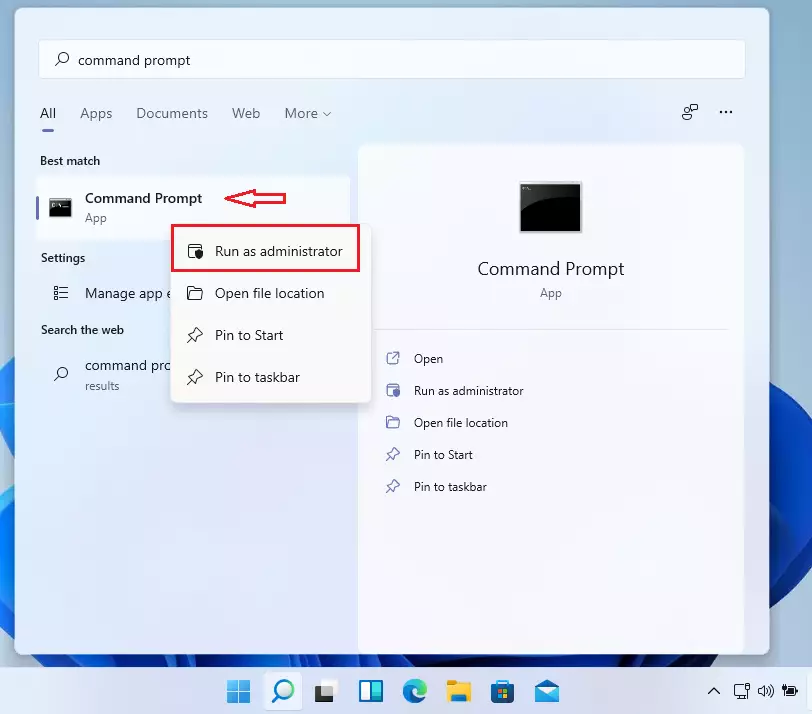
When the console opens, run the commands below to install Windows Subsystem for Linux (WSL):
wsl --install
Wait for WSL to be installed. This downloads several components, so it can take a few minutes depending on your connection. Don't close the window while it runs.
When it finishes, you should get a success message similar to the lines below:
Installing: Virtual Machine Platform
Virtual Machine Platform has been installed.
Installing: Windows Subsystem for Linux
Windows Subsystem for Linux has been installed.
Downloading: WSL Kernel
Installing: WSL Kernel
WSL Kernel has been installed.
Downloading: GUI App Support
Installing: GUI App Support
GUI App Support has been installed.
Downloading: Ubuntu
The requested operation is successful. Changes will not be effective until the system is rebooted.
Restart your computer. WSL will not work properly until you do.
WSL should now be installed and ready to use. When you want to update it later, run the commands below:
wsl --update
Install Specific Linux distro on 🪟 Windows 11
A Linux distribution is a version of Linux, such as Ubuntu or Debian, that runs inside WSL. The default install already gives you Ubuntu. If you want a specific version or a different distro, open Command Prompt and run wsl --list --online to see what is available. Then type wsl --install -d followed by the name of the distribution you want.
wsl --list --online
You should see a list of all the distributions you can install on WSL. Use the name from the NAME column in the install command.
NAME                            FRIENDLY NAME
Ubuntu                          Ubuntu
Debian                          Debian GNU/Linux
kali-linux                      Kali Linux Rolling
Ubuntu-18.04                    Ubuntu 18.04 LTS
Ubuntu-20.04                    Ubuntu 20.04 LTS
Ubuntu-22.04                    Ubuntu 22.04 LTS
Ubuntu-24.04                    Ubuntu 24.04 LTS
openSUSE-Leap-15.6              openSUSE Leap 15.6
SUSE-Linux-Enterprise-15-SP5    SUSE Linux Enterprise 15 SP5
To install a distribution from the list, run the commands below with its name. For example, to install Ubuntu 20.04, run:
wsl --install -d ubuntu-20.04You should then get a message that the distribution is installed.
Downloading: Ubuntu 20.04 LTS
Installing: Ubuntu 20.04 LTS
Ubuntu 20.04 LTS has been installed.
Launching Ubuntu 20.04 LTS.
After installing, an Ubuntu console opens with setup details. On first launch it asks you to create a Linux username and password. These are separate from your Windows account. When you type the password, nothing appears on screen. That is normal, so keep typing and press Enter. You will need this password for every sudo command later.
Installing, this may take a few minutes.
Please create a default UNIX user account. The username does not need to match your Windows username.
For more information visit: https://aka.ms/wslusers
Enter new UNIX username: Richard
New password:
Retype new password:
passwd: password updated successfully
Installation successful!
To run a command as administrator (user "root"), use "sudo <command>".
See "man sudo_root" for details.

Welcome to Ubuntu 20.04 LTS (GNU/Linux 4.4.0-22000-Microsoft x86_64)
If something goes wrong during the install, the commands below are useful for troubleshooting.
wsl --set-default-version 2
bcdedit /set hypervisorlaunchtype auto
Now that Ubuntu is installed, the next step is the LAMP stack (Linux, Apache, MariaDB, PHP) that phpMyAdmin runs on. Start with the Apache HTTP Server.
Install Apache HTTP Server
Apache HTTP Server is a program that serves web pages to browsers. Here it answers requests inside your WSL environment. To install it on Ubuntu, open your Linux terminal and run sudo apt update, followed by sudo apt install apache2. This downloads Apache and sets it up as a service.
To install Apache on Ubuntu, run the commands below:
sudo apt update
sudo apt install apache2
After installing Apache2, use the commands below to stop, start and restart the Apache2 service. You will restart it several times in this guide, for example after installing PHP modules or changing settings.
sudo service apache2 stop
sudo service apache2 start
sudo service apache2 restart
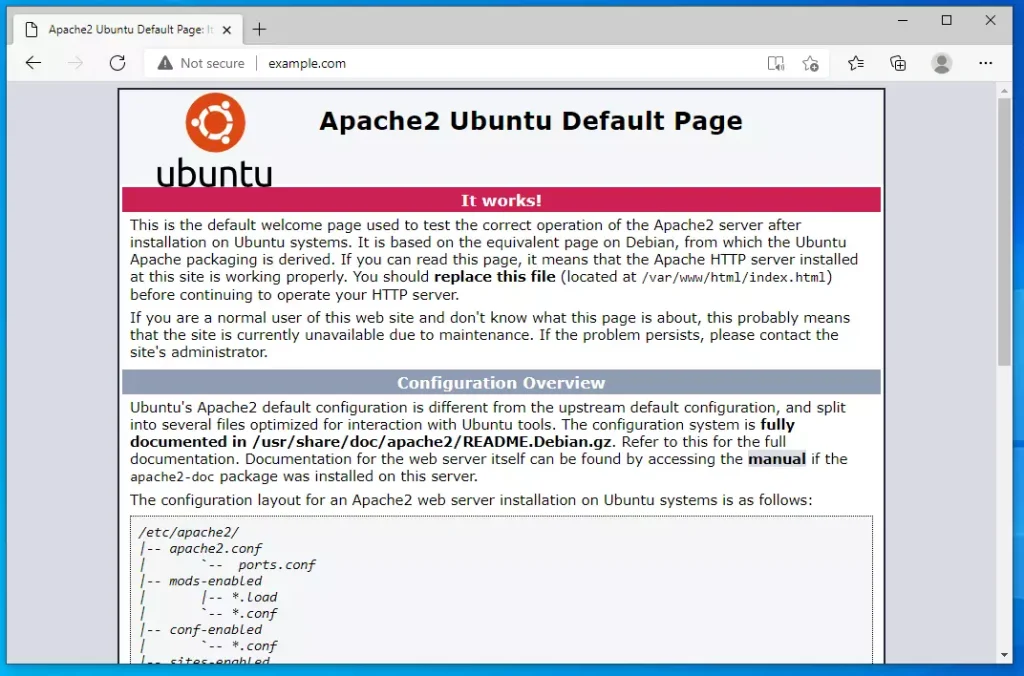
To check that Apache is installed and working, open your web browser in Windows and browse to the server's hostname or IP address. With WSL2, the address localhost in a Windows browser normally reaches the web server running inside Linux.
If everything works, you should see the Apache default test page. If the page does not load, make sure Apache is started, then try again.
http://localhost
Install MariaDB Database Server
MariaDB is a database program that stores and organizes your website data. It is the database server phpMyAdmin will manage. To install it on your WSL setup, open your Linux terminal and run sudo apt-get install mariadb-server mariadb-client. This installs both the database engine and the client tools.
To install MariaDB, run the commands below:
sudo apt-get install mariadb-server mariadb-client
After installing MariaDB, use the commands below to stop, start and restart the MariaDB service.
sudo service mysql stop
sudo service mysql start
sudo service mysql restart
Next, run the commands below to secure the database server with a root password. Run them even if the installer did not prompt you for one, because a fresh install has no password set on root.
sudo mysql_secure_installation
The script asks a series of questions. Answer them as listed below:
- Enter current password for root (enter for none): just press Enter
- Set root password? [Y/n] : Y
- New password: enter a password
- Re-enter new password: repeat the password
- Remove anonymous users? [Y/n] : Y
- Disallow root login remotely? [Y/n] : Y
- Remove test database and access to it? [Y/n] : Y
- Reload privilege tables now? [Y/n] : Y
To confirm MariaDB is installed and working, log in to the database console with the commands below:
sudo mysql -u root -p
Type the root password when prompted. Remember that nothing shows on screen as you type it.
Welcome to the MariaDB monitor.  Commands end with ; or g.
Your MariaDB connection id is 46
Server version: 10.3.29-MariaDB-0ubuntu0.20.04.1 Ubuntu 20.04
Copyright (c) 2000, 2018, Oracle, MariaDB Corporation Ab and others.
Type 'help;' or 'h' for help. Type 'c' to clear the current input statement.
MariaDB [(none)]>
The server is installed and running if you see a screen similar to the one below.
PHP and Related Modules
PHP is a programming language used to build dynamic websites, and phpMyAdmin is written in it. To install PHP and its modules on your Ubuntu WSL environment, open your Linux terminal and run the apt install command that includes php, libapache2-mod-php and the database connectors. The exact command is in the block below.
To install PHP and the recommended modules, run the commands below.
sudo apt install php libapache2-mod-php php-common php-mysql php-gmp php-curl php-intl php7.4-mbstring php-xmlrpc php-gd php-xml php-cli php-zip
That installs PHP along with the recommended modules used by many PHP-based applications.
To check that PHP is installed, run the commands below:
php -v
You should see output like the one below, showing the installed PHP version:
PHP 7.4.3 (cli) (built: Oct  6 2020 15:47:56) ( NTS )
Copyright (c) The PHP Group
Zend Engine v3.4.0, Copyright (c) Zend Technologies
with Zend OPcache v7.4.3, Copyright (c), by Zend Technologies
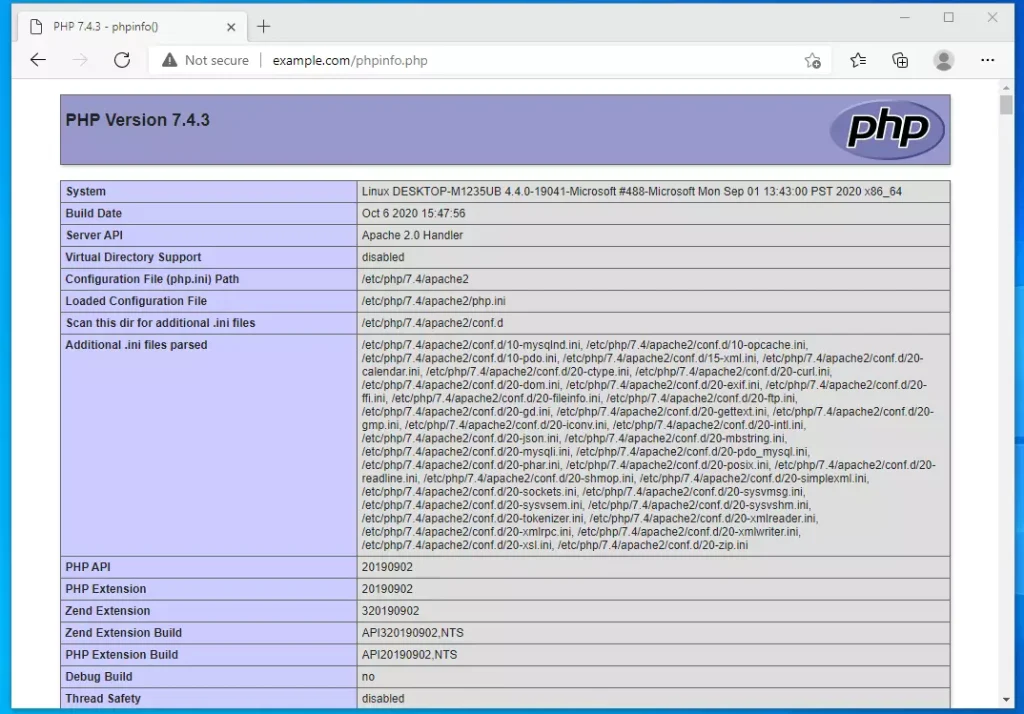
You can also test PHP with a small script that shows the installed version and which modules are enabled or disabled. This also proves that Apache is passing PHP files to PHP correctly.
To do that, run the commands below to create a PHP test file called phpinfo.php
sudo nano /var/www/html/phpinfo.php
Then type the content below into the file.
<?php phpinfo( ); ?>
Save the file. If the command opened the nano editor, press Ctrl+O, then Enter to confirm the name, then Ctrl+X to exit.
Open your browser and browse to your server hostname followed by phpinfo.php.
If the page does not load or shows the PHP code as text, restart Apache, then type the address again and reload the file.
http://localhost/phpinfo.php
You should see the PHP default test page. When you are done, delete the test file. It lists details about your server setup that you don't want left on a web-accessible folder.
Install phpMyAdmin
phpMyAdmin is a web-based tool for managing MariaDB and MySQL databases through your browser. To install it in WSL, open your Linux terminal and run sudo apt install phpmyadmin. When the installer asks which web server to configure, select apache2.
sudo apt install phpmyadmin
During the installation, a blue configuration screen asks you to select the web server to run with phpMyAdmin.
Select apache2 and continue. Use the arrow keys to move to it, press the Spacebar so a star appears next to it, then press Tab to reach Ok and press Enter.
+------------------------+ Configuring phpmyadmin +-------------------------+
 | Please choose the web server that should be automatically configured to   |
 | run phpMyAdmin.                                                           |
 | Web server to reconfigure automatically:                                  |
 |                                                                           |
 |    [*] apache2                                                            |
 |    [ ] lighttpd                                                           |                                                     |
 |                                 <Ok>                                                                            |
 +---------------------------------------------------------------------------+
When asked again, select Yes to let dbconfig-common install a database and configure it for phpMyAdmin.
 +------------------------+ Configuring phpmyadmin +-------------------------+
 |                                                                           |
 | The phpmyadmin package must have a database installed and configured      |
 | before it can be used.  This can be optionally handled with               |
 | dbconfig-common.                                                          |
 |                                                                           |
 | If you are an advanced database administrator and know that you want to   |
 | perform this configuration manually, or if your database has already      |
 | been installed and configured, you should refuse this option.  Details    |
 | on what needs to be done should most likely be provided in                |
 | /usr/share/doc/phpmyadmin.                                                |
 |                                                                           |
 | Otherwise, you should probably choose this option.                        |
 |                                                                           |
 | Configure database for phpmyadmin with dbconfig-common?                   |
 |                                                                           |
 |                  <Yes>                  <No>                              |
 |                                                                           |
 +---------------------------------------------------------------------------+
Enter a password for phpMyAdmin to register with the database, confirm it, then select OK and let the installation finish. This is an internal password used by phpMyAdmin itself, not the one you log in with.
MySQL and MariaDB can authenticate the root user through the auth_socket plugin.
This plugin lets users connecting from the local host through a socket file log in without a password. Because of this, phpMyAdmin will refuse a login with the MariaDB root account, even with the correct password.
If you want to use the root account to log in to phpMyAdmin, change its authentication method from auth_socket to mysql_native_password. The steps below do that. On a local test setup this is fine. If the server will ever be reachable from other machines, create a separate database user for phpMyAdmin instead.
First, log back in to the MariaDB console.
sudo mysql
Then run the commands below to switch the root account to mysql_native_password authentication.
USE mysql;
UPDATE user SET plugin='' WHERE user ='root';
Save your changes and exit the console:
FLUSH PRIVILEGES;
EXIT;
Restart Apache, then browse to the phpMyAdmin web portal using the URL below:
http://localhost/phpmyadmin
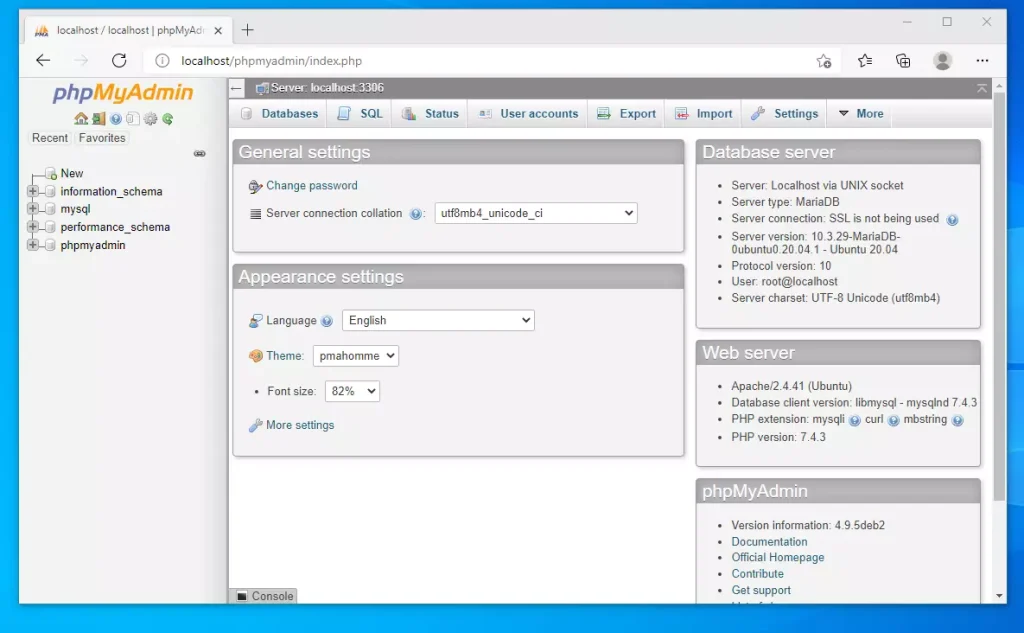
The phpMyAdmin login page should appear. Sign in with the username root and the root password you set earlier.
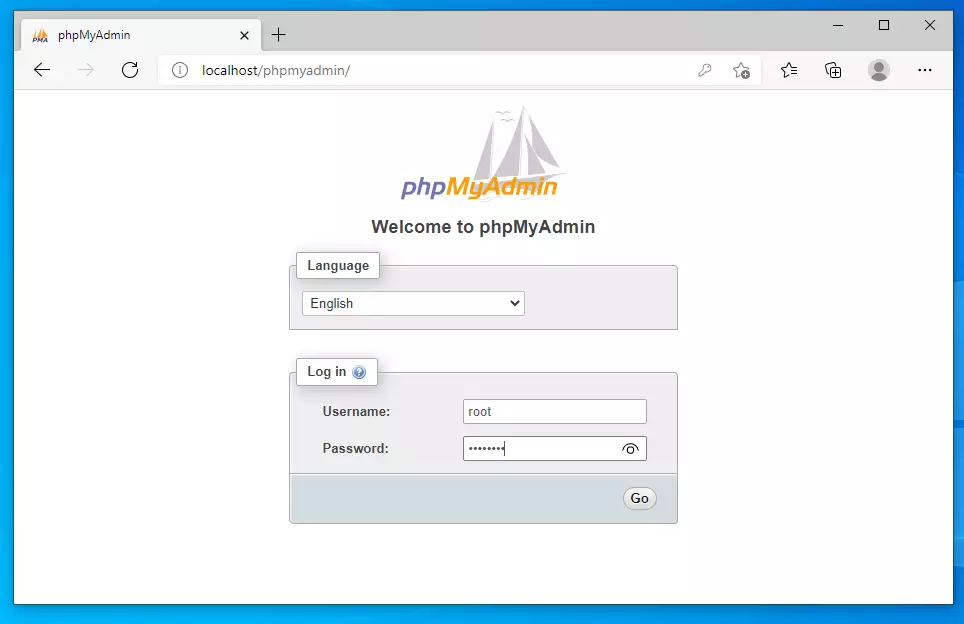
You can now manage your database server from the phpMyAdmin portal: create databases, run queries and add users.
Conclusion:
Setting up phpMyAdmin on Windows 11 with WSL gives you an efficient environment for managing MySQL and MariaDB databases. Here are the key takeaways:
- Accessible Interface: phpMyAdmin offers a user-friendly web interface for database management.
- Integration with WSL: Running phpMyAdmin within WSL removes the need for a separate virtual machine or extra server software on Windows.
- Powerful Features: It supports database tasks such as running SQL queries, managing user accounts, and importing and exporting data.
- Enhanced Performance with WSL2: WSL2's improved performance and compatibility make it a good choice for developers.
- Step-by-Step Installation: The installation is straightforward when you work through each component in turn (WSL, Apache, MariaDB, PHP).
- Security Considerations: Set a root password, run the MariaDB security script, and keep the server local. Proper database access and user authentication settings protect your data.
- Easily Manage Databases: With phpMyAdmin, you can manage and monitor your database instances from any web browser on your PC.
phpMyAdmin is useful for students and developers who manage databases on Windows 11. It simplifies tasks such as creating tables, running SQL queries and checking data. The interface also makes database administration easier for people who are new to database work.
Have a question about this guide?
Answered by AI from this guide. Good questions may be added to this page — please don't include personal details.
Did this guide fix your problem?

About the Author
Richard
Tech Writer, IT Professional
Richard is a writer at Geek Rewind who turns complex IT tasks into clear, step-by-step guides. He draws on years of hands-on experience in system administration and enterprise IT operations, focusing on Windows, Linux and WordPress: the problems people actually run into, and the fixes that work. His server and WordPress guides come from systems he runs himself. Richard builds and maintains the platform behind Geek Rewind, from its Ubuntu servers and Nginx configuration to its custom WordPress plugins. Many new tutorials start with readers' questions, and he's always glad to answer them in the comments.
You also need to copy the phpmyadmin configuration file to the apache directory and enable it.
Run these:
sudo cp /etc/phpmyadmin/apache.conf /etc/apache2/conf-available/phpmyadmin.conf
sudo a2enconf phpmyadmin
sudo service apache2 restart