How to Install VBScript in Windows 11
VBScript is a scripting language from Microsoft that lets you automate tasks and build simple applications in Windows. This scripting language, short for Visual Basic Scripting Edition, is usually already on in Windows 11 through the Windows Script Host feature.
While newer languages like PowerShell are now more common, VBScript remains useful for running older scripts. You might see errors when trying to run VBScript files (.vbs) if the Windows Script Host feature is turned off, which sometimes happens for security.
This guide shows you how to easily turn the Windows Script Host back on, so you can run your VBScript files without problems.
You can install VBScript in Windows 11 by going to Settings Apps Optional features, clicking “View features,” searching for VBScript, checking the box, and clicking Install. Alternatively, use the DISM command in Windows Terminal: DISM /Online /Add-Capability /CapabilityName:VBSCRIPT~~~~.
Why use VBScript?
VBScript, an older scripting language, is being phased out by Microsoft to boost system security. You will likely only need VBScript if you are working with legacy software or old business scripts that cannot run without VBScript.
Security and Deprecation Roadmap
Microsoft has stopped updating VBScript, meaning it’s no longer improved and can be a security risk, which is why it’s not included by default in Windows 11.
Install or Uninstall via Settings
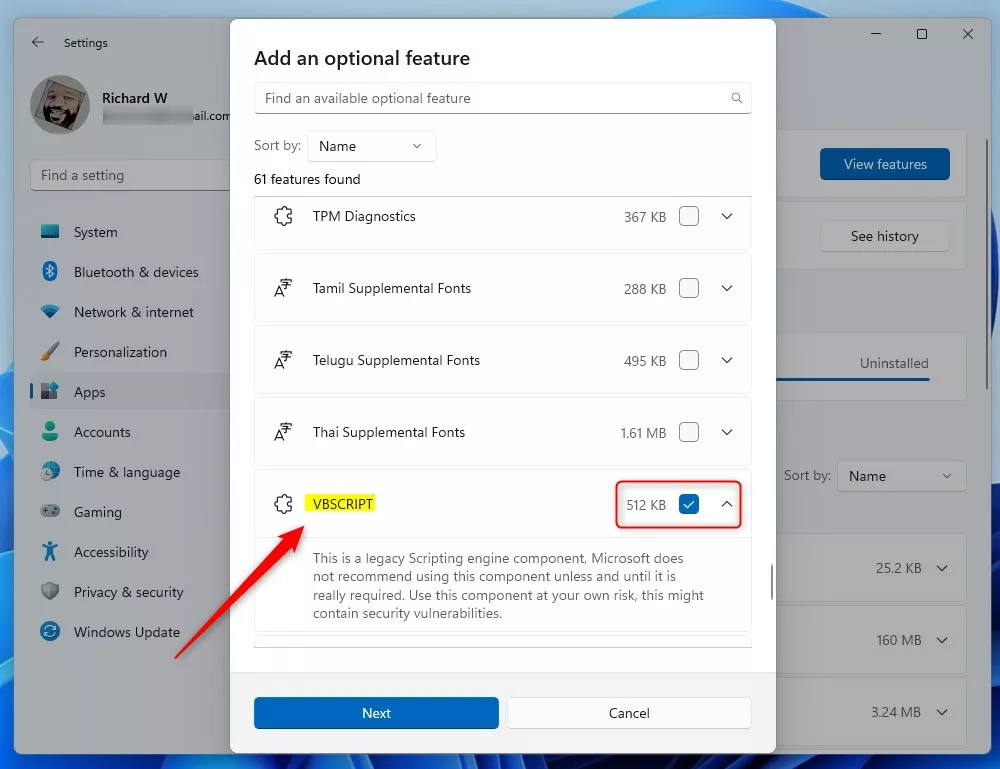
If older programs need VBScript, you can install it through the Settings app in Windows 11. To install VBScript, open Settings by pressing the Windows key and I, then go to Apps, select Optional features, click View features, search for VBScript, check the box, and click Next.
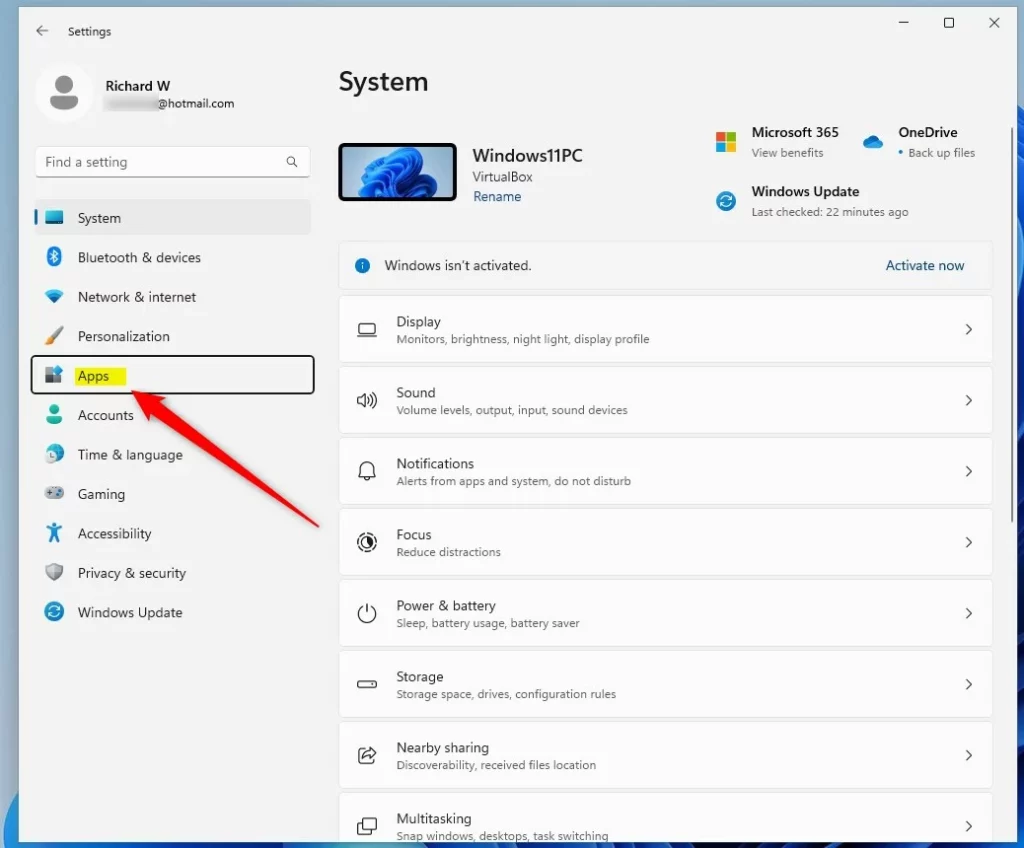
- Open the Windows Settings app by pressing Windows key + I.
- Click on Apps on the left side.
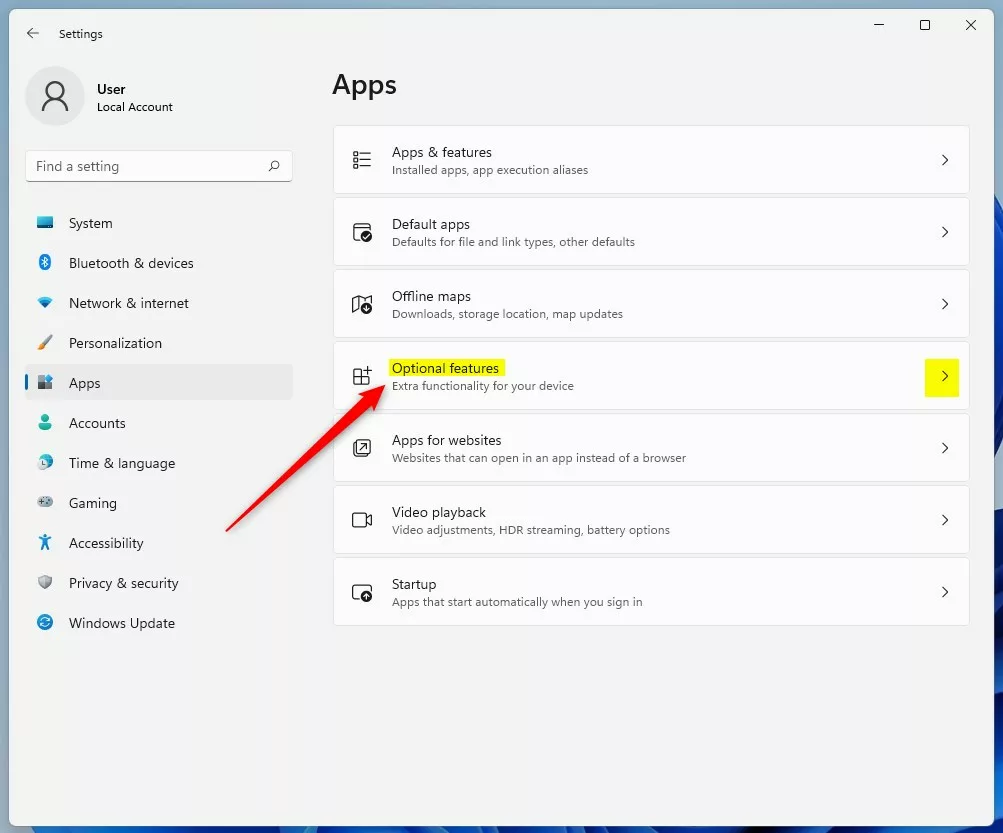
- Select the Optional features tile.
- Click the View features button.
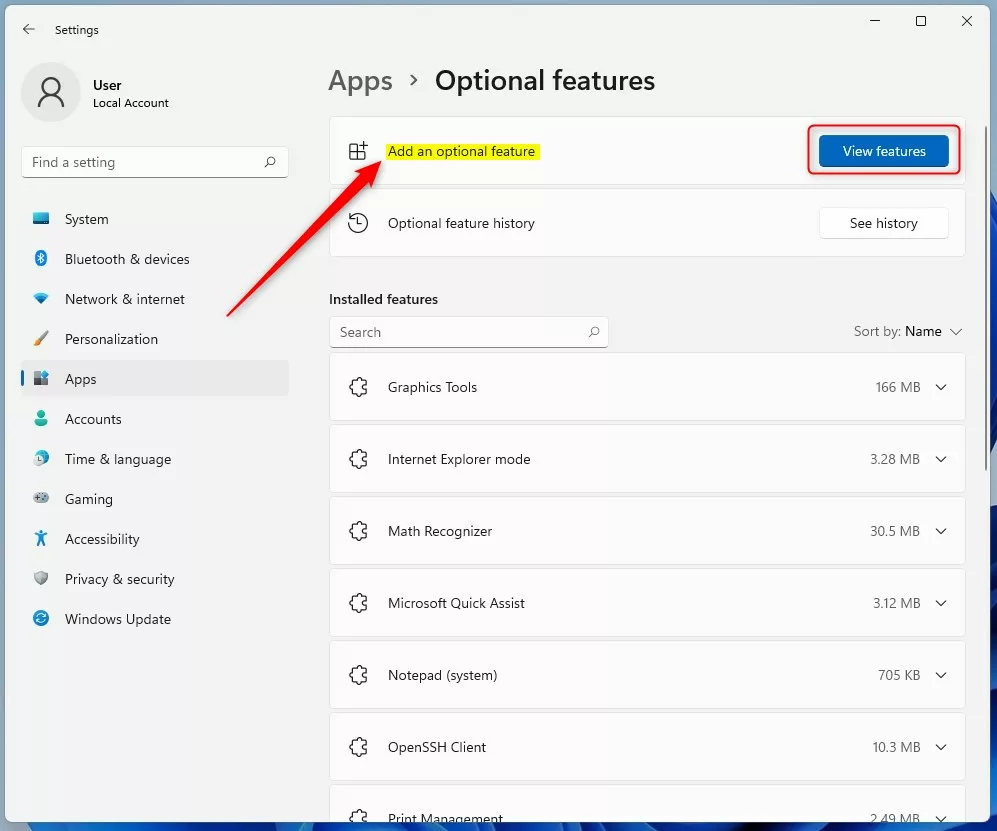
- Search for VBScript, check the box, and click Next.
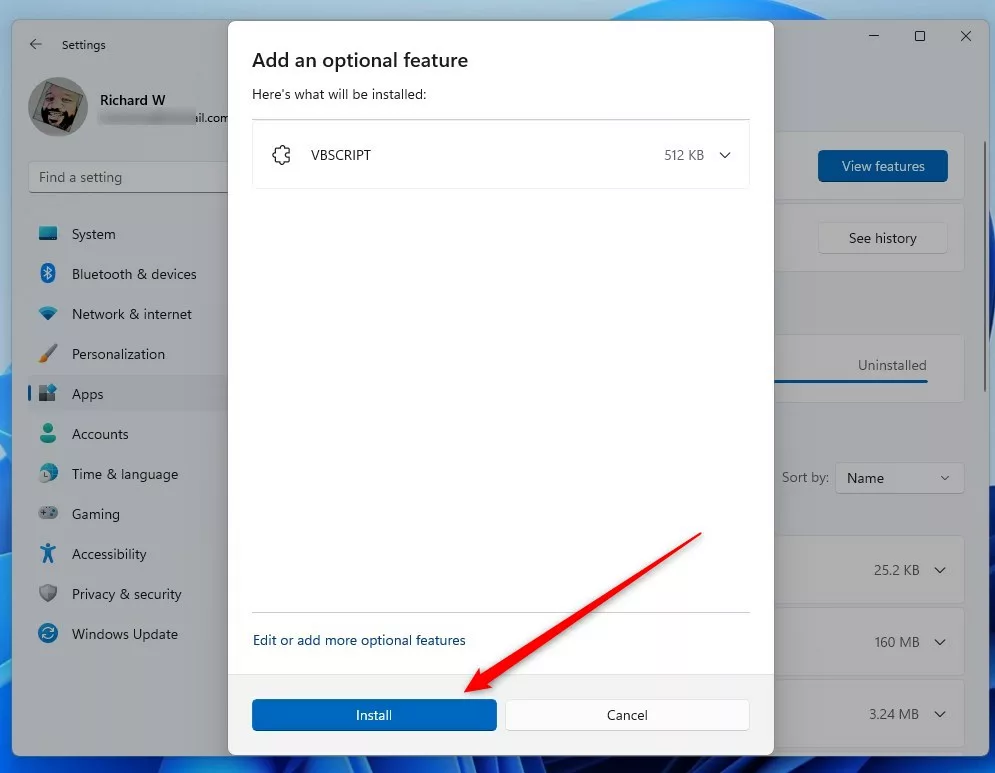
- Click Install to finish.
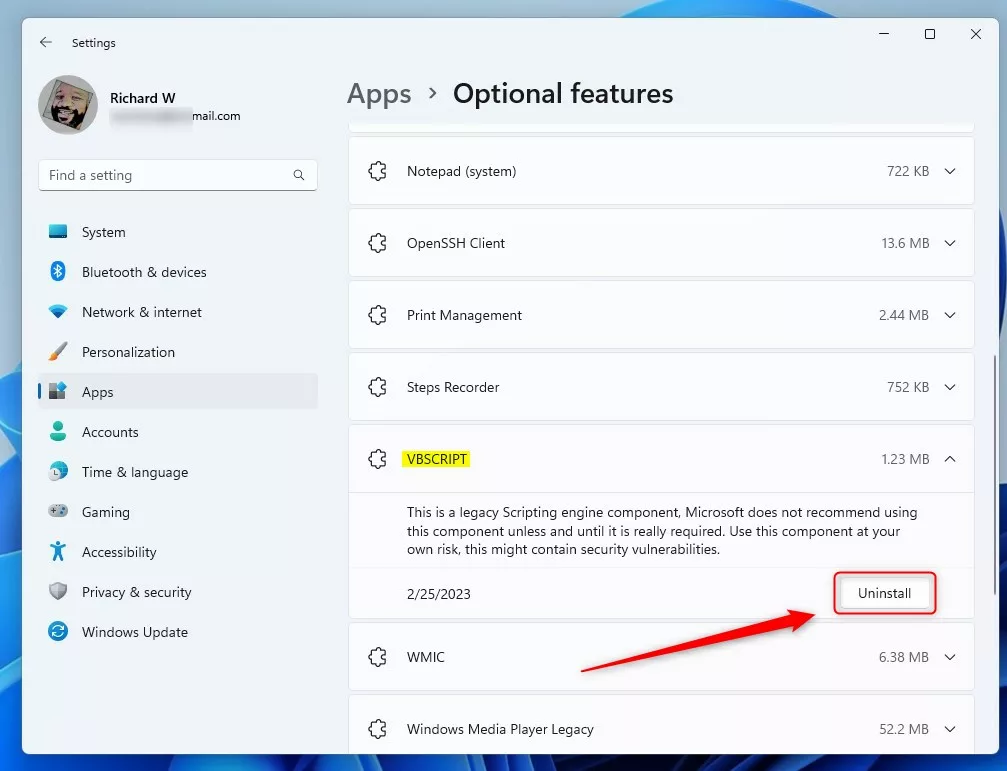
To uninstall later, return to this menu, find VBScript, and select Uninstall.
Install or Uninstall via Command Line
If you're comfortable using the command line, you can use Windows Terminal. Make sure you run it as an administrator.
To install the feature, use this command:
DISM /Online /Add-Capability /CapabilityName:VBSCRIPT~~~~
To remove it, use this command:
DISM /Online /Remove-Capability /CapabilityName:VBSCRIPT~~~~
Enterprise Management (GPO & Intune)
IT professionals can use tools like Group Policy Objects (GPO) or Microsoft Intune to deploy the VBScript Feature-on-Demand (FOD) to multiple computers simultaneously. This keeps legacy applications working in a company setting while you maintain control over what gets installed.
Troubleshooting 24H2 Errors
VBScript installation status on Windows 11 24H2 can be checked in PowerShell. Run the command 'Get-WindowsCapability -Online -Name VBSCRIPT~~~~'. If the output shows 'NotPresent', use DISM to install VBScript. Ensure your user account has administrator rights to complete the installation and fix remaining issues.
Get-WindowsCapability -Online -Name VBSCRIPT~~~~
Summary
VBScript is an older tool not included in Windows 11 by default, but you can install it through Optional Features or the command line if needed for old programs.
Is VBScript permanently removed in 🪟 Windows 11 24H2?
VBScript isn't permanently removed, but it's no longer installed by default. It's now an optional feature you can manually add back if you need to run older scripts or legacy applications that rely on this specific scripting environment.
What are the security risks of enabling VBScript?
VBScript is considered a security risk because it lacks modern protections. Attackers often use VBScript to execute malicious code on your computer. By keeping it disabled, you reduce the "attack surface" of your system, making it much harder for harmful software to run successfully on your machine.
Was this guide helpful?

About the Author
Richard
Tech Writer, IT Professional
Richard, a writer for Geek Rewind, is a tech enthusiast who loves breaking down complex IT topics into simple, easy-to-understand ideas. With years of hands-on experience in system administration and enterprise IT operations, he’s developed a knack for offering practical tips and solutions. Richard aims to make technology more accessible and actionable. He's deeply committed to the Geek Rewind community, always ready to answer questions and engage in discussions.


No comments yet — be the first to share your thoughts!