
This article explains installing Eclipse Mosquitto MQTT message broker on Ubuntu Linux.
Eclipse Mosquitto MQTT is an open-source, lightweight message broker that implements the MQTT protocol, which is suitable for all devices, including low-power computers and full servers.
The MQTT protocol provides a lightweight messaging method using a publish/subscribe model. As a result, it’s portable and available for a wide range of platforms.
Below is how to install and use Mosquitto MQTT on Ubuntu Linux.
Install Mosquitto MQTT message broker on Ubuntu Linux
As mentioned above, if you want to use an open-source message broker using the MQTT protocol, you may want to look at Eclipse Mosquitto.
Here’s how to install it on Ubuntu Linux.
Install Mosquitto packages
Mosquitto MQTT is a popular project. Because of that, its installer packages are available in Ubuntu repositories by default.
All one has to do is run the commands below to install Mosquitto MQTT on Ubuntu Linux.
sudo apt update
sudo apt install mosquitto mosquitto-clients
Once the Mosquitto MQTT packages are installed, use the commands below to enable and verify that the service is running.
sudo systemctl is-enabled mosquitto
sudo systemctl status mosquitto
The commands should output similar results below:
● mosquitto.service - Mosquitto MQTT Broker
     Loaded: loaded (/lib/systemd/system/mosquitto.service; enabled; preset: enabled)
     Active: active (running) since Sat 2023-05-06 11:13:28 CDT; 27s ago
       Docs: man:mosquitto.conf(5)
             man:mosquitto(8)
    Process: 3750 ExecStartPre=/bin/mkdir -m 740 -p /var/log/mosquitto (code=exited, status=0/SUCCESS)
    Process: 3751 ExecStartPre=/bin/chown mosquitto /var/log/mosquitto (code=exited, status=0/SUCCESS)
    Process: 3752 ExecStartPre=/bin/mkdir -m 740 -p /run/mosquitto (code=exited, status=0/SUCCESS)
    Process: 3753 ExecStartPre=/bin/chown mosquitto /run/mosquitto (code=exited, status=0/SUCCESS)
   Main PID: 3754 (mosquitto)
      Tasks: 1 (limit: 2243)
     Memory: 1.5M
        CPU: 59ms
     CGroup: /system.slice/mosquitto.service
             └─3754 /usr/sbin/mosquitto -c /etc/mosquitto/mosquitto.conf
You can see that Mosquitto MQTT is up and running.
Next, we should try some tests. For this, we’ll need to open two terminal windows. On the terminal 1 window, run the commands below to use the “mosquitto_sub” command-line tool to listen for messages on the “test” topic.
sudo mosquitto_sub -h localhost -t test
Then on terminal 2, run the commands below to send messages on the topic “test.”
sudo mosquitto_pub -h localhost -t test -m "Testing Mosquitto MQTT"
sudo mosquitto_pub -h localhost -t test -m "You should receive my test message"
On the terminal 1 window, you should see messages on the test topic from terminal 2.
Setup authentication
By default, Mosquitto MQTT is installed without authentication. You may want to create an administrator account and secure your Mosquitto server in a production environment.
Let’s create a new user called superadmin. To do that, run the commands below to do that.
sudo mosquitto_passwd -c /etc/mosquitto/.passwd superadmin
You’ll be prompted to create and repeat a new password for the account. Please do it.
Once you create an account with Mosquito, you must disable anonymous access. Run the commands below to open the auth.conf file.
sudo nano /etc/mosquitto/conf.d/auth.conf
In the file, copy and paste these lines and save.
listener 1883
allow_anonymous false
password_file /etc/mosquitto/.passwd
Then restart the Mosquitto service.
sudo systemctl restart mosquitto
To use the Mosquitto MQTT service, the subscriber or receiver must use the password created.
The publisher or sender must also be authenticated.
#Subscriber/receiver
sudo mosquitto_sub -h localhost -t test -u "superadmin" -P "type_your_password"

#Publisher/sender
sudo mosquitto_pub -h localhost -t "test" -m "Hello - testing auth" -u "superadmin" -P "type_your_password"
Use SSL/TLS with Mosquitto MQTT
Additional security measures can be implemented with Mosquitto MQTT, including enabling SSL/TLS certificates.
If you need to use SSL/TLS certificate with Mostquitto, run the following openssl command to generate the dhparam certificate.
This will generate the DHPARAM certificate to ‘/etc/mosquitto/certs/dhparam.pem‘.
sudo openssl dhparam -out /etc/mosquitto/certs/dhparam.pem 2048
sudo chown -R mosquitto: /etc/mosquitto/certs
Next, generate a certificate to use. You can use either a self-signed or public certificate from Let’s Encrypt.
- How to create self-signed certificates in Ubuntu Linux
- How to create Let’s Encrypt certificates in Ubuntu Linux
Once you have the certificates you want to use, open the Mosquitto SSL.conf file by running the commands below.
sudo nano /etc/mosquitto/conf.d/ssl.conf
Then copy and paste the lines below into the file and save.
listener 8883

certfile /etc/letsencrypt/live/example.com/fullchain.pem
cafile /etc/letsencrypt/live/example.com/chain.pem
keyfile /etc/letsencrypt/live/example.com/privkey.pem
dhparamfile /etc/mosquitto/certs/dhparam.pem
Restart the Mosquitto service again.
sudo systemctl restart mosquitto
With SSL/TLS certificate enabled, publishers must use the hostname with SSL/TLS options in the commands.
sudo mosquitto_pub -h msqt.example.com -t test -m "Hello - testing SSL" -p 8883 --capath /etc/ssl/certs/ -u "superadmin" -P "type_your_password"
Enable WebSockets for Mosquitto
Finally, you can turn on WebSockets for Mosquitto. WebSockets allows reusing the same connections and provides a stateful and persistent full-duplex channel between the server and the client.
Run the commands below to create a WebSockets file.
sudo nano /etc/mosquitto/conf.d/websockets.conf
Then copy and paste the lines below into the file and save. This will enable and secure the WebSockets protocol via SSL/TLS certificates. The WebSockets will be run on port 8083.
listener 8083

protocol websockets
certfile /etc/letsencrypt/live/example.com/fullchain.pem
cafile /etc/letsencrypt/live/example.com/chain.pem
keyfile /etc/letsencrypt/live/example.com/privkey.pem
Restart the Mosquitto service.
sudo systemctl restart mosquitto
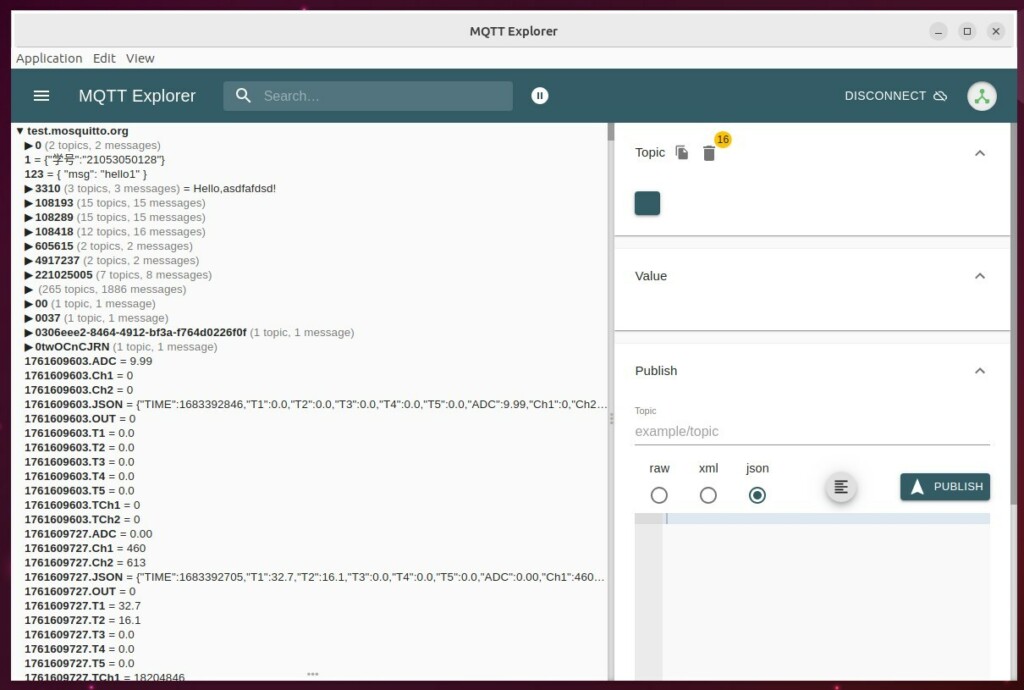
Using an MQTT explorer, you should see messages between the server and clients.
That should do it!
Conclusion:
- Eclipse Mosquitto MQTT is an open-source, lightweight message broker supporting the MQTT protocol suitable for various devices.
- Installation on Ubuntu involves installing Mosquitto packages and enabling the service, followed by authentication setup and optionally using SSL/TLS and WebSockets for enhanced security and functionality.
- The step-by-step guide provides comprehensive instructions for setting up Mosquitto MQTT on Ubuntu Linux, ensuring a secure and functional messaging system.
- Feel free to use the comments section below the article for any feedback, suggestions, or corrections.

Leave a Reply