How to Install Oracle Java JDK on Windows 11


Oracle Java Development Kit (JDK) is a software package that gives you the tools you need to write and run Java apps on Windows 11. Installing Oracle JDK 21, the current long-term support release, sets up the compiler and command-line tools required for your programming projects.
Download the JDK installer from Oracle’s website and run it. Follow the on-screen prompts, accepting default settings. After installation, edit system environment variables to set JAVA_HOME and add the JDK’s bin directory to the Path.
Prerequisites
Before you begin, ensure you have the following:
- Administrative Rights: You must have an administrator account on your Windows 11 PC to install software and modify system environment variables.
- Storage Space: Ensure you have at least 500MB of free disk space.
- Internet Connection: Required to download the JDK installer.
Oracle JDK vs. OpenJDK: Which Should You Choose?
When installing Java JDK on Windows 11, you’ll encounter two primary options: Oracle JDK and OpenJDK.
Downloading and Installing Java
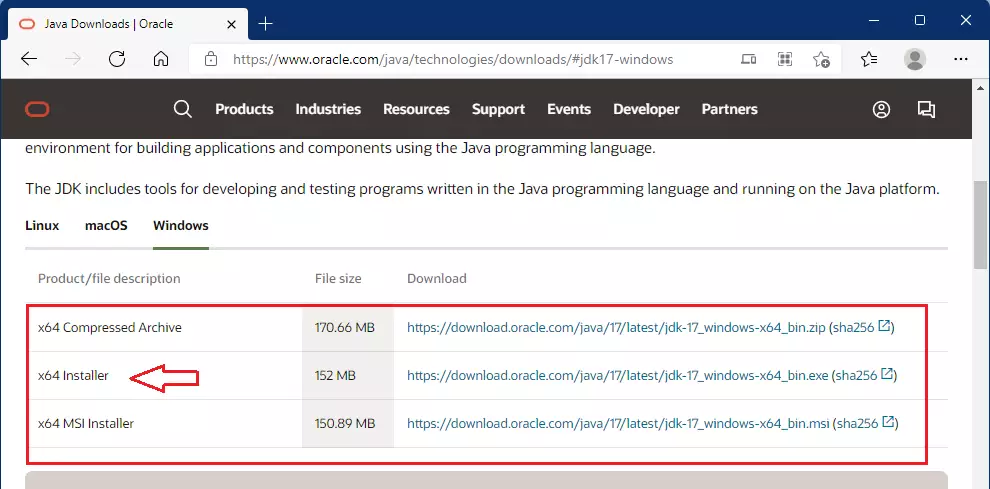
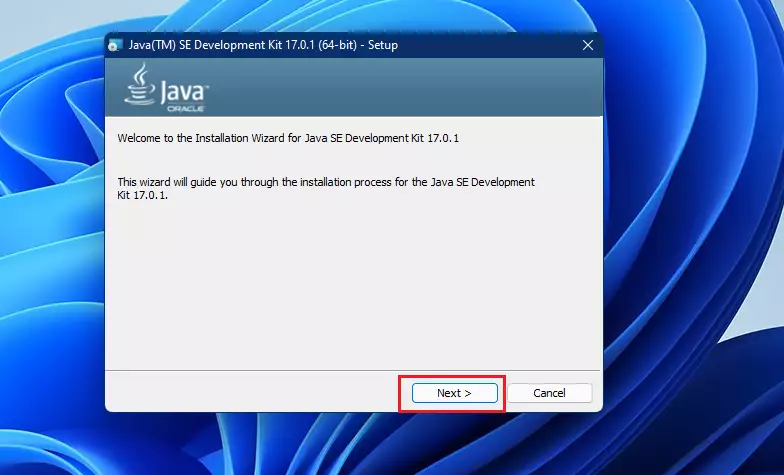
Installing Java JDK on Windows 11 starts by downloading the correct installer from the official Oracle website and running the setup wizard. You need administrator permissions to complete this setup. Follow the standard on-screen prompts and keep the default installation path to avoid future configuration problems.
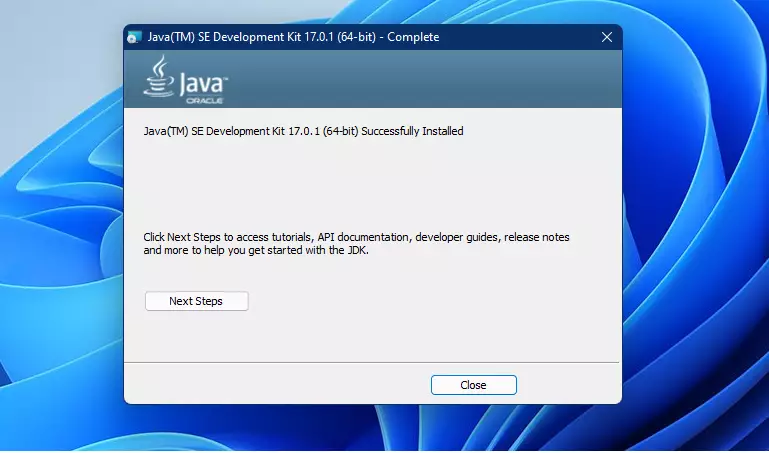
When the installation completes, click ‘Close’.
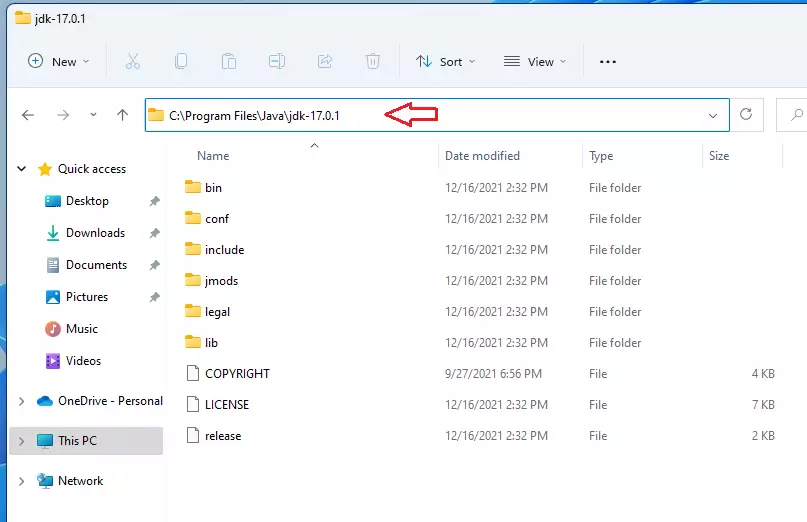
Java will install to C:\Program Files\Java\jdk-version-number. Click ‘Close’ when the installation finishes.
Configuring Environment Variables
Setting up the JAVA_HOME environment variable tells Windows 11 and your coding tools where to find your Java installation. You add this variable through the system settings by creating a new system variable, naming it JAVA_HOME, and pasting the exact folder path of your Java folder.
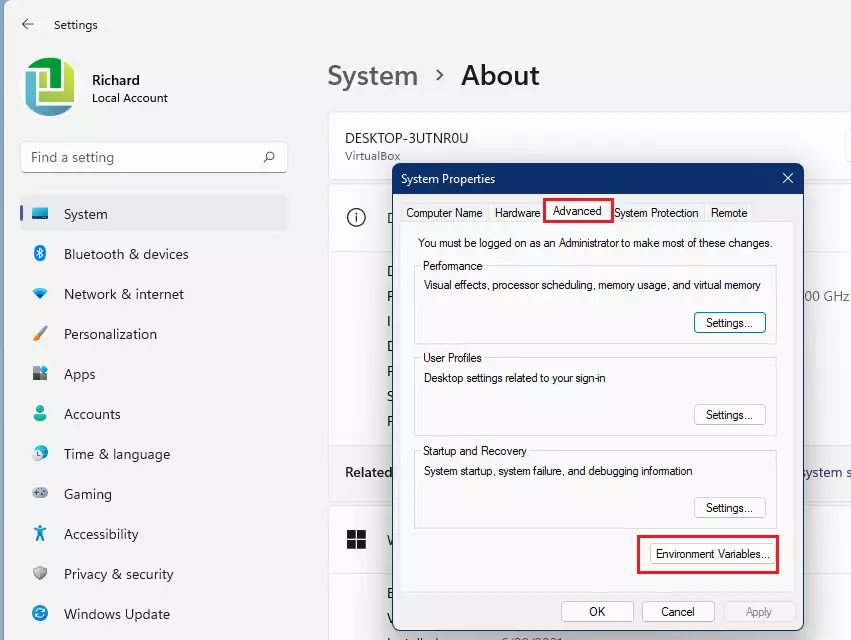
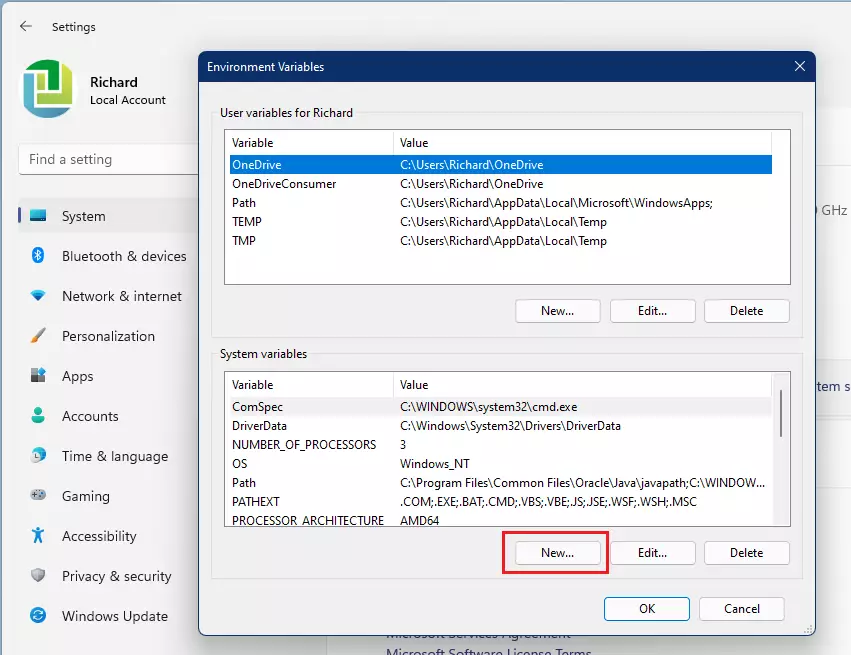
Click the "Environment Variables" button at the bottom. Under "System variables," click "New."
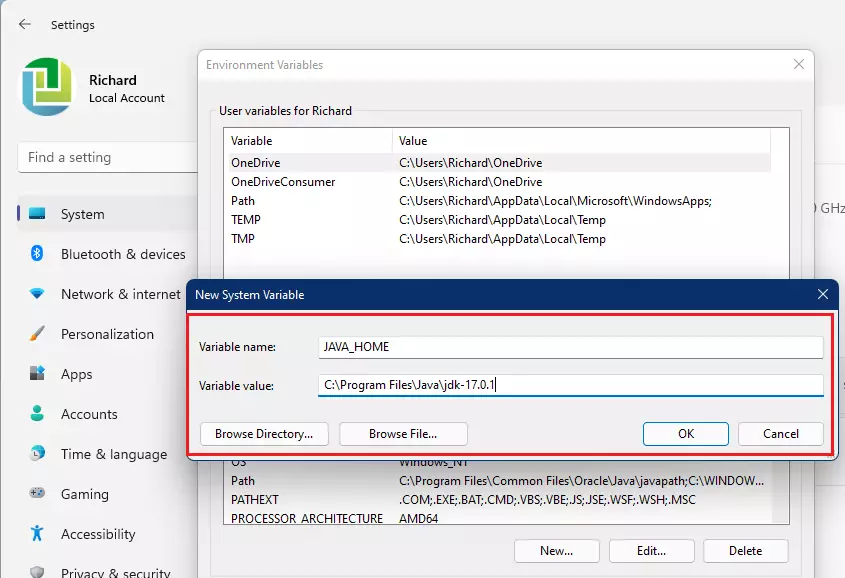
Input the full directory path to the Oracle Java Development Kit (JDK) installation, for example, C:\Program Files\Java\jdk-17. This step ensures Windows 11 can find the Java tools.
%JAVA_HOME%\bin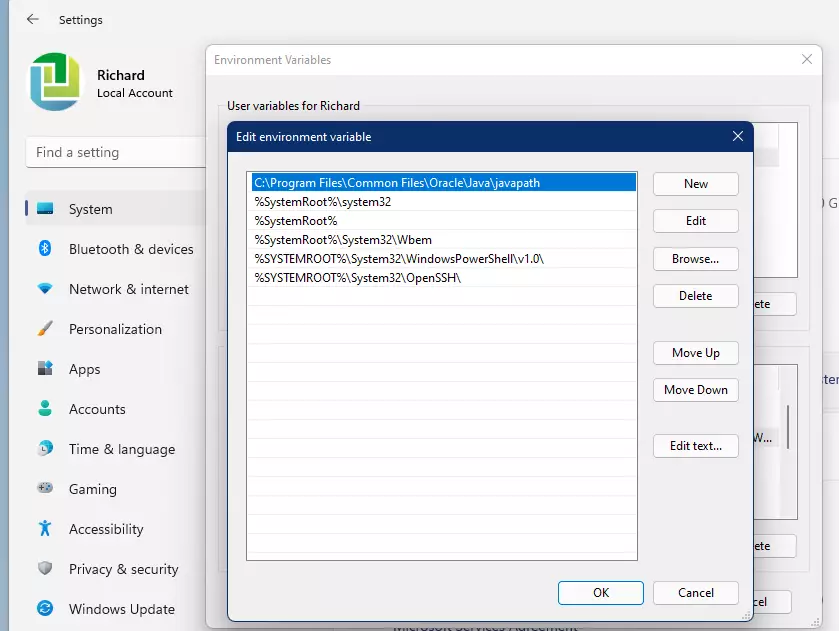
Verifying the Installation
Open Command Prompt or PowerShell and type these commands:
java -version
javac -version
Troubleshooting Installation
Fixing a java -version command that does not work on Windows 11 usually requires checking your file paths and restarting your Command Prompt. If your computer still cannot find Java, verify that you typed the path correctly and closed all open command windows to load the new settings.
- Path Typos: Ensure your
JAVA_HOMEpath matches your actual installation folder exactly. - Restart Terminal: Always close and reopen your Command Prompt after changing environment variables so the system can refresh the settings.
- Permissions: Ensure you ran the installer as an administrator.
Summary
To install Java JDK on Windows 11, you'll download the installer, run it as an administrator, and set up your JAVA_HOME and Path environment variables.
```Was this guide helpful?

About the Author
Richard
Tech Writer, IT Professional
Richard is a writer at Geek Rewind who turns complex IT tasks into clear, step-by-step guides. He draws on years of hands-on experience in system administration and enterprise IT operations, focusing on Windows, Linux and WordPress: the problems people actually run into, and the fixes that work. His server and WordPress guides come from systems he runs himself. Richard builds and maintains the platform behind Geek Rewind, from its Ubuntu servers and Nginx configuration to its custom WordPress plugins. Many new tutorials start with readers' questions, and he's always glad to answer them in the comments.


No comments yet — be the first to share your thoughts!