
This article describes the steps to install and use the JasperReports server on Ubuntu Linux.
JasperReports library is an open-source reporting engine that is entirely written in Java. As a result, developers can use JasperReports as a stand-alone reporting and analytics library server.
It can use data from any data source and produce pixel-perfect documents that can be viewed, printed, or exported in various document formats, including HTML, PDF, Excel, OpenOffice, and Word.
Below is how to install and use the JasperReports library server on Ubuntu Linux.
Install and use JasperReports server on Ubuntu Linux
As described above, the JasperReports library is an open-source reporting engine entirely written in Java. Developers can use JasperReports as a stand-alone reporting and analytics library server.
Below is how to install and use it on Ubuntu Linux.
Install Java OpenJDK
Because JasperReports is written in Java, you’ll need Java installed on the server to install JasperReports.
The open-source Java JDK app will work perfectly with JasperReports. Below is how to install OpenJDK on Ubuntu Linux.
sudo apt update
sudo apt install default-jdk
After installing OpenJDK, you can run the commands below to view the version installed.
java --version
For additional resources on installing and managing OpenJDK, read the post below.
How to install OpenJDK on Ubuntu Linux
Install MariaDB
JasperReports needs a database to store its data. MariaDB should be a great place to start if you are looking for an open-source database with JasperReports.
Run the commands below to install MariaDB.
sudo apt update
sudo apt install mariadb-server
For additional resources on installing MariaDB, read the post below.
How to install MariaDB on Ubuntu Linux
Create database account
Now that the MariaDB database is installed let’s create an account we will use with JasperReports.
Log on to the database console shell.
sudo mysql
Then, run the SQL statement below to create an account named jasparadmin with a password.
GRANT ALL ON *.* to jasperadmin@localhost identified by 'type_password_here';
Then save and exit.
FLUSH PRIVILEGES;
exit;
Install Tomcat server
JasperReports also needs a Java-based Web server application. Therefore, the Tomcat server is what you will need to use with JasperReports.
Below is how to install the Tomcat server.
First, create a user and group accounts to use with Tomcat.
sudo groupadd tomcat
sudo useradd -s /bin/bash -g tomcat -d /opt/tomcat tomcat
Create a Tomcat account home directory, then download and extract Tomcat content into the directory.
sudo mkdir /opt/tomcat
wget https://dlcdn.apache.org/tomcat/tomcat-8/v8.5.83/bin/apache-tomcat-8.5.83.tar.gz
sudo tar -xzvf apache-tomcat-8.5.83.tar.gz -C /opt/tomcat --strip-components=1
Next, change the ownership of Tomcat’s directory to be owned by the Tomcat user account.
sudo chown -R tomcat: /opt/tomcat
sudo sh -c 'chmod +x /opt/tomcat/bin/*.sh'
Create a systemd service config for Tomcat so the service can be started, stopped, and reloaded on demand.
sudo nano /etc/systemd/system/tomcat.service
Copy the content below and save it into the file.
[Unit]
Description=Tomcat webs servlet container
After=network.target

[Service]
Type=forking

User=tomcat
Group=tomcat
RestartSec=10
Restart=always
Environment="JAVA_HOME=/usr/lib/jvm/java-1.11.0-openjdk-amd64"
Environment="JAVA_OPTS=-Djava.awt.headless=true -Djava.security.egd=file:/dev/./urandom"

Environment="CATALINA_BASE=/opt/tomcat"
Environment="CATALINA_HOME=/opt/tomcat"
Environment="CATALINA_PID=/opt/tomcat/temp/tomcat.pid"
Environment="CATALINA_OPTS=-Xms1024M -Xmx2048M -server -XX:+UseParallelGC"

ExecStart=/opt/tomcat/bin/startup.sh
ExecStop=/opt/tomcat/bin/shutdown.sh

[Install]
WantedBy=multi-user.target
Exit and save the file.
Next, reload the systemd daemon and start the Tomcat service. If you run systemd with the status option, it should show Tomcat started and running.
sudo systemctl daemon-reload
sudo systemctl start tomcat
sudo systemctl status tomcat
Install JasperReports
Now that we have installed all the server requirements for JasperReports, let’s go and download JasperReports files and configure them.
Change as a Tomcat user.
sudo su - tomcat
Then, download the latest version of JasperReports.
wget https://sourceforge.net/projects/jasperserver/files/JasperServer/JasperReports%20Server%20Community%20edition%208.0.0/TIB_js-jrs-cp_8.0.0_bin.zip
Unzip the downloaded file.
unzip TIB_js-jrs-cp_8.0.0_bin.zip
After that, run the command below to copy the MySQL properties file to create a default master properties file.
cp jasperreports-server-cp-8.0.0-bin/buildomatic/sample_conf/mysql_master.properties jasperreports-server-cp-8.0.0-bin/buildomatic/default_master.properties
Run the commands below to open the newly created file.
nano jasperreports-server-cp-8.0.0-bin/buildomatic/default_master.properties
Then, edit the highlighted lines to include the database user account created above.
# if linux package managed tomcat instance, set two properties below

CATALINA_HOME = /opt/tomcat
CATALINA_BASE = /opt/tomcat

#database type

dbType=mysql
#database location and connection settings
dbHost=localhost
dbUsername=jasperadmin
dbPassword=type_password_here
Save and exit.
Nest, run the commands below to install JasperReports.
cd jasperreports-server-cp-8.0.0-bin/buildomatic/
./js-install-ce.sh
You should see a successful build at the end of the output file. If not, make sure you follow the steps above correctly.
install-normal-ce:
[echo] Installation successfully completed!

BUILD SUCCESSFUL
Total time: 1 minute 26 seconds
Checking Ant return code: OK
Restart the Tomcat service after all the changes above.
sudo systemctl restart tomcat
Access JasperReports portal
At this point, all is set, and JasperReports is ready. Next, open your web browser and browser to the server’s hostname or IP address, followed by port number 8080 with uri /jasperserver.
http://localhost:8080/jasperserver/
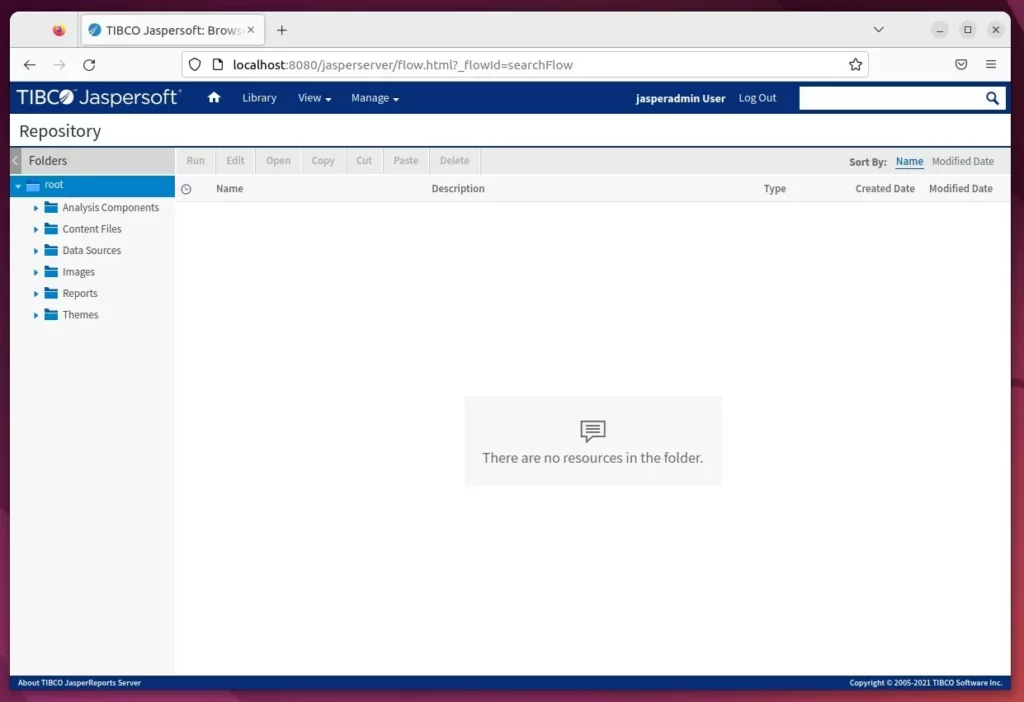
You should see the JasperReports portal.
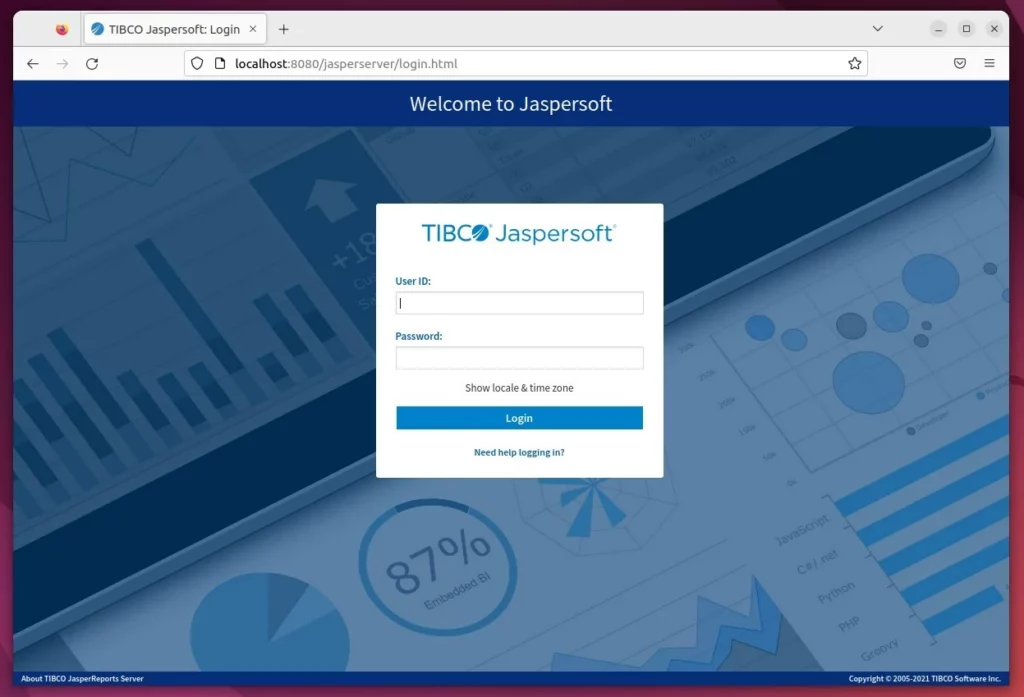
Use the account below to log in:
- Username: jasperadmin
- Password: jasperadmin
Configure JasperReports to use a proxy
The most efficient way to use JasperReports is to set up a reverse proxy server. Below are two ports you can read and learn how to use JasperReports with a reverse proxy.
A good reverse proxy configuration file should look similar to the one below.
upstream tomcat {
    server 127.0.0.1:8080 weight=100 max_fails=5 fail_timeout=5;
    }

server {
    server_name jasper.example.com;

location = / {
    return 301 http://jasper.example.com/jasperserver/;
    }

location / {
    proxy_set_header X-Forwarded-Host $host;
    proxy_set_header X-Forwarded-Server $host;
    proxy_set_header X-Forwarded-For $proxy_add_x_forwarded_for;
    proxy_pass http://tomcat/;
    }
}
That should do it!
Conclusion:
- This article covers the detailed steps to install and utilize the JasperReports server on Ubuntu Linux, an open-source reporting engine entirely written in Java.
- The process includes installing essential components like Java OpenJDK, MariaDB, and the Tomcat server, creating necessary accounts, and configuring the JasperReports files.
- With the JasperReports server set up, users can access the portal with login credentials and enhance its efficiency by configuring a reverse proxy server.
- By following these steps, users can successfully set up and leverage the capabilities of JasperReports for reporting and analytics on their Ubuntu Linux server.
Leave a Reply