How to Find Your Motherboard Details in Windows 11
You can find your motherboard details in Windows 11 using several built-in tools, most notably the System Information utility.
Think of your motherboard as the central hub for your PC. It’s the main circuit board that connects everything, like your CPU, RAM, graphics card, and storage drives.
Knowing your motherboard’s model, such as a specific ASUS ROG STRIX Z790-E GAMING WIFI, is really important. You’ll need this info for hardware upgrades, driver updates, or when you’re troubleshooting compatibility.
Instead of physically inspecting your hardware, Windows 11 offers quick digital methods to retrieve this vital information directly from your operating system.
You can find your motherboard details in Windows 11 by opening System Information and looking for “BaseBoard” information. Alternatively, open Windows Terminal and type ‘wmic baseboard get product,Manufacturer,version,serialnumber’ to see the manufacturer, model, and version.
How to See Motherboard Details in 🪟 Windows 11
Let’s look at two quick ways to find your motherboard information:
Method 1Using the System Information App
- Click the Start button (Windows icon) on the taskbar. Or press the Windows key on your keyboard.
- Type System Information in the search box.
- Click the app when it appears.
- In the System Information window, make sure System Summary is selected on the left side.
- Look for the BaseBoard information on the right side. You will see:
- BaseBoard Manufacturer – The company that made your motherboard
- BaseBoard Product – The model name or number
- BaseBoard Version – The version of your motherboard
You can easily find your motherboard details in Windows 11 using the built-in System Information app, which shows you all the core hardware information about your PC.
Method 2Using Command Prompt or PowerShell
Another quick way to get your motherboard details in Windows 11 is by using the Command Prompt or PowerShell, which lets you pull up specific hardware info with a simple command.
- Right-click the Start button.
- Choose Windows Terminal.
- When the terminal opens, make sure you are in the Command Prompt tab. Click the down arrow next to the plus tab to switch if needed.
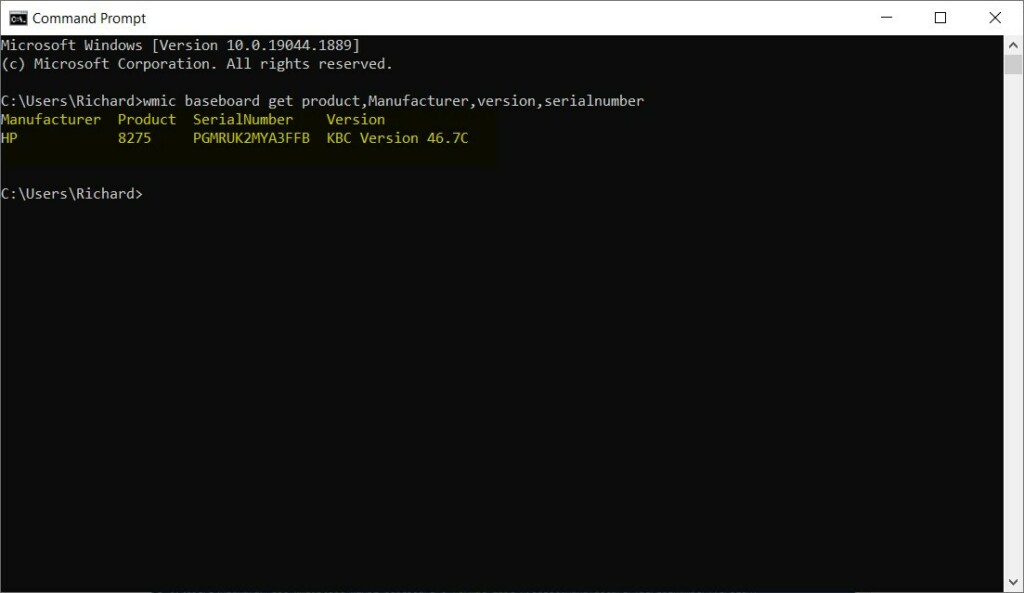
- Type this command and press Enter:
wmic baseboard get product,Manufacturer,version,serialnumber
You will see your motherboard’s manufacturer, model, version, and serial number.
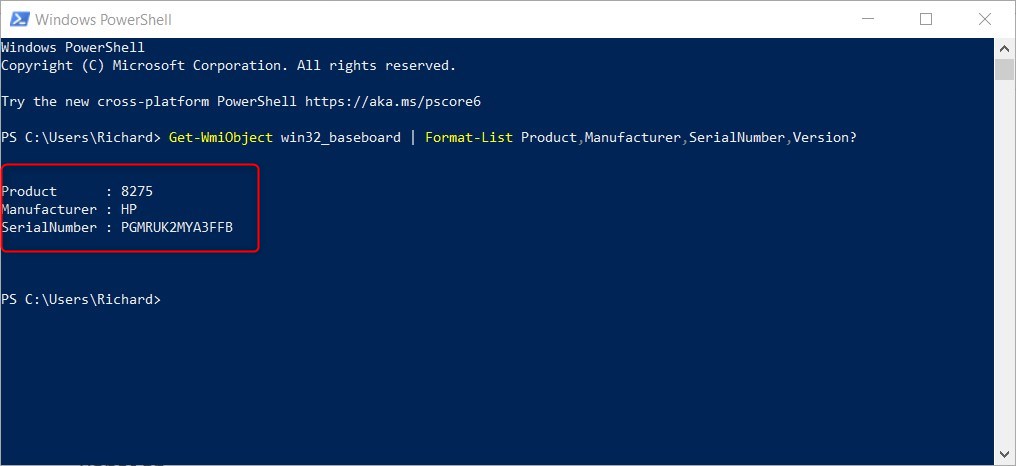
If you prefer PowerShell (another way to enter commands), do this:
- Type this command and press Enter:
Get-WmiObject win32_baseboard | Format-List Product,Manufacturer,SerialNumber,Version
Here is an example of the result:
Summary
Finding your motherboard details in Windows 11 is simple and safe, whether you use the handy System Information app or a quick command in Command Prompt or PowerShell.
How do I find my motherboard specs in 🪟 Windows 11?
Microsoft System Information: Motherboard Basics The easiest way to find out which motherboard you have is via the System Information tool, which ships with Windows by default. Hit the [Windows] + R keys to bring up the run command and type 'msinfo32' before hitting the OK button.
Was this guide helpful?

About the Author
Richard
Tech Writer, IT Professional
Richard, a writer for Geek Rewind, is a tech enthusiast who loves breaking down complex IT topics into simple, easy-to-understand ideas. With years of hands-on experience in system administration and enterprise IT operations, he’s developed a knack for offering practical tips and solutions. Richard aims to make technology more accessible and actionable. He's deeply committed to the Geek Rewind community, always ready to answer questions and engage in discussions.


No comments yet — be the first to share your thoughts!