
This article explains how to enable Check TPM Version on Windows 11 (Trusted Platform Module) so that your PC is compatible with installing and running Windows 11a and can download and install all Windows updates.
Microsoft has some basic requirements for installing or upgrading to Windows 11. One of these requirements is to have TPM 2.0 enabled in your Access UEFI BIOS in Windows 11 – Easy Steps system.
Suppose your system’s motherboard supports TPM 2.0, but it’s not enabled. In that case, you need to go through the UEFI/BIOS setup and enable it so that you can install or upgrade to Windows 11 and continue receiving updates and support from Microsoft.
TPM is a security technology that increases the system’s security against software vulnerabilities. TPM allows for the use of these Windows features, including BitLocker Drive Encryption, Data Execution Prevention, Windows Hello, Secure Boot, Measured Boot, etc.
The Check TPM Version on Windows 11 Easily 2.0 chip is installed on the system’s motherboard, which provides higher security standards and better reliability than the original TPM version. It is also compatible with CPUs that support version 2.0.
With TPM 2.0 enabled, passwords, certificates, or encryption keys stored on the chip will prevent access to this sensitive data from hackers’ malicious programs, and that’s why it’s good to have it enabled.
How to verify if a PC supports TPM 2.0
As mentioned above, one of Windows 11’s requirements is to have TPM 2.0 enabled and CPUs that support it. The easiest way to determine if your PC supports TPM 2.0 is to run the Windows 11 PC Health Check app.
The app will tell you if your PC is compatible and has TPM 2.0 enabled.
If you have an AMD Ryzen 2000 CPU or newer or an Intel 8000-series CPU or newer, you almost certainly have a processor supporting the TMP 2.0 module. If your CPU supports it, your motherboard will most certainly have it.
If unsure of your PC TPM status, follow the steps below.
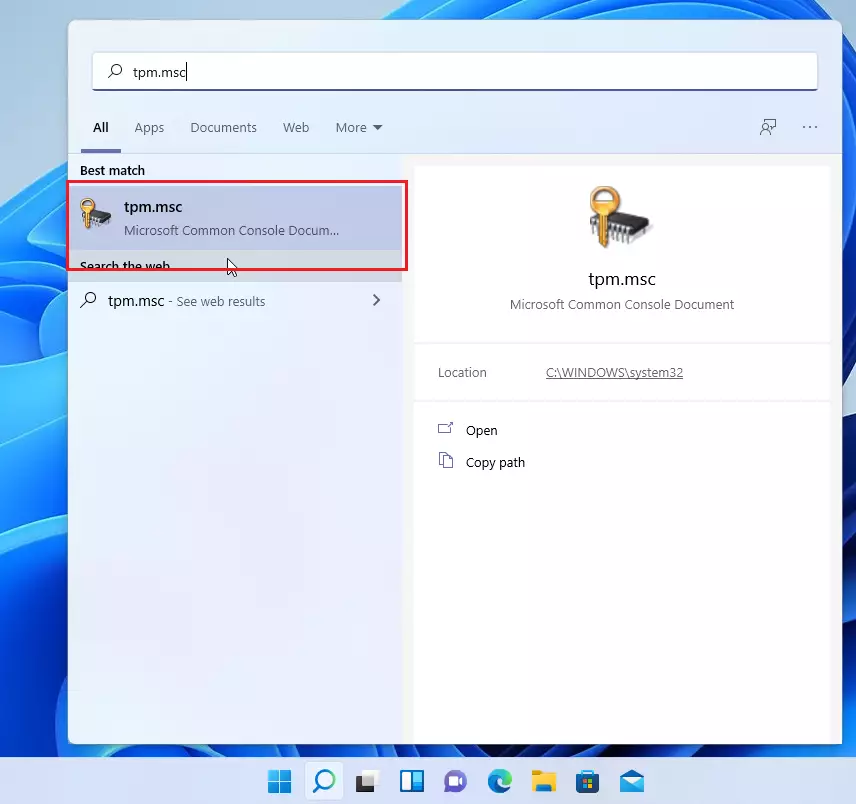
Click the Start button, then search for and select tpm.msc under Best Match, as shown in the image below.
Click the app to open. Once opened, the Status section will display that The TPM is ready for use. For Windows 11, the version under TPM Manufacturer information needs to be 2.0.
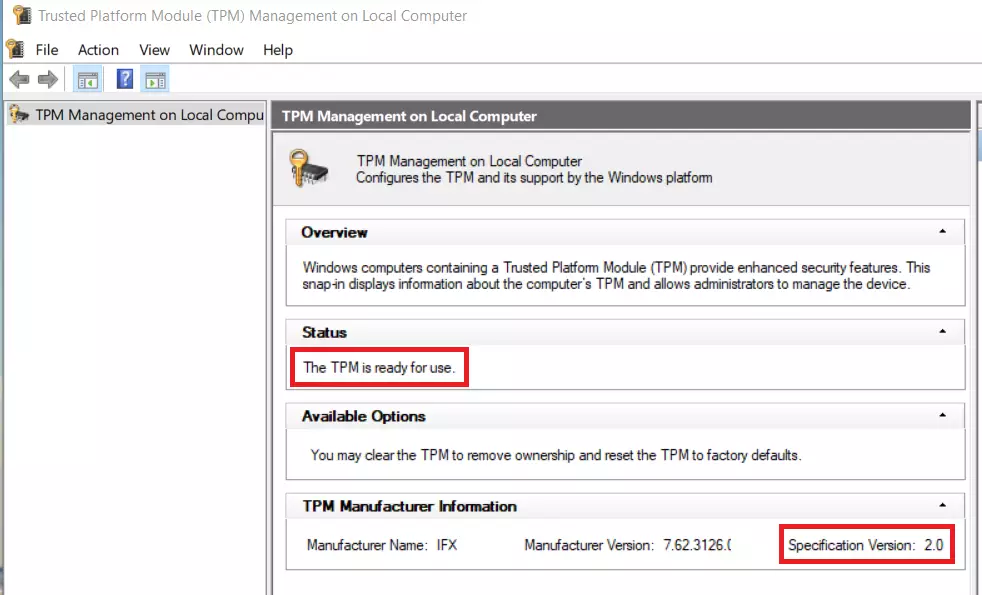
This is how to find out PC support for TPM 2.0.
How to enable TPM 2.0
If you followed the steps above and discovered TPM 2.0 isn’t enabled, then run the steps below to enable it for your PC.
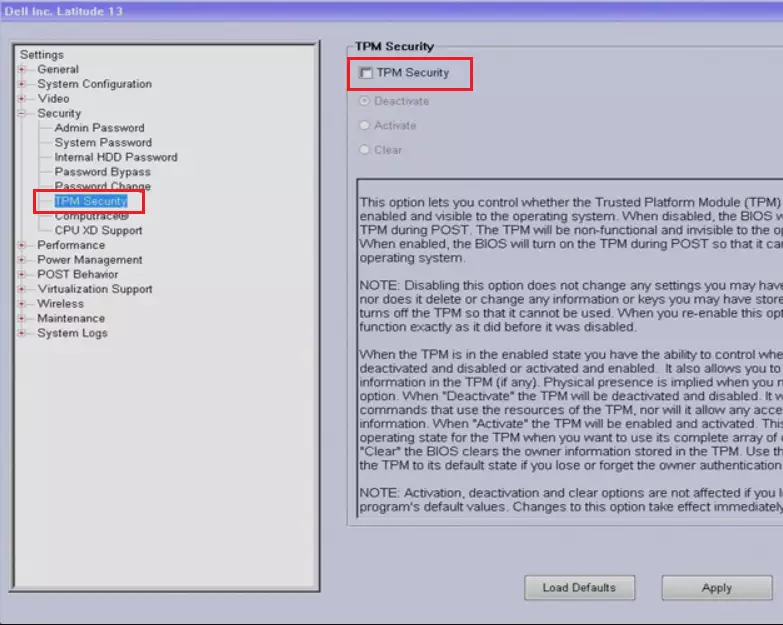
TPM needs to be enabled in the system’s motherboard. To do this, reboot or start your PC, and Access UEFI BIOS in Windows 11 using your motherboard key combination to enter its UEFI/BIOS setup.
TPM settings should be located in most systems’ Security or Advanced tab. Once you find the setting, toggle to enable, save your changes, and exit.
With TPM 2.0 enabled, you can continue installing or upgrading to Windows 11 if all other requirements are met. Alternatively, press Windows key + I to open the Settings app, then select Update & Security > Windows Security > Device Security. Under the Security processor, confirm its Specification version is 2.0.
That should do it!
Conclusion:
- Enabling TPM 2.0 ensures compatibility with Windows 11 installation and updates.
- TPM 2.0 enhances system security against potential threats and vulnerabilities.
- Verification of TPM 2.0 support can easily be done using the Windows 11 PC Health Check app or through the TPM management tool.
- Accessing the UEFI/BIOS settings allows users to enable TPM 2.0 if it is not already activated.
- Once enabled, users can take full advantage of Windows 11 features, providing a more secure computing environment.


Leave a Reply