This article explains how to clear and reset the Trusted Platform Module (TPM) in Windows 11.
TPM technology is designed to provide hardware-based, security-related functions. A TPM chip is a secure cryptoprocessor that helps you generate, store, and limit the use of cryptographic keys.
If your device has a TPM chip and isn’t working properly, you may need to troubleshoot and fix the problem.
The Windows Security app allows users to clear and reset their device TPM module to the default settings. When you click the Clear TPM button, your device will restart and complete the actions.
It’s always recommended to back up your data before clearing and resetting your device’s TPM module.
Reset TPM in the Windows Security app
As mentioned above, Windows lets you clear and reset your device’s TPM module via the Windows Security app. Howerver, clearing the TPM will remove the PIN for users on your device.
Below is how to do that.
First, open the Windows Security app.
You can do that by clicking on the Start menu and searching for “Windows Security.” Then, under Best match, click on the Windows Security app.

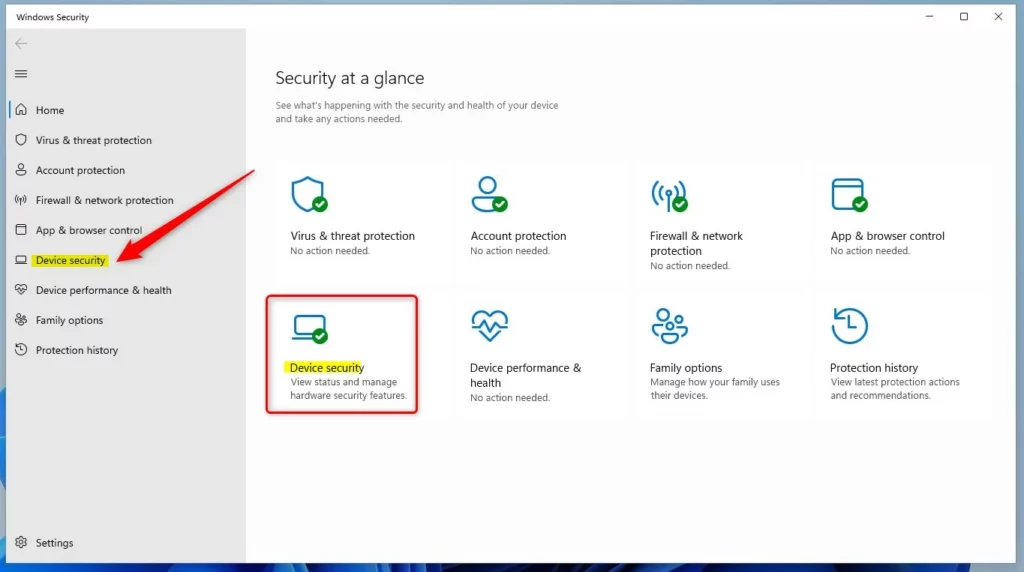
In the Windows Security app, on the “Security at a glance page,” click the Device security link on the left or the icon on the screen.
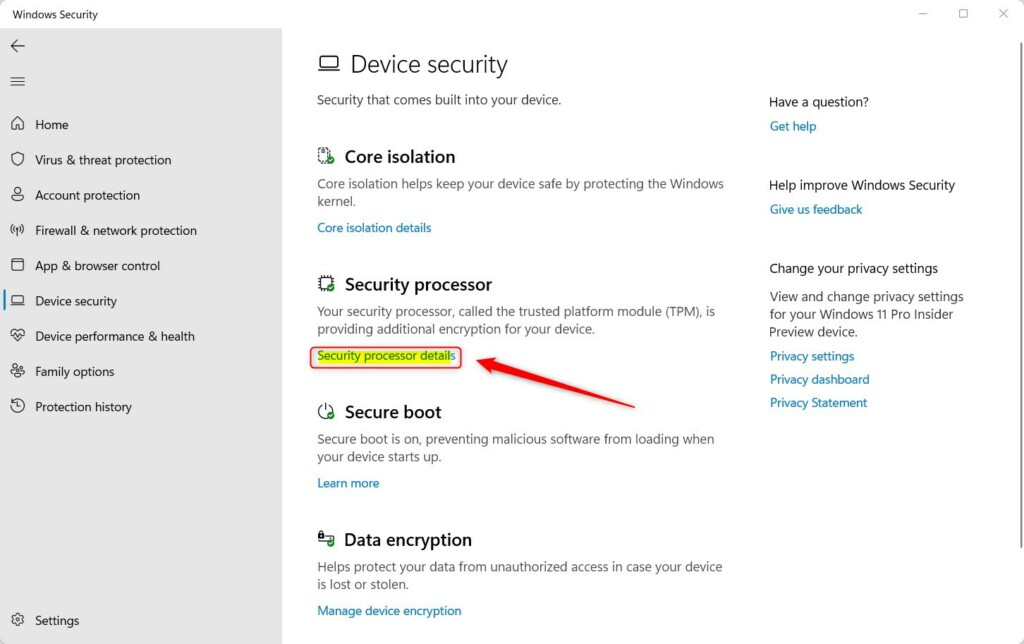
Next, click the Security processor details link under the Security processor.
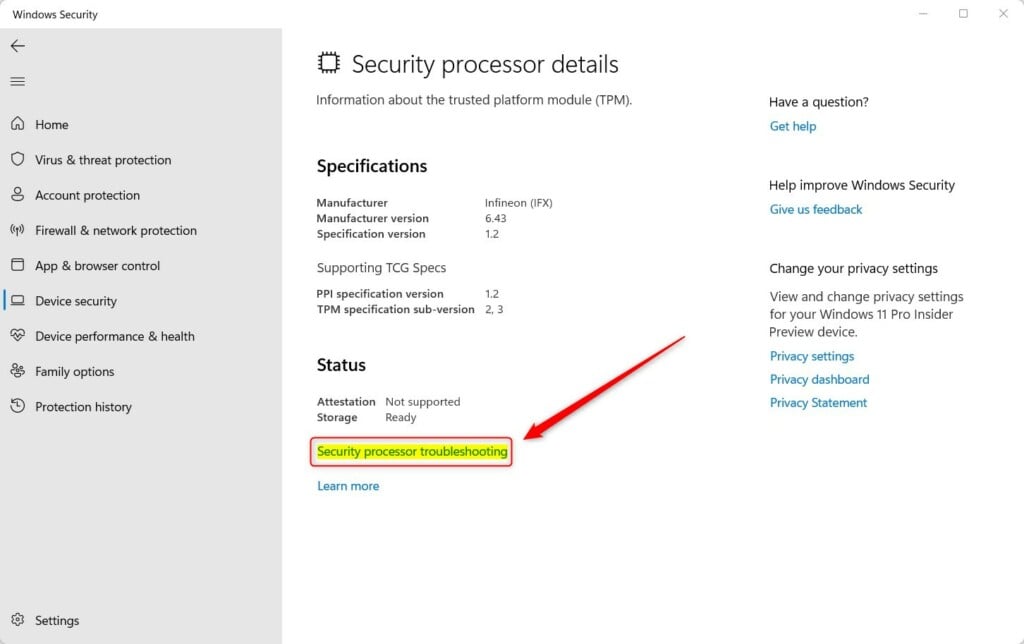
On the Security processor details page, select the Security processor troubleshooting link to open the troubleshooter page.
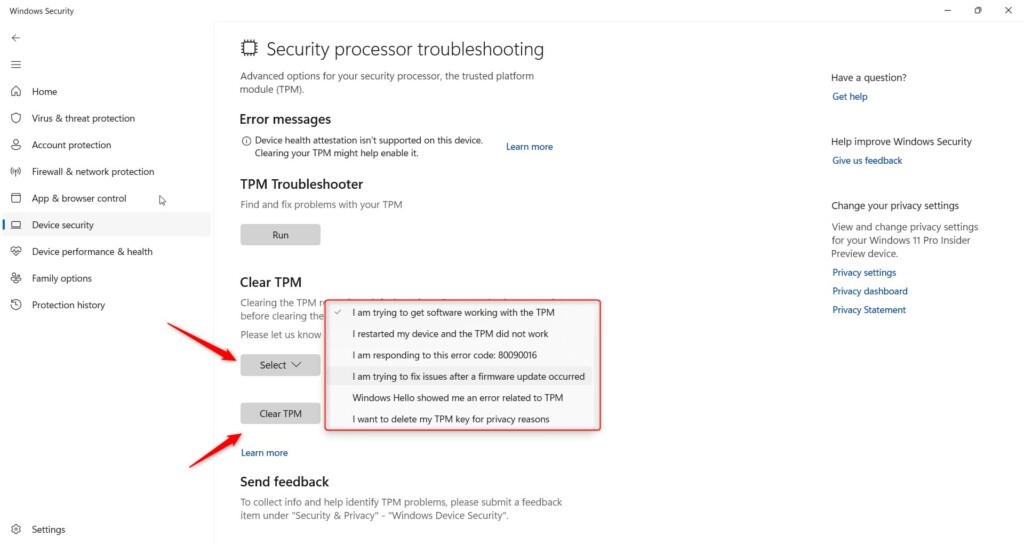
On the page, you will find three sections: “Error messages,” “TPM Troubleshooter,” and “Clear TPM.”
Under the Clear TPM section, select why you want to clear and reset your device’s TPM. Next, click the Clear TPM button to clear and reset your device’s TPM module.
Use PowerShell
Users can also use the Windows PowerShell app to clear their device’s TPM settings and reset the defaults.
First, open Windows PowerShell as an administrator.
Then run the command below.
Clear-TPM
Use TPM Management Console
Yet another way to reset or clear your device’s TPM settings is to use the TPM management console.
To access the console, click the Start menu and search for “Trusted Platform Module (TPM) Management (tpm.msc)”.
When the TPM console app opens, click the Clear TPM link at the top right corner, as highlighted below.
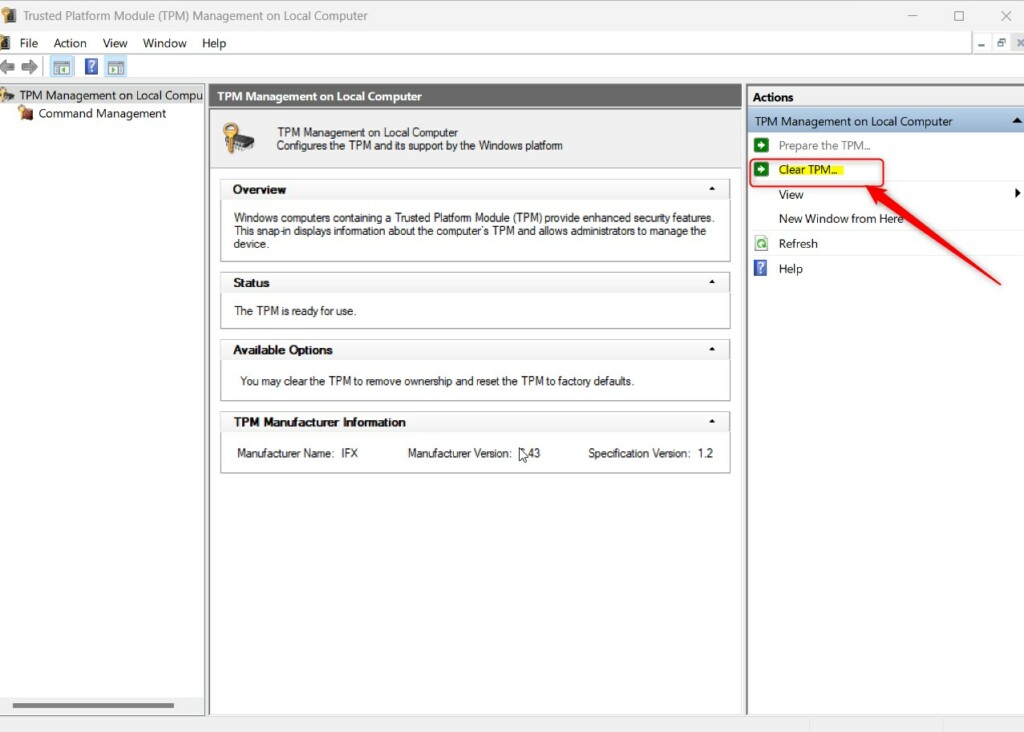
Before your computer restarts, UEFI might prompt you to press a button to confirm that you wish to clear the TPM. After the device restarts, Windows should find and reassociate it.
Below are some messages you may see when your device’s TPM module isn’t working properly.
- A firmware update is needed for your security processor (TPM).
- TPM is disabled and requires attention.
- TPM storage is not available. Please clear your TPM.
- Device health attestation isn’t available. Please clear your TPM.
- Device health attestation isn’t supported on this device.
- Your TPM isn’t compatible with your firmware and may not work properly.
- TPM measured boot log is missing. Try restarting your device.
- There is a problem with your TPM. Try restarting your device.
Make sure to back up your data before you clear the TPM.
That should do it!
Reference:
Security Processor troubleshooting
Conclusion:
- Clearing and resetting your device’s TPM in Windows 11 can help troubleshoot issues with the Trusted Platform Module.
- Windows provides multiple methods to clear and reset the TPM, including through the Windows Security app, Windows PowerShell, and the TPM Management Console.
- It’s important to back up your data before proceeding with the TPM clearing process to prevent potential data loss.
- If you encounter error messages related to TPM issues, such as firmware updates, TPM compatibility, or device health attestation, clearing the TPM may resolve these problems.
- For further details and potential updates, refer to the Microsoft support page on Security Processor Troubleshooting.

Leave a Reply