

This article describes steps to turn on or off “Always on top” to keep the Task Manager app on top of other windows in Windows 11.
The Task Manager has been part of Windows since early Windows NT 4.0 / 2000, allowing users to view tasks (processes), start-up programs, services, and the computer’s overall performance.
With the release of Windows 11 build 22557, Microsoft has updated the design of Task Manager to match the new Windows 11 design principles, including bringing a dark theme and automatically matching the system-wide theme.
Windows has always had a setting to keep the Task Manager app on top of other windows. This is known as “Always on top.”
Here’s how to turn it on or off in Windows 11.
Keep the Task Manager app always on top of other windows in Windows 11
As described above, Windows has always had a setting to keep the Task Manager app on top of other windows. This is known as “Always on top.”
Here’s how to turn it on.
First, open the Task Manager app. You can also use the keyboard shortcut ( Ctrl + Shift + Esc ) to launch the Task Manager app.
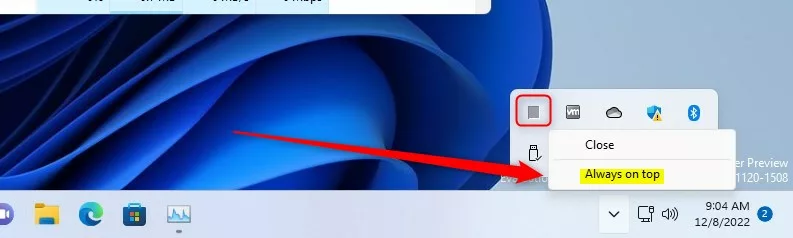
While the Task Manager app is opened, right-click the app’s icon on the Taskbar (or Taskbar overflow), then select “Alway on top.”
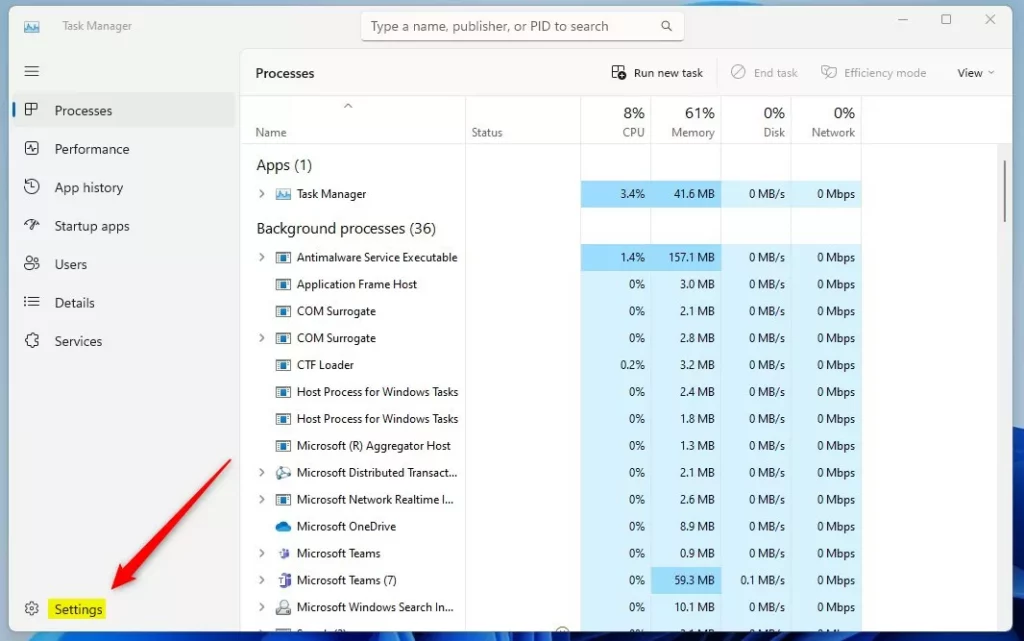
Alternatively, select Settings at the bottom left of the Task Manager app.
On the Settings pane, under Windows management, check or uncheck the box next to “Always on top” to enable or disable the Task Manager app on top of other windows.
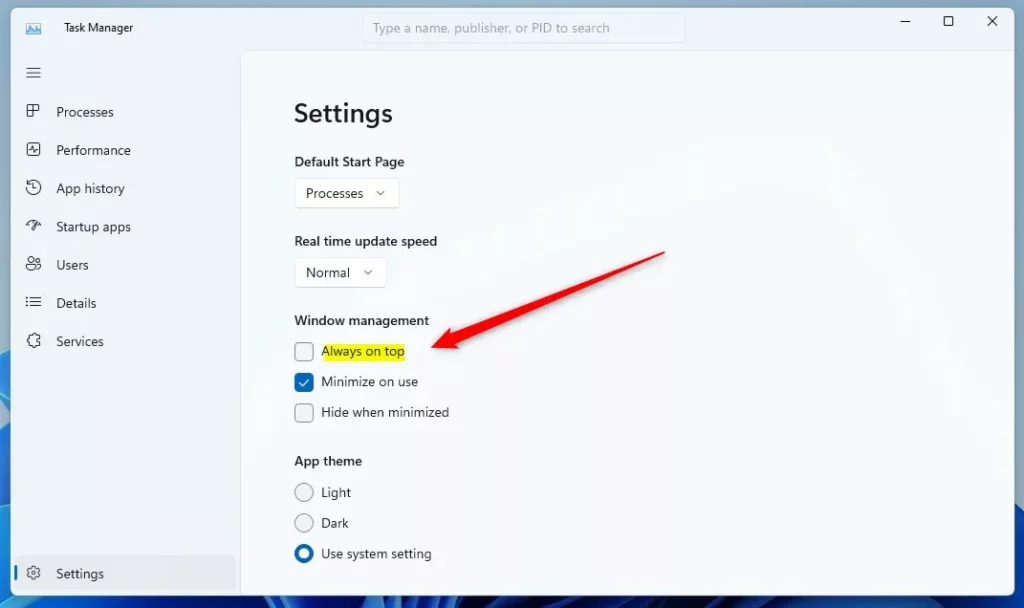
You can also press the Alt + A keys to toggle check or uncheck the “Always on top” box in the Settings app.
Reference:
That should do it!
Conclusion:
- This article outlines the steps to enable or disable the “Always on top” feature for the Task Manager app in Windows 11.
- The provided instructions can help users optimize their Task Manager experience while working with multiple windows.
- We encourage readers to provide feedback or additional insights through the comment section for further interaction and content improvement.

Leave a Reply Cancel reply