
This tutorial shows you how to turn real-time protection on or off for Microsoft Defender Antivirus in Windows 10 and Windows 11.
What is Microsoft Defender Antivirus?
Microsoft Defender Antivirus is antivirus software built into Windows 10 and Windows 11. It helps protect your computer from viruses, malware, and other threats.
What is Real-time Protection?
Real-time protection means your computer is always scanning files and watching how programs behave. It looks for signs of malware and unwanted software. When real-time protection is on, Microsoft Defender stops malware before it can install or run on your device. It asks you what to do when it finds a threat.
Why turn it off? If you turn off real-time protection, files you open or download won’t be checked for threats. This is risky and not recommended for most users.
Important: You need admin rights to turn real-time protection on or off. Also, Controlled Folder Access requires real-time protection to be on.
Note: If you have another antivirus program installed, Microsoft Defender will turn itself off automatically. Real-time protection will stay off even if you enable periodic scanning while another antivirus is active.
Option One: Use Windows Security
Steps:
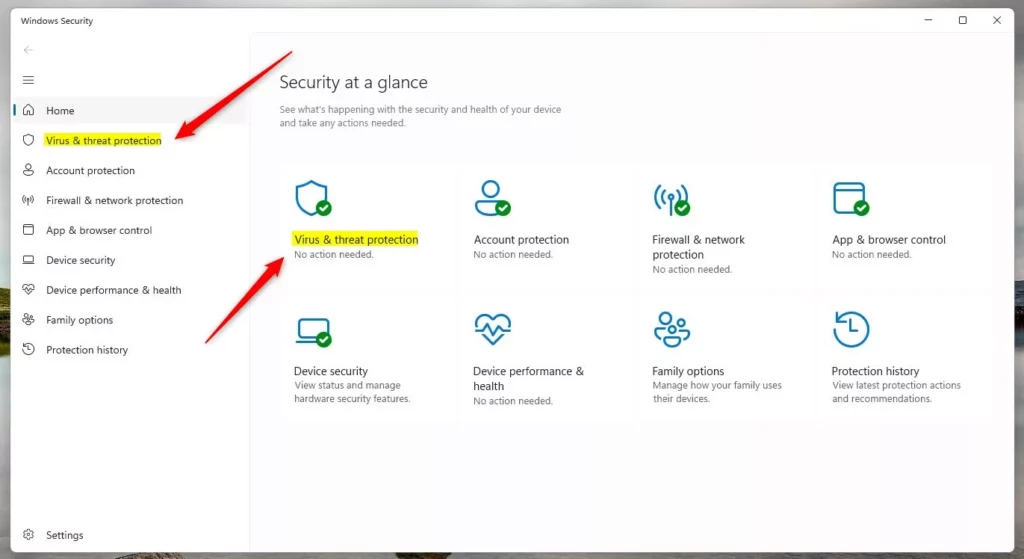
- Open Windows Security.
- Click Virus & threat protection.
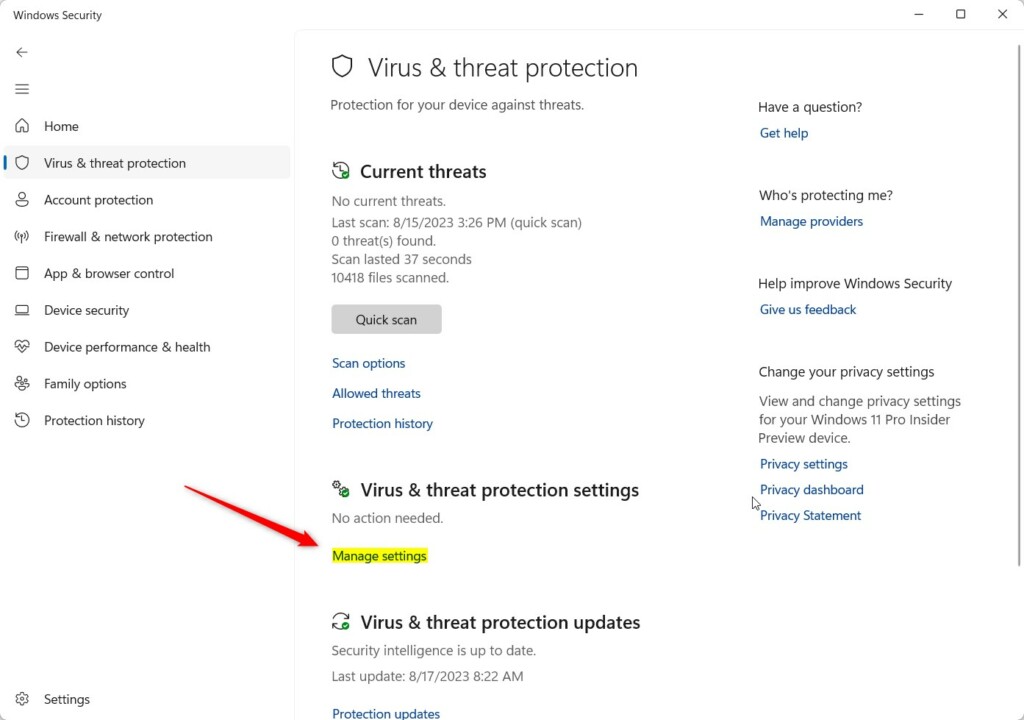
- Click the Manage settings link under Virus & threat protection settings.
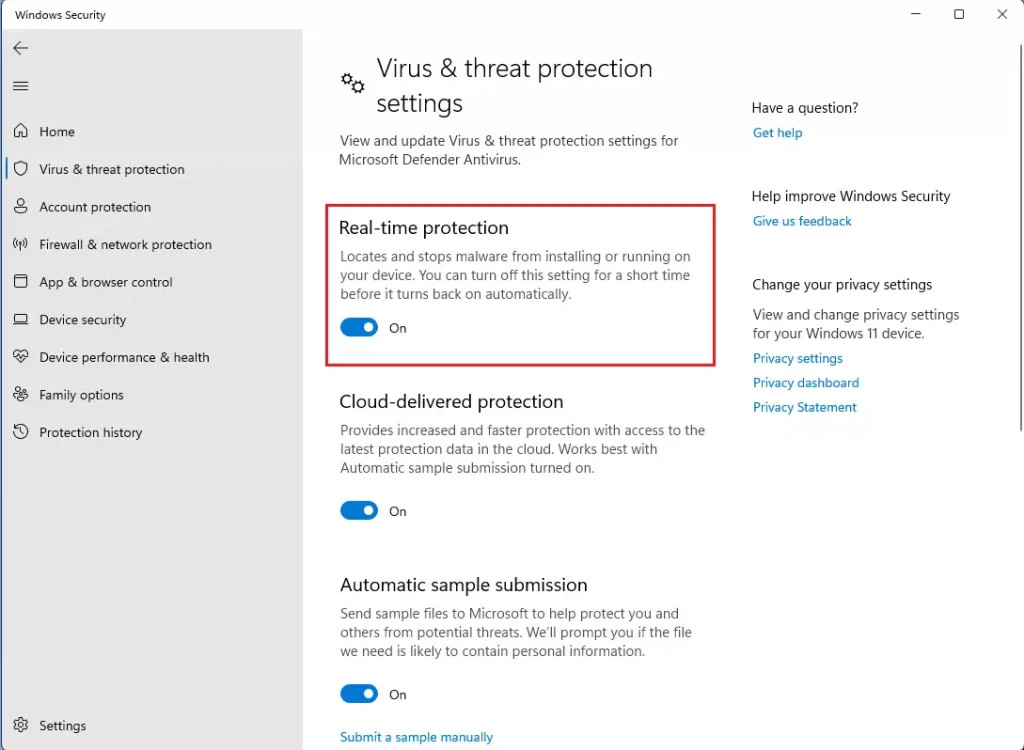
- Turn Real-time protection On (default) or Off based on what you want.
- 🔒 Admin required: If prompted by UAC, click Yes to approve.
- Close Windows Security when done.
Note: If you turn off real-time protection, it will turn back on automatically after a short time. Turn off Tamper Protection first if you want to keep it off.
Option Two: Use Command Line
Before you start: This option requires you to turn off Tamper Protection first. After you turn on real-time protection with this method, you can turn Tamper Protection back on if you want.
Steps:
- 🔒 Admin required: Open Windows Terminal as Administrator. Choose either Windows PowerShell or Command Prompt.
- Copy and paste one of the commands below and press Enter.
- Close Windows Terminal when done.
To Turn On Real-time Protection:
Set-MpPreference -DisableRealtimeMonitoring 0
OR
Set-MpPreference -DisableRealtimeMonitoring $false
To Turn Off Real-time Protection:
Set-MpPreference -DisableRealtimeMonitoring 1
OR
Set-MpPreference -DisableRealtimeMonitoring $true
Option Three: Use Local Group Policy Editor
Before you start: This option requires you to turn off Tamper Protection first. This method only works on Windows 11 Pro, Enterprise, and Education editions. Use Option Four for other editions.
Steps:
- 🔒 Admin required: Open the Local Group Policy Editor by typing
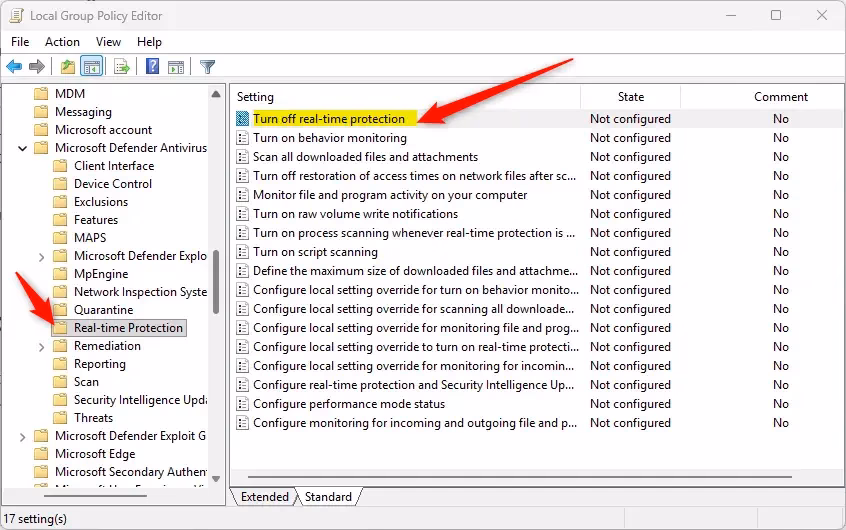
gpedit.mscin the search box. - Navigate to this path on the left side:
Computer Configuration > Administrative Templates > Windows Components > Microsoft Defender Antivirus > Real-time Protection - On the right side, double-click the Turn off real-time protection policy.
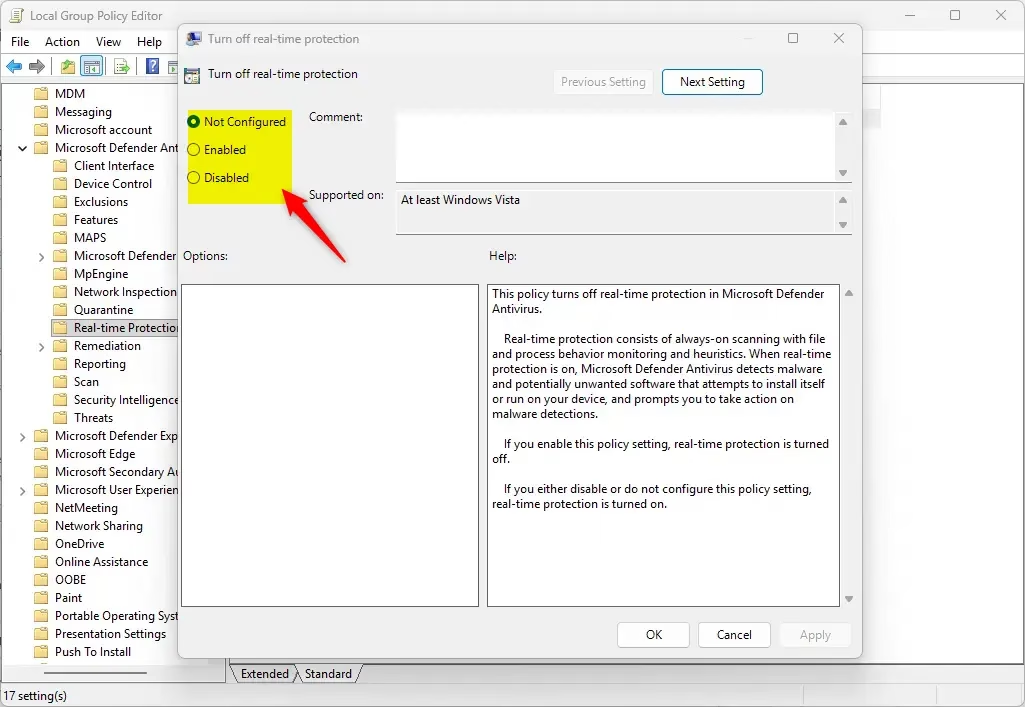
To Enable Real-time Protection:
- Select the dot next to Not Configured.
- Click OK.
- Close the Local Group Policy Editor.
To Disable Real-time Protection:
- Select the dot next to Enabled.
- Click OK.
- Close the Local Group Policy Editor.
Option Four: Edit the Registry
Before you start: This option requires you to turn off Tamper Protection first. After you enable real-time protection this way, you can turn Tamper Protection back on if you want.
Steps:
- 🔒 Admin required: Open the Terminal app.
- Copy and paste the command below and press Enter.
To Enable Real-time Protection:
reg delete "HKLM\SOFTWARE\Policies\Microsoft\Windows Defender\Real-Time Protection" /v DisableRealtimeMonitoring /f
To Disable Real-time Protection:
reg add "HKLM\SOFTWARE\Policies\Microsoft\Windows Defender\Real-Time Protection" /v DisableRealtimeMonitoring /t REG_DWORD /d 1 /f
Summary
Real-time protection is an important feature that keeps your computer safe by constantly scanning for threats. You have four ways to turn it on or off: using Windows Security (easiest), using Command Prompt, using Group Policy Editor (Pro and Enterprise only), or editing the Registry. All methods require admin rights. Remember that turning off real-time protection leaves your computer at risk, so only do this if you have a good reason. If you use another antivirus program, Microsoft Defender will turn off automatically.
Leave a Reply