How to Enable Nearby Sharing in Windows 11
This guide explains how to turn the Nearby sharing feature on or off in Windows 11.
Why Enable Nearby Sharing in Windows 11?
Nearby Sharing is a wireless feature that lets you send files, photos, and links to nearby computers without using cables, USB drives, or email. It uses Bluetooth and Wi-Fi Direct to create a secure, direct connection between devices. When you are done, you have successfully moved your data without relying on cloud storage or internet bandwidth.
System Requirements and Setup
Before you begin, ensure your PC meets these requirements:
- Both devices must run Windows 10 or Windows 11.
- Bluetooth must be enabled on both devices.
- Both devices must be on the same network or have Wi-Fi turned on.
- Your PC must support Bluetooth Low Energy (LE).
How to check for Bluetooth LE: Open Device Manager, expand Bluetooth, right-click your adapter, and select Properties. Under the Details tab, look for ‘Bluetooth radio supports Low Energy Central Role’. If it says ‘True’, you are ready.
How to Enable Nearby Sharing in Windows 11
Windows 11 makes it easy to manage wireless file sharing through the Settings menu. Follow these steps:
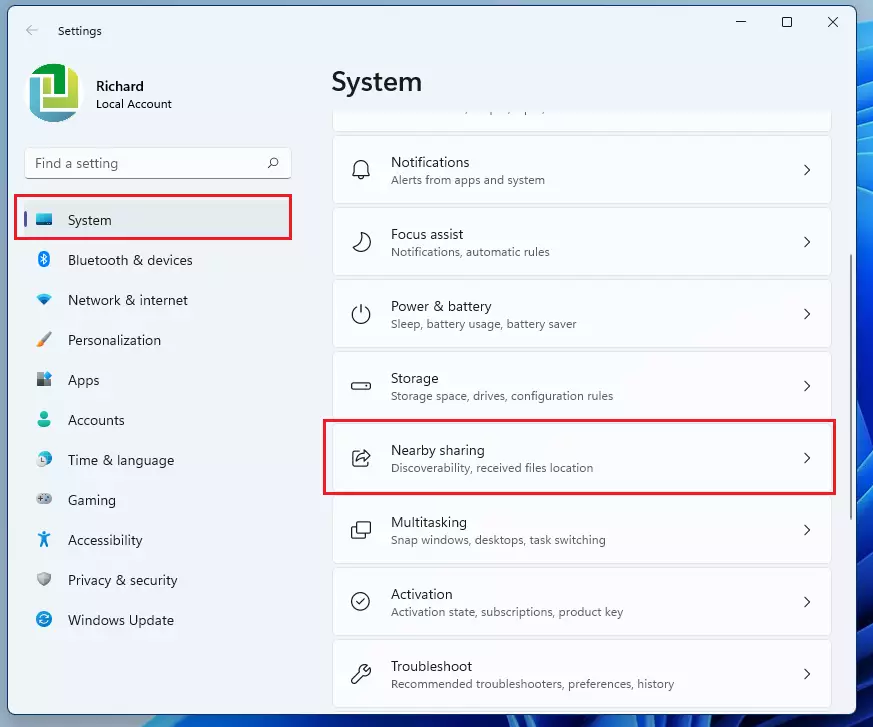
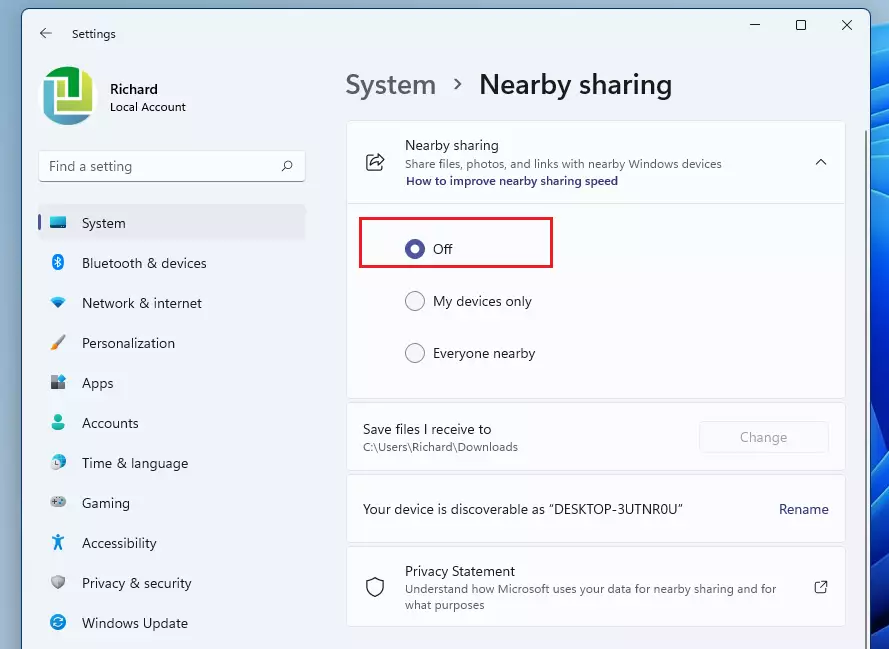
1. Press Windows key + I to open Settings.
2. Select System from the left sidebar.
3. Click on Nearby sharing.

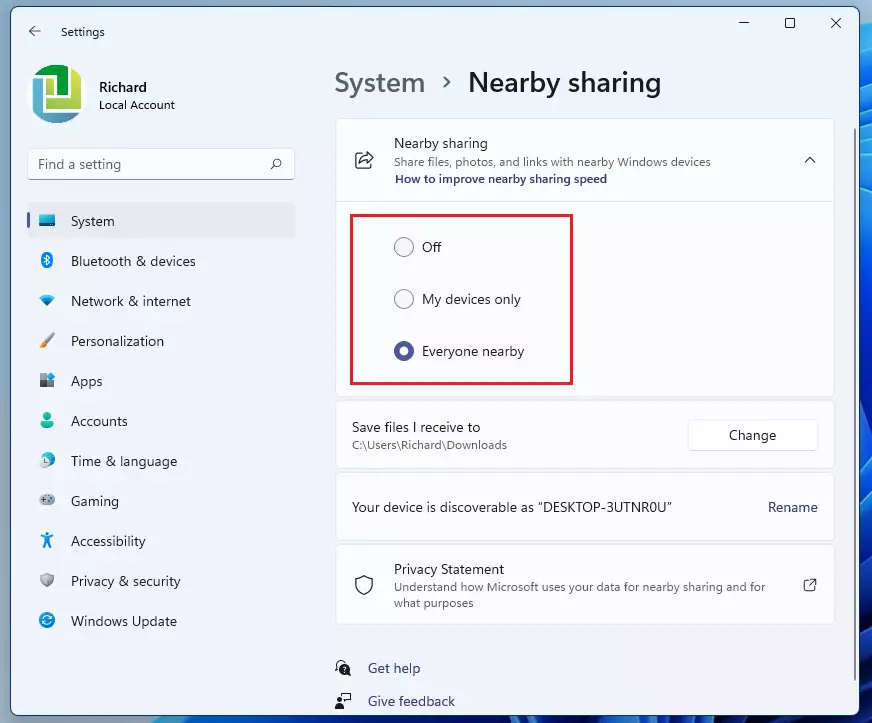
4. Choose between Off, My devices only, or Everyone nearby.
5. Your changes are saved automatically.
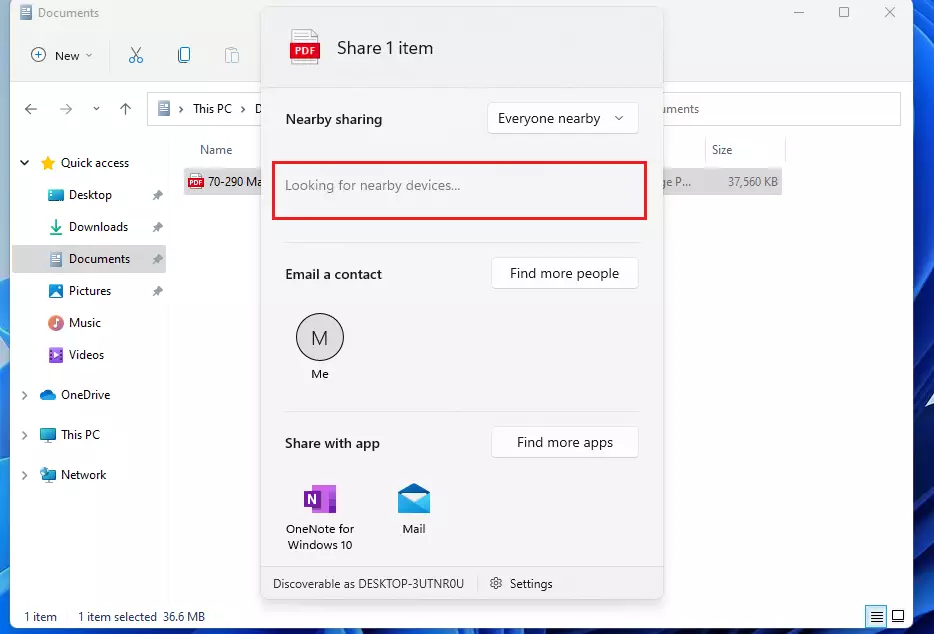
How to Share Files via File Explorer
Once enabled, you can share files directly from your folders.
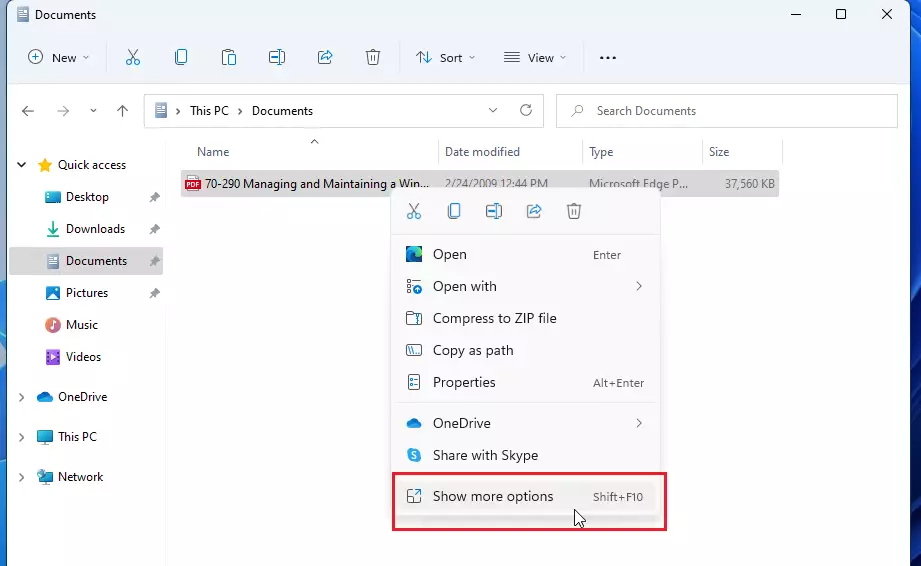
1. Open File Explorer and locate your file.
2. Right-click the file and select the Share icon.
3. A window will appear showing nearby devices. Select the target computer.
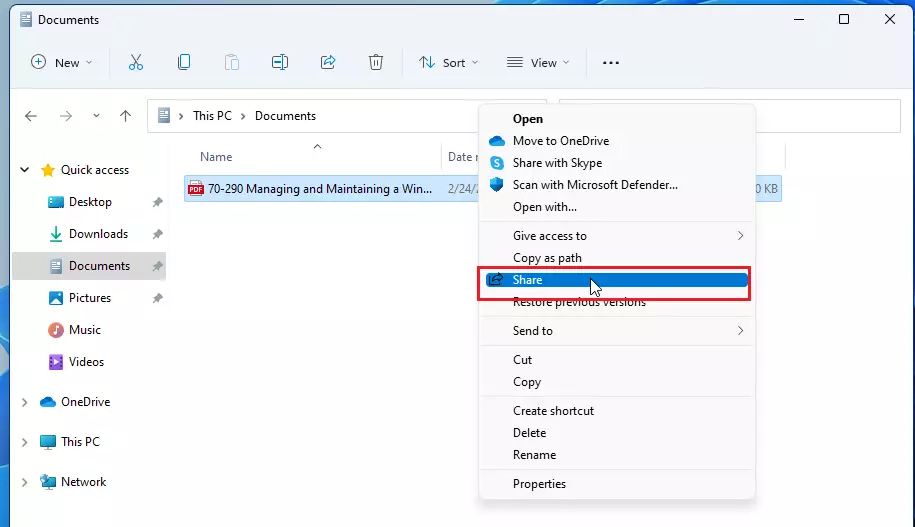
4. The receiving device will get a notification. Click Save to complete the transfer.
Advanced Sharing Options and Troubleshooting
You can change where your files go by default. In Settings > System > Nearby sharing, look for the Save files received to option. Click Change to select a new folder, such as a specific path like C:\Users\Public\Downloads.
Why is my transfer speed slow? Nearby Sharing uses Bluetooth for discovery and Wi-Fi for the actual transfer. If your Wi-Fi signal is weak or you are on a congested network, speeds will drop. Ensure both devices are close to the router.
Why can’t I see my other device? Ensure both PCs are set to Everyone nearby if they are not signed into the same Microsoft account. Also, check that your Network Profile is set to Private rather than Public in Settings > Network & internet > Wi-Fi > Hardware properties.
How to turn off Nearby Sharing
To disable the feature, navigate back to Settings > System > Nearby sharing and toggle the setting to Off.
Summary
Nearby Sharing is a powerful tool for Windows 11 users to move files wirelessly. By ensuring your Bluetooth and Wi-Fi are active and your network profile is set to Private, you can avoid common discovery issues. For further technical assistance, visit the official Microsoft support page.
Does Nearby Sharing work without an internet connection?
Yes, Nearby Sharing does not require an active internet connection. It uses Wi-Fi Direct and Bluetooth to create a local, peer-to-peer connection between your devices. As long as both computers have their wireless radios turned on and are within range, you can transfer files offline successfully.
Was this guide helpful?


[…] Nearby Sharing is a feature in Windows that allows you to quickly and easily share files and links with nearby devices using Bluetooth or Wi-Fi. It’s a convenient way to share documents, photos, and other files with friends, family, or nearby colleagues. […]
[…] experiences enable Nearby sharing and Sharing across devices in […]
[…] Everyone nearby – This will give everyone nearby permission to use the Share across devices feature to share with you. […]
[…] Nearby Sharing is a feature in Windows that lets you quickly and easily share files and links with nearby devices using Bluetooth or Wi-Fi. It’s a convenient way to share documents, photos, and other files with friends, family, or nearby colleagues. […]
[…] Night light, Wi-Fi, Bluetooth, Airplane mode, Accessibility, Battery saver, Mobile hotspot, Nearby sharing, Cast, and […]
[…] You can share files using Windows Share in Windows 11 with an app, an email contact, a mobile device, or a nearby device. […]
[…] Nearby sharing allows users to share documents, photos, and other content with devices using Bluetooth or Wi-Fi. […]