

This article outlines the steps to safely eject external storage devices from Windows 11.
Unplugging an external storage device from Windows may seem simple, but Microsoft advises following specific steps to prevent data loss from the device.
Windows 11, like any modern operating system, supports the use of external devices such as USB flash drives, CDs/DVDs, and other removable storage. However, it is essential to follow best practices by safely removing or ejecting these devices before unplugging them.
Failing to do so can lead to data corruption or loss, making it difficult or impossible to recover your files.
How to safely remove external drives in Windows 11
To eject removable devices from Windows, locate the Safely Remove Hardware and Eject Media icon on the taskbar or corner overflow, as highlighted below.
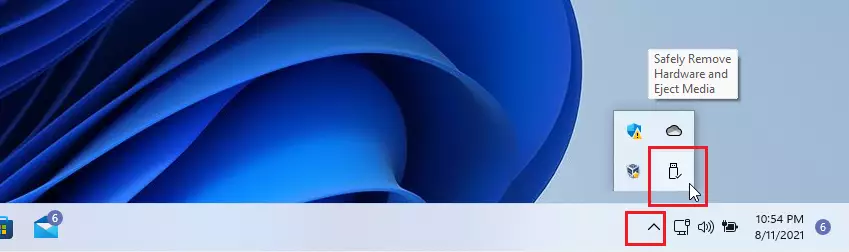
When you click the icon, it should list all the removable devices attached to your Windows computer.
Then click the Eject device name. The device name should appear with Eject.
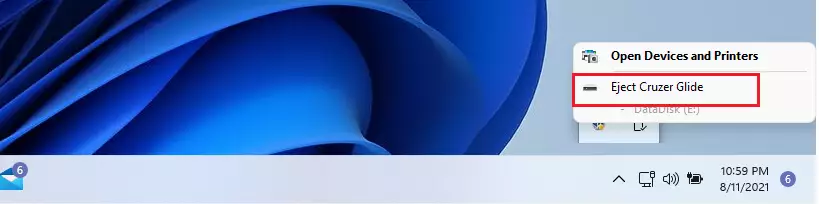
When you click Eject on the device name, Windows will message that the device is Safe To Remove Hardware.
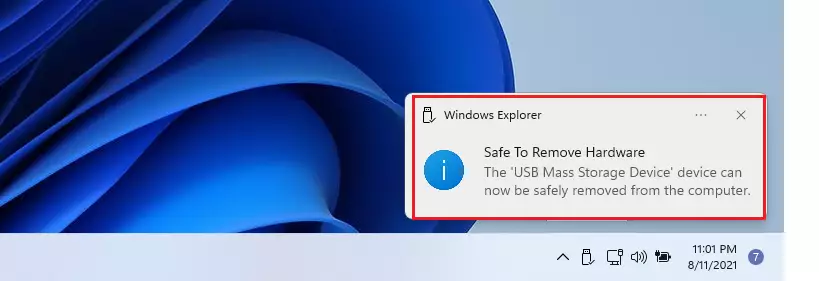
You can then safely unplug the device from your computer without losing or corrupting its data.
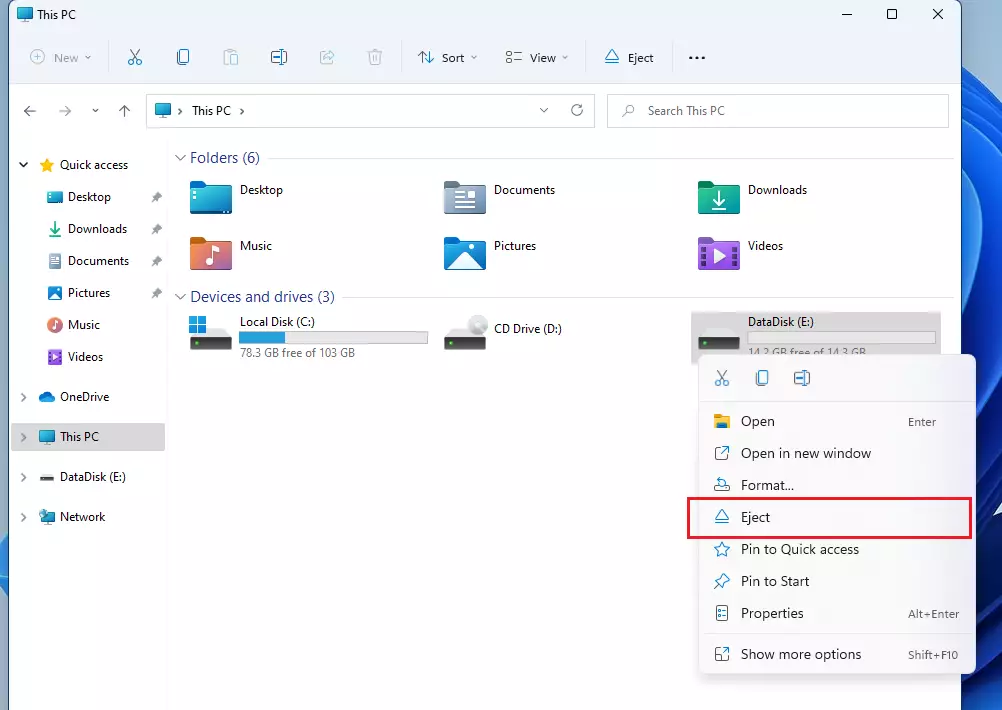
You can also eject removable devices from File Explorer. Locate the device in File Explorer, then right-click it and select Eject, as highlighted below.
When will the message be displayed that the device can safely be removed from your computer?
If any files on the device are open and used by an application, you cannot safely remove the device. You will be prompted with a window telling you the disk or volume is busy.
To safely remove or eject the device, you need to close all files on it or stop the application that is accessing the drive. Then, click the eject icon. Alternatively, you can right-click the device’s name in File Explorer and select “Eject.”
That should do it!
Conclusion:
- Safely ejecting external storage devices in Windows 11 prevents data corruption and loss.
- Utilizing the Safely Remove Hardware and Eject Media icon or File Explorer ensures a secure disconnection.
- Always check for open files or applications using the external device before ejecting.
- Following these steps maintains your data’s integrity and your applications’ performance.
- Remember that a proper eject procedure is essential for all removable devices, including USB drives and optical discs.


Leave a Reply