
This article describes steps to display or hide the Language Bar in Windows 11 when multiple languages and keyboard layouts are available.
Windows allows you to install a preferred language for features like Settings and File Explorer. A default keyboard layout for the language will also be installed with your preferred language.
Windows will add a language bar on the right of the taskbar and the sign-in screen by default when you have more than one language and keyboard layout installed.
Users can then easily switch between languages and keyboard layouts using the language bar.
Below is how to add or remove the language bar in Windows 11.
How to add or remove language bar in Windows 11
As described above, when you have more than one language and keyboard layout installed, Windows will add a language bar on the right of the taskbar and the sign-in screen by default.
Below is how to display or hide the language bar in Windows 11.
Windows 11 has a centralized location for the majority of its settings. Everything can be done, from system configurations to creating new users and updating Windows from its System Settings pane.
To get to System Settings, you can use the Windows key + I shortcut or click on Start menu ==> Settings as shown in the image below:

Alternatively, you can use the search box on the taskbar and search for Settings. Then select to open it.
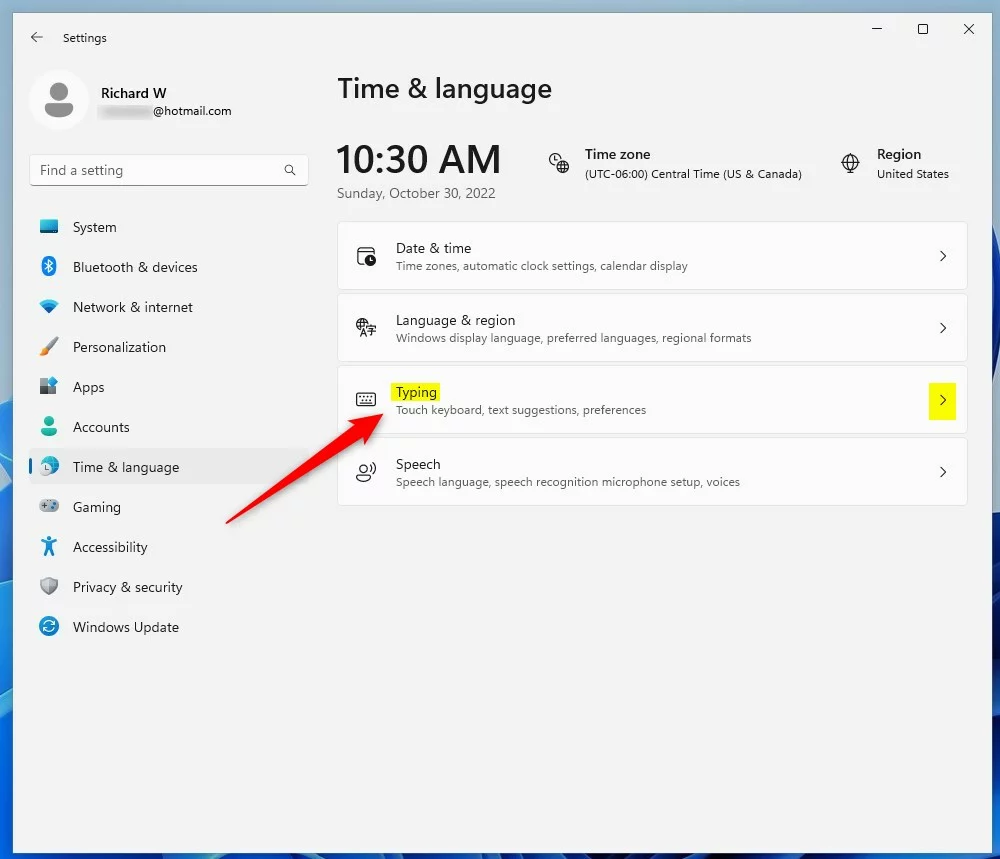
Windows Settings pane should look similar to the image below. Within the Windows Settings app, click Time & language on the left.
On the right, select the Typing tile to expand.
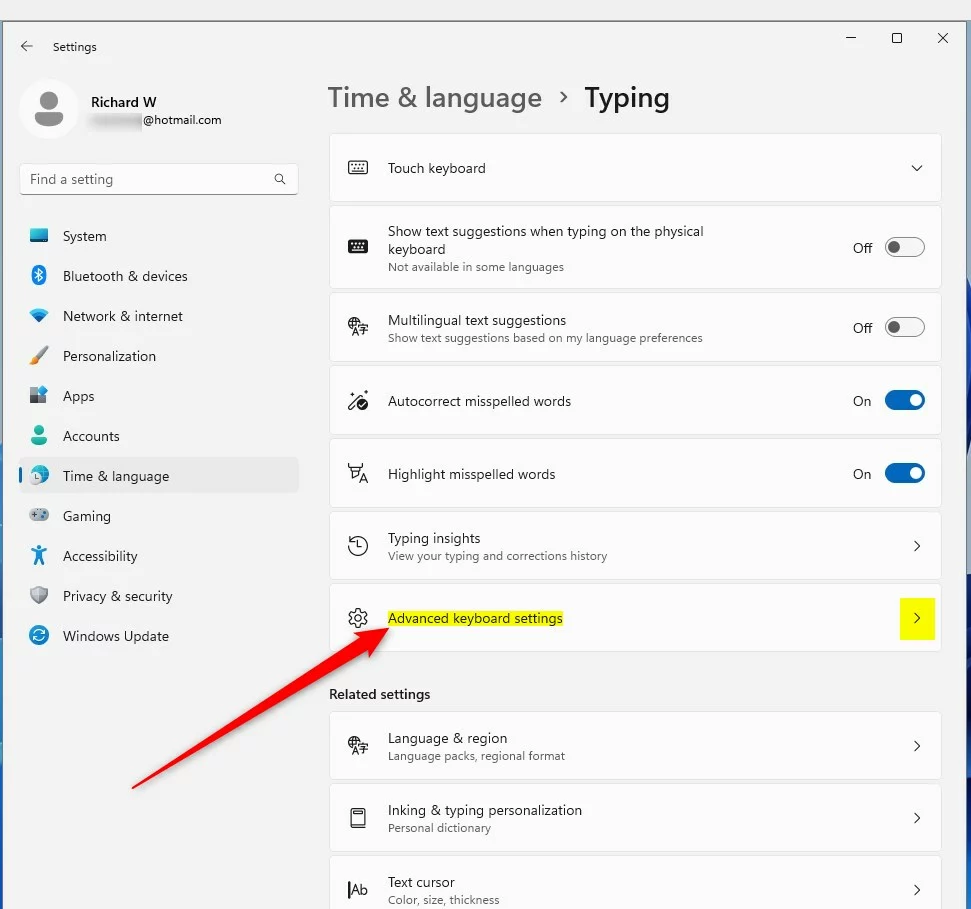
Select the Advanced keyboard tile to expand on the System -> Time & language -> Typing settings pane.
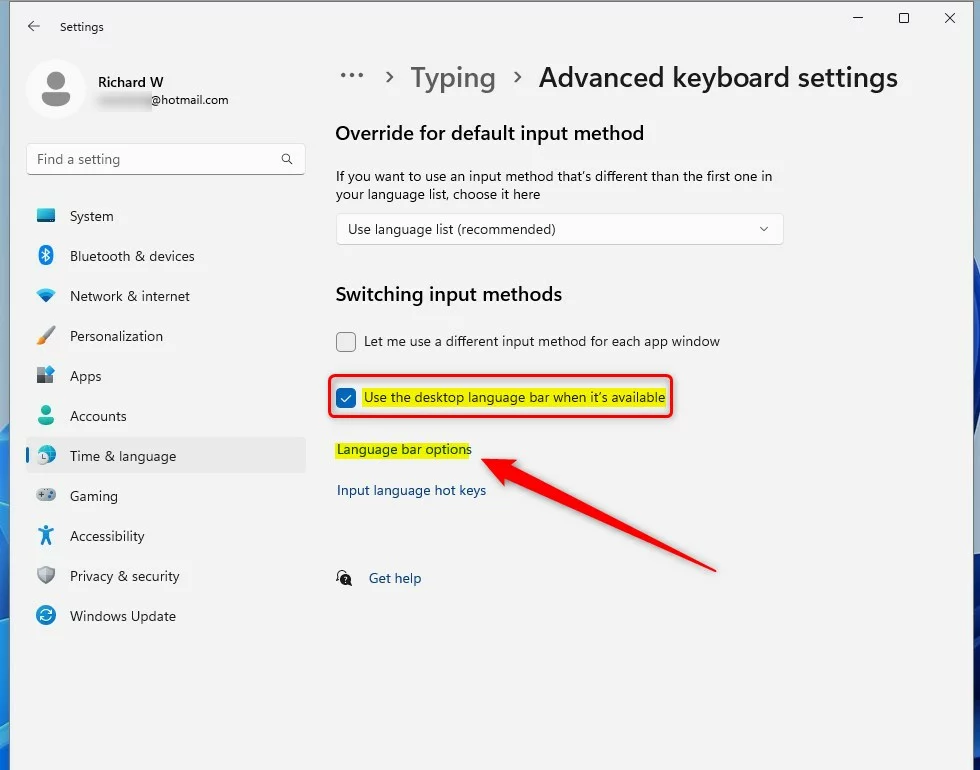
On the Time & language -> Typing -> Advanced keyboard settings pane, under Switching input methods, check the box next to “Use the desktop language bar when it’s available.”
Then click the Language bar options link below it.
On the Text Services and Input Languages pop-up window, under Language Bar, choose the display option:
- Floating On Desktop – displays a floating language bar.
- Hidden – removes the language bar.

When you choose Floating On Desktop, the language bar will show when you have installed multiple languages and keyboard layouts.
You can use the bar to switch between languages as needed quickly.
When you select Hidden, the language bar will be hidden.
That should do it!
Conclusion:
- To add or remove the language bar in Windows 11, access the System Settings through the Windows key + I shortcut or the Start menu.
- In the System Settings, navigate to Time & Language and choose the Typing section.
- Under Advanced keyboard settings, check the box next to “Use the desktop language bar when it’s available” and click the Language bar options link to set the display option as Floating on Desktop or Hidden.
- When multiple options are installed, the language bar facilitates easy switching between languages and keyboard layouts.
Leave a Reply