This article explains how to delete a user profile of an account in Windows 11.
Windows automatically creates a profile for a new account when the user signs in for the first time.
A user Profile folder is a folder that contains user-specific data and settings related to a particular user account on a computer. It includes desktop settings, application data, documents, downloads, and more.
Each user on a Windows computer has a unique profile folder stored in a specific location on the hard drive. By default, user profile folders are located in the “C:\Users” directory (ex. C:\Users\<username>).
You can delete a user profile folder without deleting the account. A new profile folder will be created the next time the user signs in to their account.
If a user changes their account name, the profile folder will not reflect the account’s new name. You may want to list and match the profile folder to the account name to ensure you’re not deleting the wrong folder.
The steps below show you how to delete a user profile folder of an account in Windows.
Delete user profile of an account in Windows 11
As mentioned, you can delete a user profile folder without deleting their account.
Here’s how to do it.
First, have the user sign out of their Windows session. You may not delete the profile folder while the user still signed in.
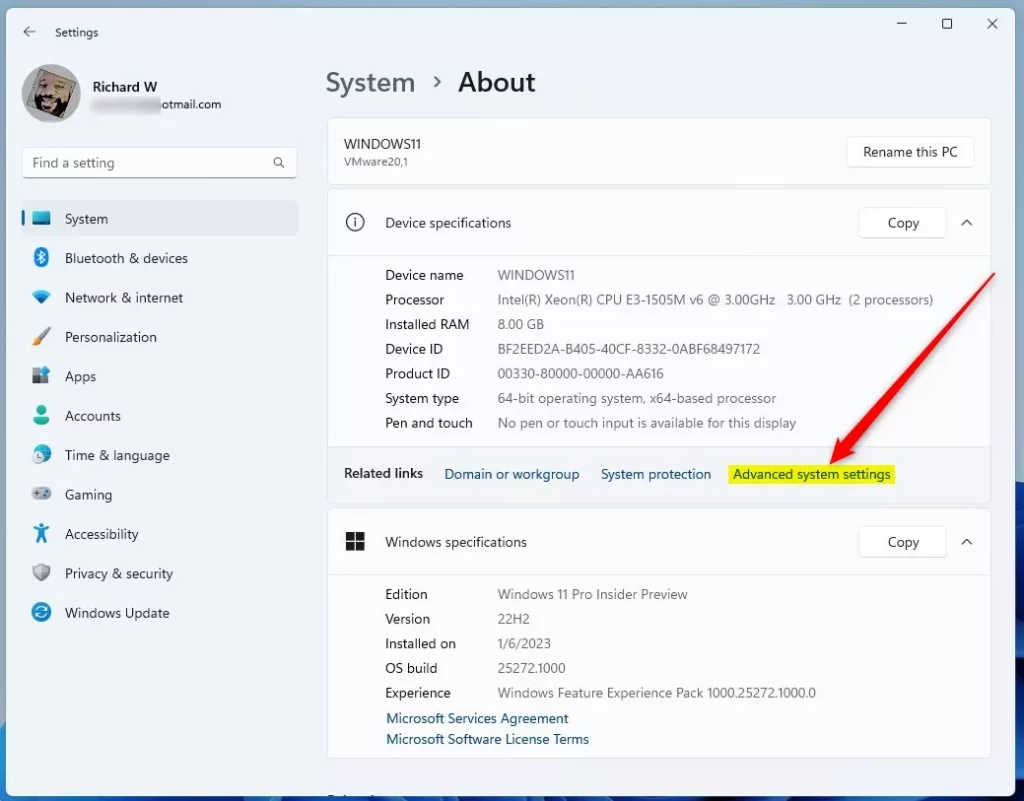
Then, open the Advanced System Properties (SystemPropertiesAdvanced.exe) by going to Settings > System > About and clicking the Advanced system settings link.
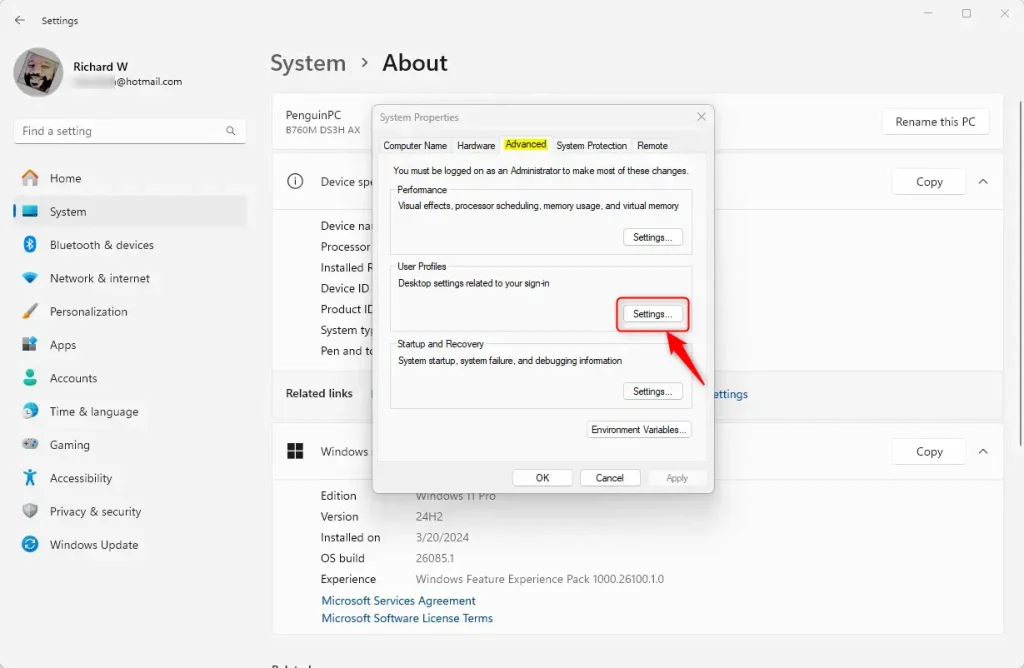
Select the “Advanced” tab on the System Properties window and click the Settings button under the User Profiles section.
Next, select the profile you want to delete and click the “Delete” button.

Confirm that you want to delete the profile by selecting “Yes” on the pop-up window.
When you’re done, click the OK button to return to the Settings app.
The next time the account signs in, a new profile folder with all its default folders and settings will be created.
That should do it!
Conclusion:
- Deleting a user profile folder in Windows 11 is possible without deleting the associated account.
- The user must sign out of their Windows session before attempting to delete the profile folder.
- Access the Advanced System Properties by navigating to Settings > System > About and clicking the Advanced system settings link, then proceed to the Advanced tab and select the Settings button under the User Profiles section.
- After selecting the profile to be deleted, confirm the action to initiate the deletion process.
- A new profile folder will be automatically generated with default folders and settings upon the next sign-in.


Leave a Reply