

This article explains how to change or configure Microsoft Defender Antivirus scanning options, including specifying the maximal CPU utilization during scans in Windows 11.
Microsoft Defender Antivirus is available in Windows 11 and is a significant component of your next-generation protection in Microsoft Defender for Endpoint.
It scans your computer regularly to protect your device from viruses and malware. The scan occurs while your computer is not actively used or idle so as not to interfere with your work.
By default, Microsoft Defender Antivirus uses 50 percent CPU usage during a scan in Windows. Devices with fewer resources 50 percent CPU utilization during scans may prevent other tasks from running.
Windows lets you change or specify the maximum percentage of CPU utilization during a scan. You can increase or decrease resource CPU usage. A value between 0 and 100 is valid. Howerver, decreasing may delay scanning on your machine.
Change CPU usage during scans with Microsoft Defender
As mentioned above, Windows lets you specify the maximum percentage of CPU utilization between 0 through 100 during a scan.
Here’s how to do that.
Use PowerShell
One way to change or view your device’s maximal CPU usage during scans with Windows Defender is by using the PowerShell app.
To do that, first, open the PowerShell app as administrator.
Then run the command below to see how your device CPU usage is configured for Microsoft Defender.
Get-MpPreference | select ScanAvgCPULoadFactor
The command above will display the current percentage of CPU usage with Microsoft Defender.
To change to a new value, run the command format below.
Set-MpPreference -ScanAvgCPULoadFactor <percentage>
Replace <pacentage> with an actual number. The default value is 50. Howerver, you can use a value between 0 through 100.
Ex.
Set-MpPreference -ScanAvgCPULoadFactor 40
Use the Local Group Policy Editor
Another way to change the maximum CPU usage with Microsoft Defender is by using the Local Group Policy Editor.
First, open the Local Group Policy Editor.
Then expand the following folders Computer Configuration -> Administrative Templates -> Windows Components -> Microsoft Defender Antivirus -> Scan.
Computer Configuration -> Administrative Templates -> Windows Components -> Microsoft Defender Antivirus -> Scan
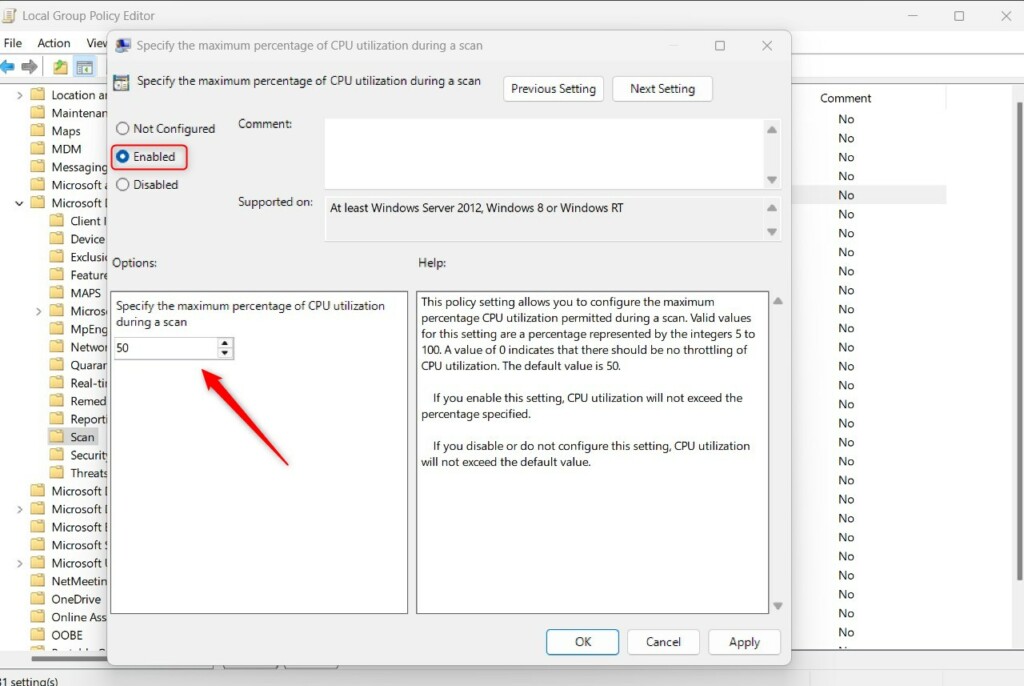
Next, click on the Scan folder on the left panel, and double-click the setting on the right called “Specify the maximum percentage of CPU utilization during a scan” to open.

When the setting window opens, select one of the options:
- Not Configured – Same as Disabled. CPU utilization will not exceed the default value.
- Enabled – CPU utilization will not exceed the percentage specified.
- Disabled – CPU utilization will not exceed the default value.
Save your settings and restart your computer for the changes to apply.
Use Windows Registry Editor
Yet another way to change the default maximum CPU usage with Microsoft Defender in Windows is to use the Windows Registry Editor.
If you can’t open the Local Group Policy Editor, use the Windows Registry editor instead.
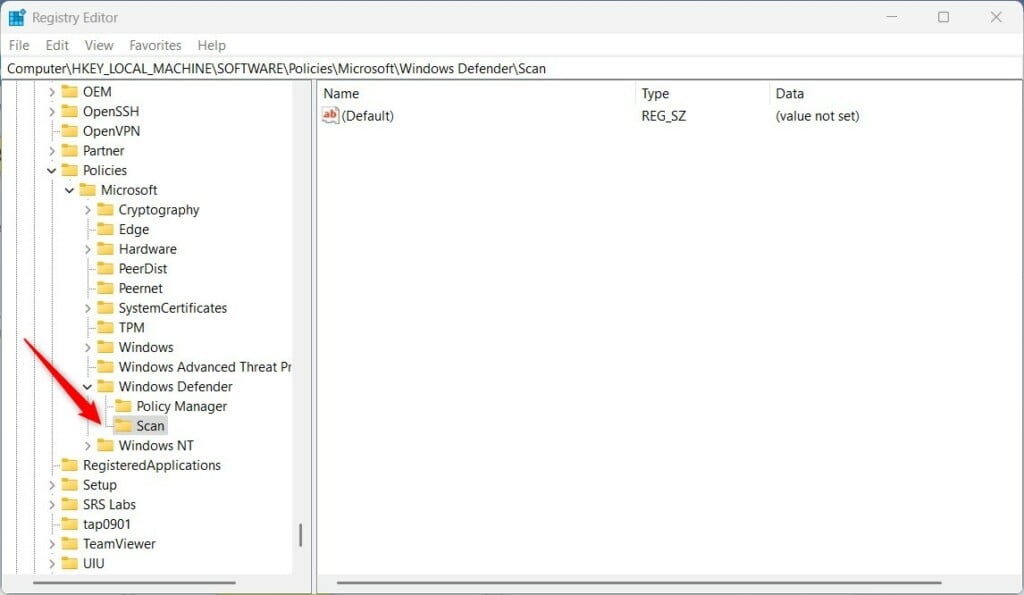
Open the Windows Registry, and navigate to the two folder keys below.
HKEY_LOCAL_MACHINE\SOFTWARE\Policies\Microsoft\Windows Defender\Scan
If you don’t see the Scan folder key, right-click on the Windows Defender key, then create the subkey (Scan) folders.
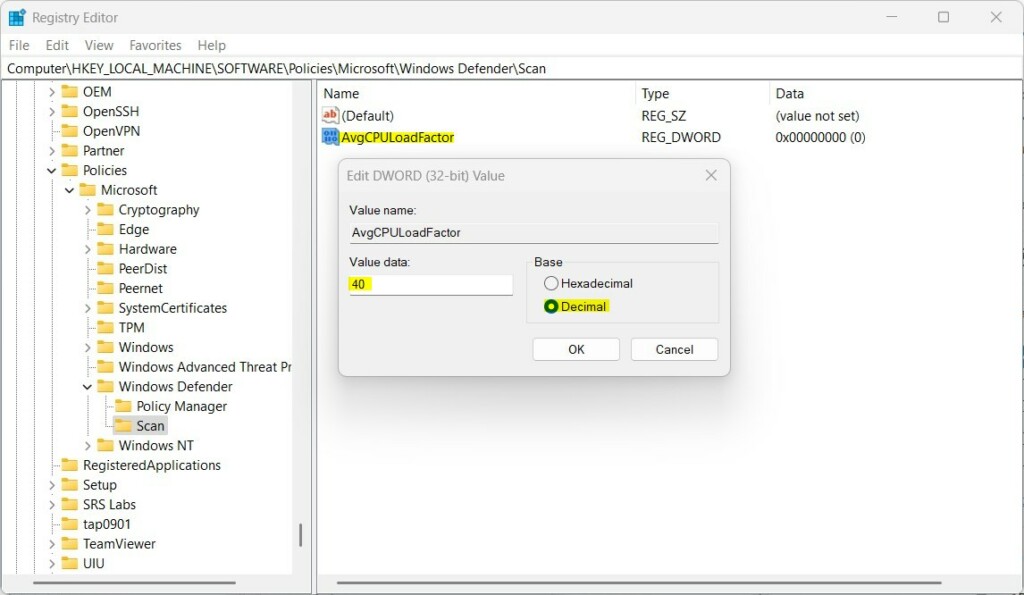
Right-click the Scan folder key’s right pane and select New -> DWORD (32-bit) Value. Type a new key named AvgCPULoadFactor.
Double-click the new key item name (AvgCPULoadFactor) and make sure the Base option is Decimal, and then update the Value data:
- To disable the Registry Editor, type 0 through 100. The default value is
50. - To enable the Registry Editor, delete the name AvgCPULoadFactor created above.
Save your changes and restart your computer.
Reference:
Configure scanning options for Microsoft Defender
Conclusion:
- In conclusion, configuring Microsoft Defender Antivirus scanning options, including specifying the maximal CPU utilization during scans, is essential for optimizing resource usage and balancing it with other tasks.
- By utilizing PowerShell, the Local Group Policy Editor, or the Windows Registry Editor, users can modify the maximum percentage of CPU utilization during a scan to suit their device’s resources and performance needs.
- This in-depth guide explored how to change the scanning options with Microsoft Defender, offering users the flexibility to adjust CPU utilization and enhance protection against viruses and malware.
- Please use the comments section below the post for additional information or contributions.


Leave a Reply