How to Clear Recent Device Search History in Windows 11
This guide shows you how to delete your search history in Windows 11. Windows saves your recent searches on your computer to help you find apps and files faster next time.
Why clear your search history?
You might want to clear your history to keep your computer tidy or to protect your privacy if other people use your device.
What happens when done?
Once you clear the history, the list of recent items in your search bar will be wiped clean. Windows will no longer suggest those specific items based on your past activity.
Reference: Windows Search and privacy – Microsoft Support
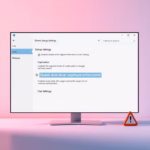
Option One: Clear All Recent Device Search History in Settings
Microsoft has updated Windows 11 to make managing your search settings easier. You can now find all your search controls in one place.
- Open Settings (press the Win+I keys on your keyboard).
- Click Privacy & security on the left.
- Click Search on the right.

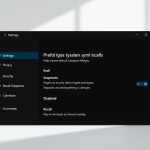
- Look for the Search history section.
- Click the Clear device search history button.

- You can close the Settings window when you are finished.
Option Two: Clear Specific Recent Device Search History
If you only want to remove one or two items, you can do it directly from the search bar.
- Open Windows Search (press the Win+S keys on your keyboard).
- Find the item in your Recent list that you want to remove.
- Hover your mouse over the item and click the X button that appears.
- Repeat this for any other items you wish to delete.
Summary
Keeping your search history clean helps maintain your privacy and keeps your search results relevant. You can either wipe your entire search history through the Privacy & security settings or manually remove individual items by clicking the X next to them in the search menu.
Was this guide helpful?
50% of readers found this helpful (2 votes)


Leave a Reply Cancel reply