
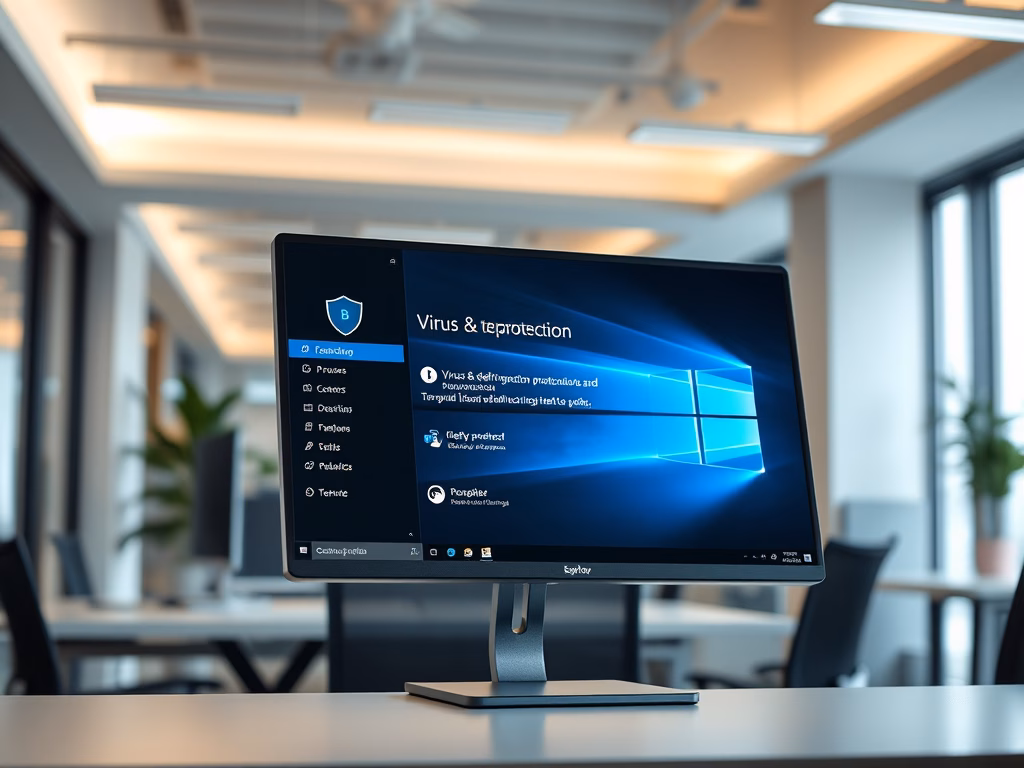
Microsoft Defender Antivirus is built into Windows 11 to protect your computer from viruses and harmful threats. It works by downloading special security updates called security intelligence. These updates help Defender recognize and block new threats before they can damage your PC.
Windows 11 usually downloads these security updates automatically in the background. But sometimes you might want to check for updates yourself right away. This guide shows you simple steps to check and update Microsoft Defender whenever you need to.
How to Check for Microsoft Defender Updates
Step 1: Open the Windows Security App
Click the Start button (Windows icon on the bottom-left of your screen). Type Windows Security and press Enter. You can also learn more about this app here: Windows Security app guide.
Step 2: Go to Virus & Threat Protection
In the Windows Security window, click on Virus & threat protection.
Step 3: Open Protection Updates
Scroll down a little bit. Click the Protection updates link.
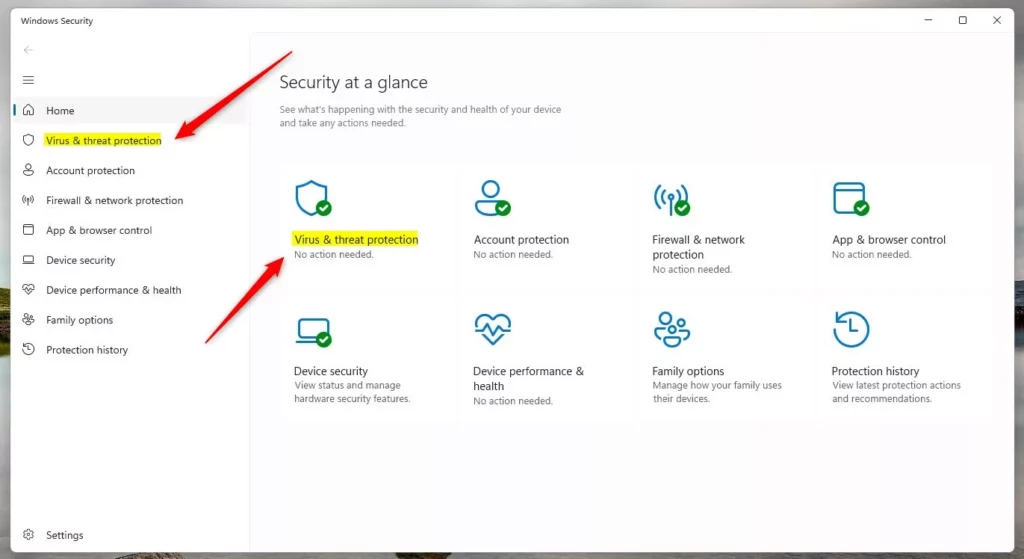
Windows Security app – Virus & threat protection screen
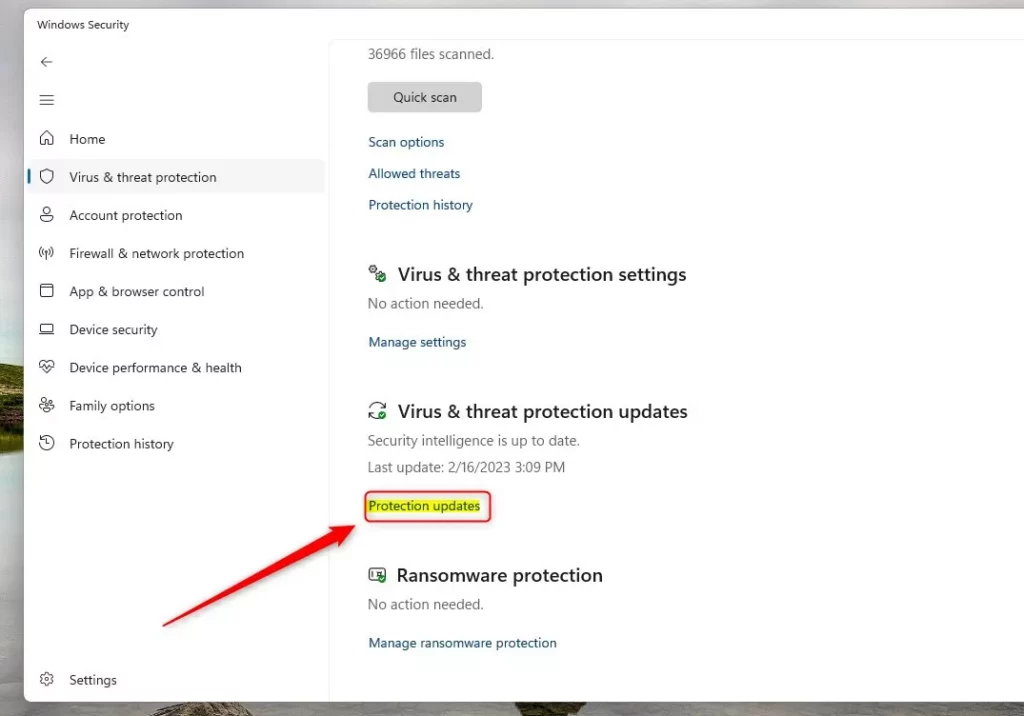
Click the ‘Protection updates’ link
Step 4: Check for Updates
You will see information about your current security update. This includes the version number and when it was last updated. Click the Check for updates button. Your computer will look for the newest update and download it if one is available.

Click ‘Check for updates’ to get the latest security intelligence
Why Should You Keep Microsoft Defender Updated?
Why does this matter? Microsoft Defender uses these updates to recognize and stop new viruses and threats. When you skip updates, your computer becomes more vulnerable to new types of attacks.
What happens when you update? Your computer gets the latest protection against current threats. Keeping your security intelligence fresh helps protect your files, passwords, and personal information.
You can always manually check anytime you want to make sure you have the newest protection available.
Summary
Checking for Microsoft Defender updates in Windows 11 is quick and easy. Open Windows Security, go to Virus & threat protection, click Protection updates, and then click Check for updates. Regular updates keep your PC safer from new threats. While Windows 11 usually updates automatically, manually checking gives you peace of mind that you have the latest protection.

Leave a Reply Cancel reply