

This article explains how to check BitLocker encryption drive status when using Windows 11.
BitLocker helps protect your computer data so only authorized users can access it.
If your device is stolen or missing and BitLocker is enabled, your device will remain secured and protected because only authorized users will be allowed access to the device.
You can quickly turn on BitLocker to encrypt the operating system drive ( C: ), internal or external fixed drives, and removable USB or flash thumb drives. Once a drive is BitLocker protected, it’s secured and safe.
You can use built-in command tools to ensure a driver is BitLocker protected. The steps below show you how to do that.
Other BitLocker encryption posts:
- How to back up BitLocker keys in Windows 11
- How to turn on BitLocker in Windows 11
- How to turn on drive encryption in Windows 11
How to check BitLocker status for drives in Windows 11
As mentioned above, Windows has built-in command-line tools that allow users to check the status of their BitLocker drive.
Below is how to find if a drive is encrypted with BitLocker in Windows 11.
You must be logged in as an administrator or run the Command Prompt as an administrator to use the tool.
First, open Windows Terminal or the Command Prompt as an administrator.
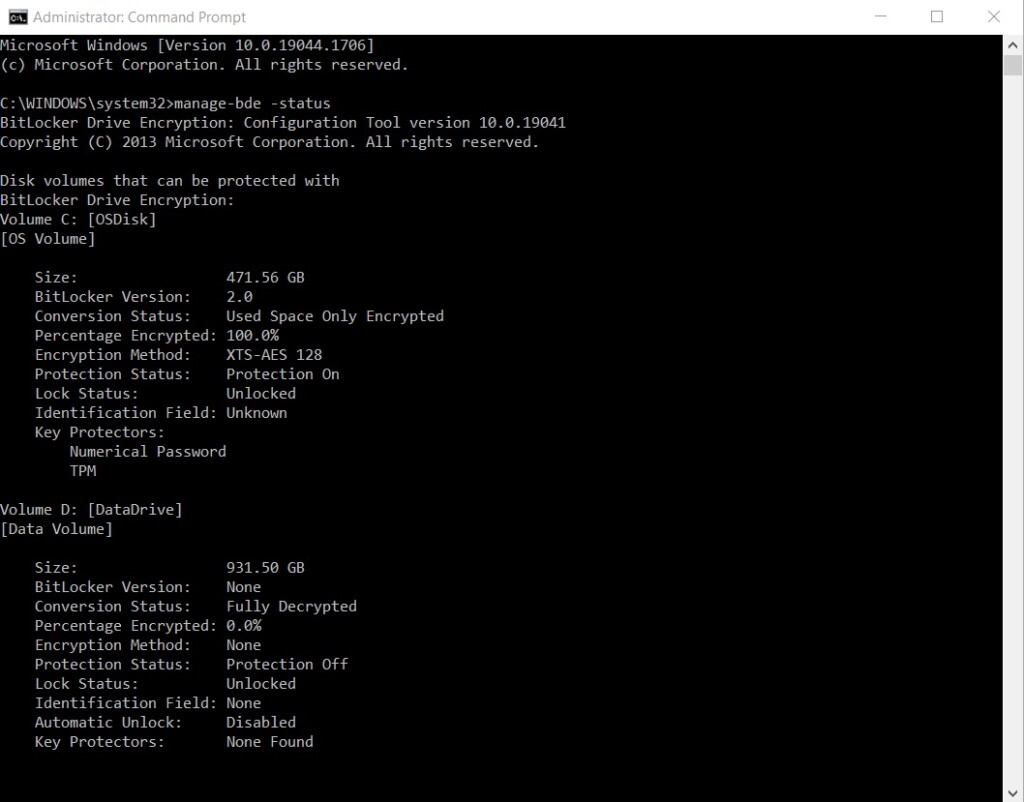
Type the commands below on the Windows Terminal or Command Prompt console to get all drives’ BitLocker status.
manage-bde -status
The command should display something similar to the lines below:
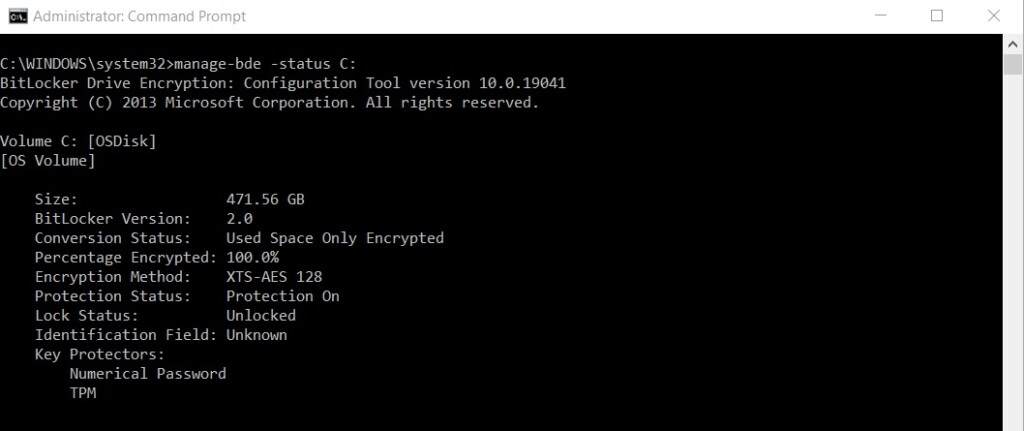
For individual drives, use the command format as follows:
manage-bde -status <drive letter>:
#OR
manage-bde -status C:
Next, you’ll see the status of the drive specified.
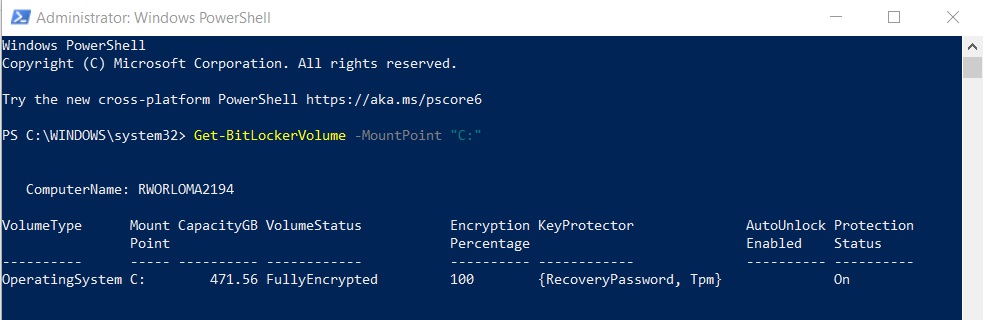
When using PowerShell, run the command format below:
Get-BitLockerVolume -MountPoint "<drive letter>:"
#OR
Get-BitLockerVolume -MountPoint "C:"
You should see similar lines below:
That should do it!
Conclusion:
- Checking the BitLocker status for drives in Windows 11 is an essential security measure to ensure your data remains protected from unauthorized access.
- Using built-in command-line tools or PowerShell, users can easily verify if a drive is encrypted with BitLocker, providing peace of mind regarding their data security.
- Regularly confirming the BitLocker status for all drives, including internal, external, and removable storage, helps maintain a robust security posture for sensitive information on Windows 11 devices.


Leave a Reply Cancel reply