
When you plug a USB flash drive or external hard drive into Windows 11, your computer can handle it in different ways. This guide shows you simple steps to change how your computer treats these devices. You get to pick what works best for you.
What Are Removal Policies?
Windows 11 gives you two choices for how your computer works with removable drives:
- Quick removal (default): You can unplug your device anytime without clicking “Safely Remove Hardware.” Your computer might run a tiny bit slower though.
- Better performance: Your computer runs faster with the device plugged in. But you must click “Safely Remove Hardware” before unplugging to protect your data.
Pick the setting that matches how you use your device.
⚠️ Admin Privileges Required: You need to be signed in as an administrator on your PC to change these settings.
Three Easy Ways to Change Removal Policy
Option 1: Change Using Windows Settings
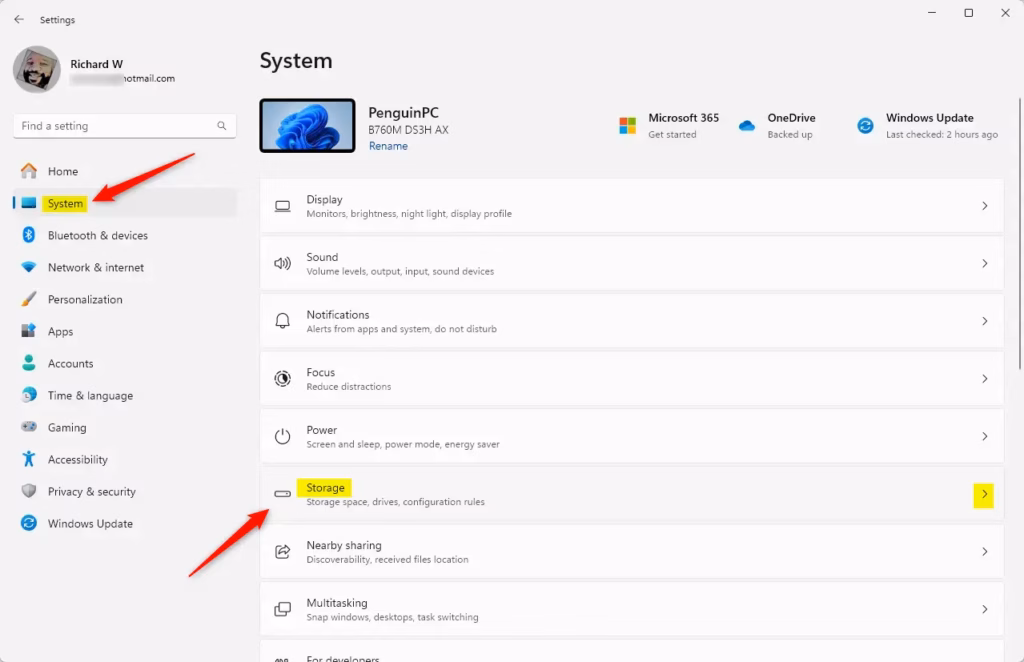
- Press Windows key + I to open Settings.
- Click System on the left, then choose Storage on the right. Or use this shortcut: Open Storage settings
- If a pop-up asks for permission, click Yes.
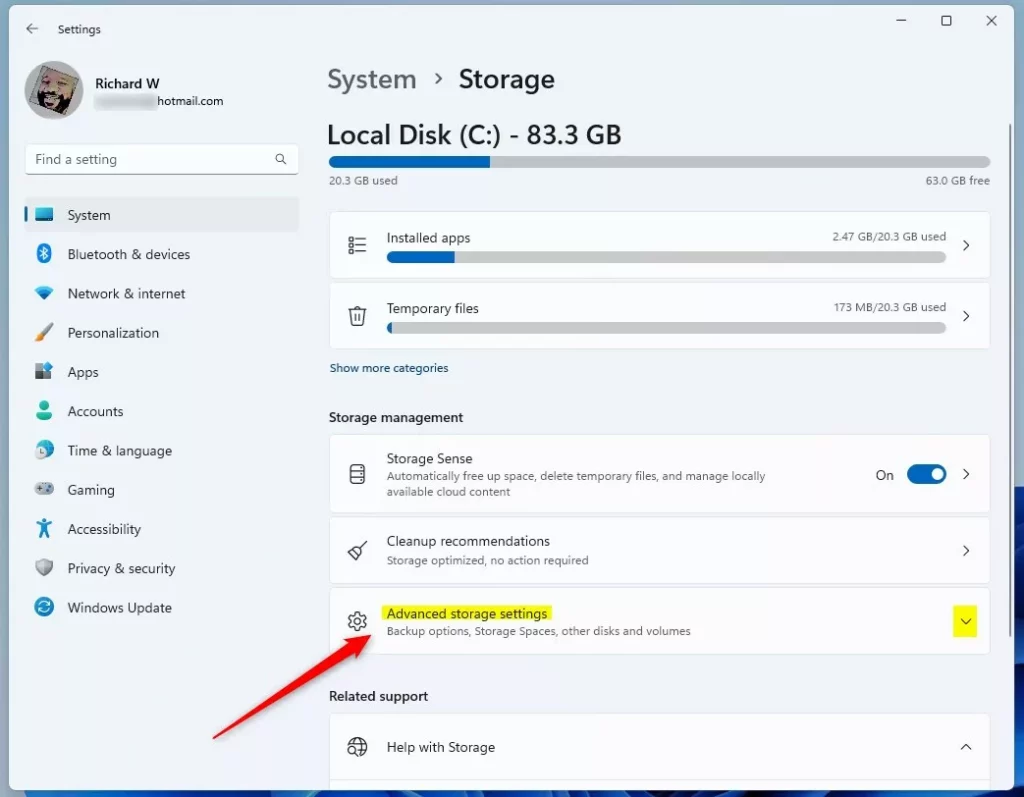
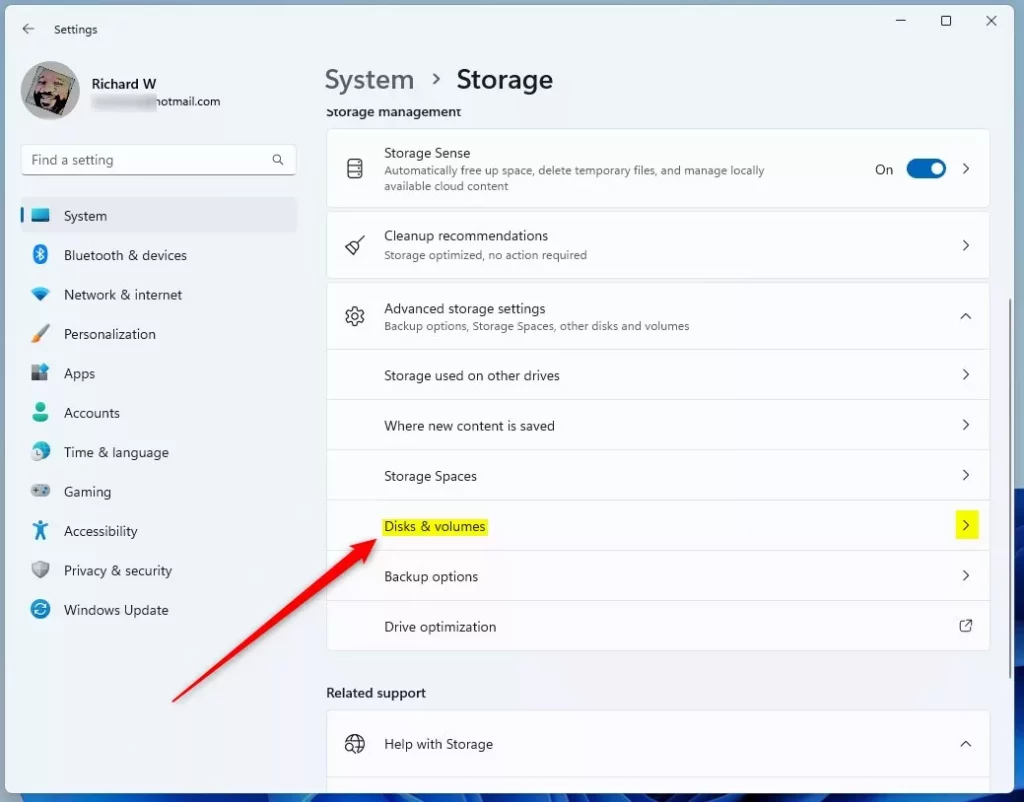
- Scroll down and click Advanced storage settings to expand it, then select Disks & volumes. Or open it directly: Open Disks & volumes
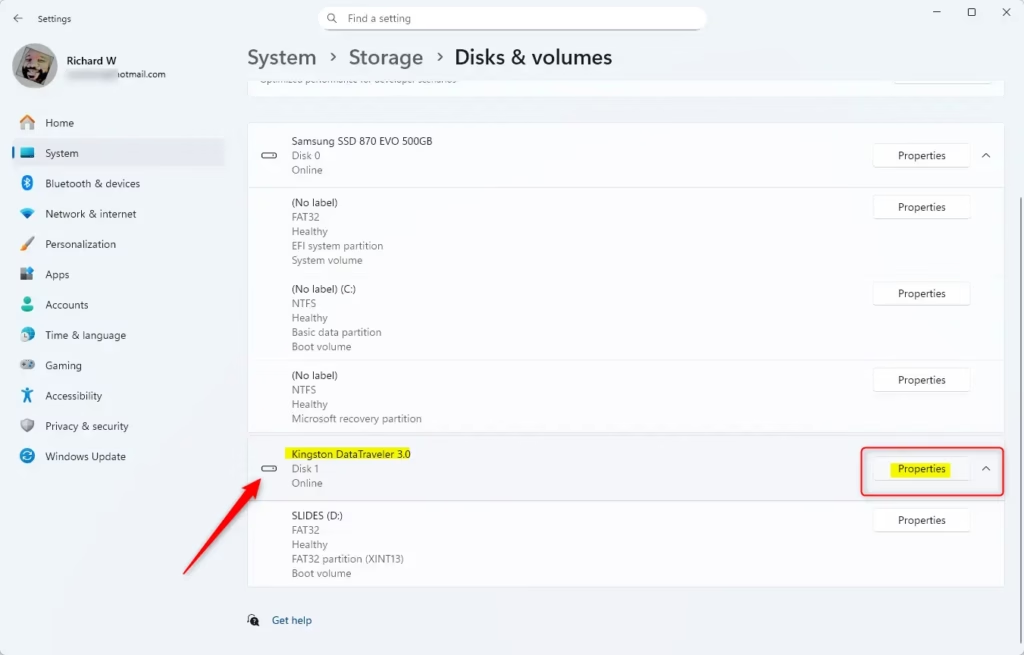
- Find your removable drive in the list, then click the Properties button.
- Under Removal policy, pick either Quick removal or Better performance.
- Close Settings when done.

Option 2: Change Using Disk Management
- Press Windows key + R, type
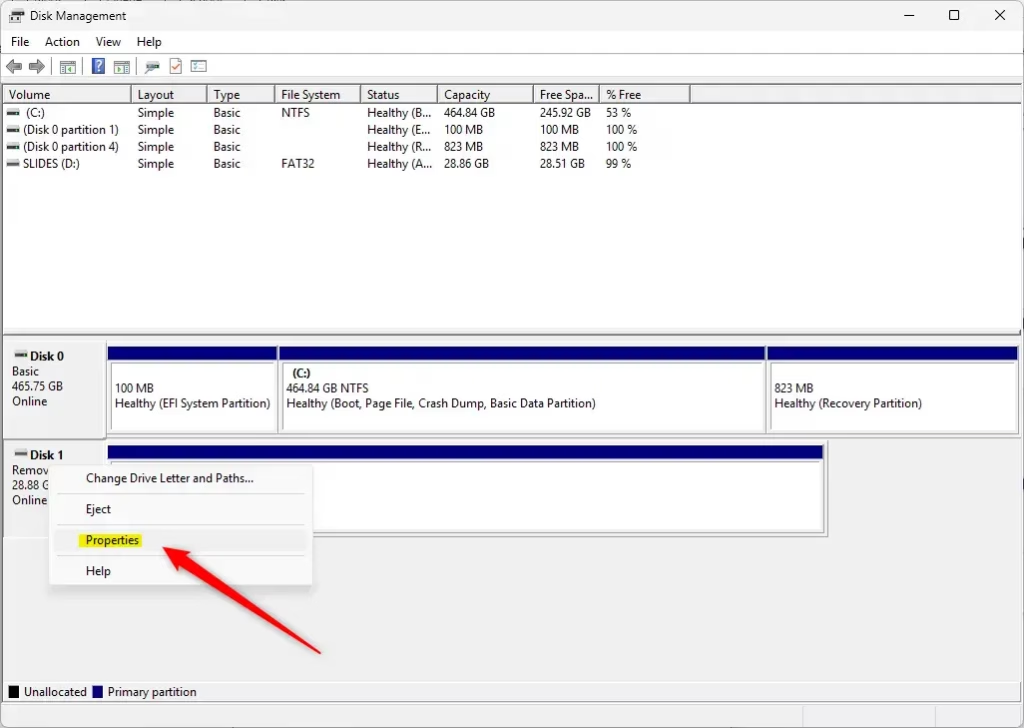
diskmgmt.msc, and press Enter to open Disk Management. - In the list at the bottom, find your removable drive and right-click its label (like “Disk 1”).
- Select Properties from the menu.
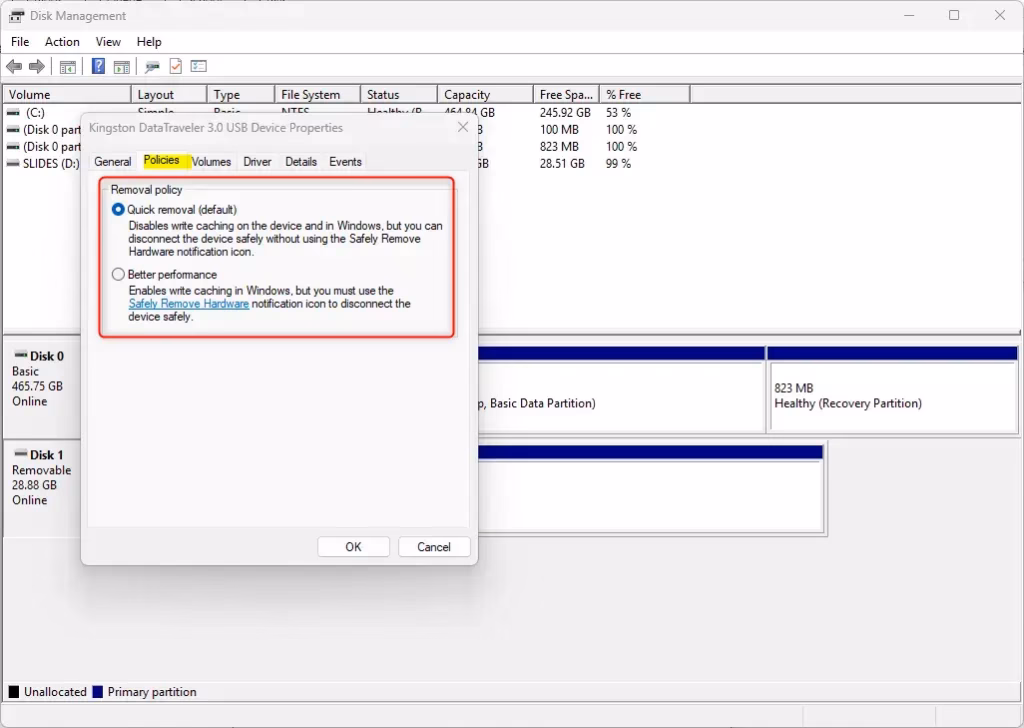
- Go to the Policies tab.
- Choose Quick removal or Better performance, then click OK.
- Close Disk Management.
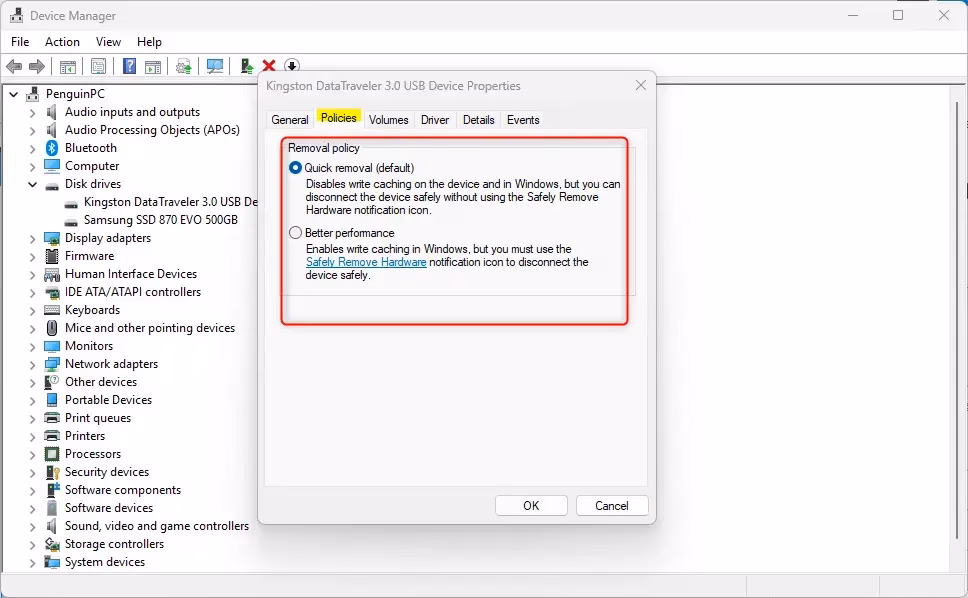
Option 3: Change Using Device Manager
- Press Windows key + R, type
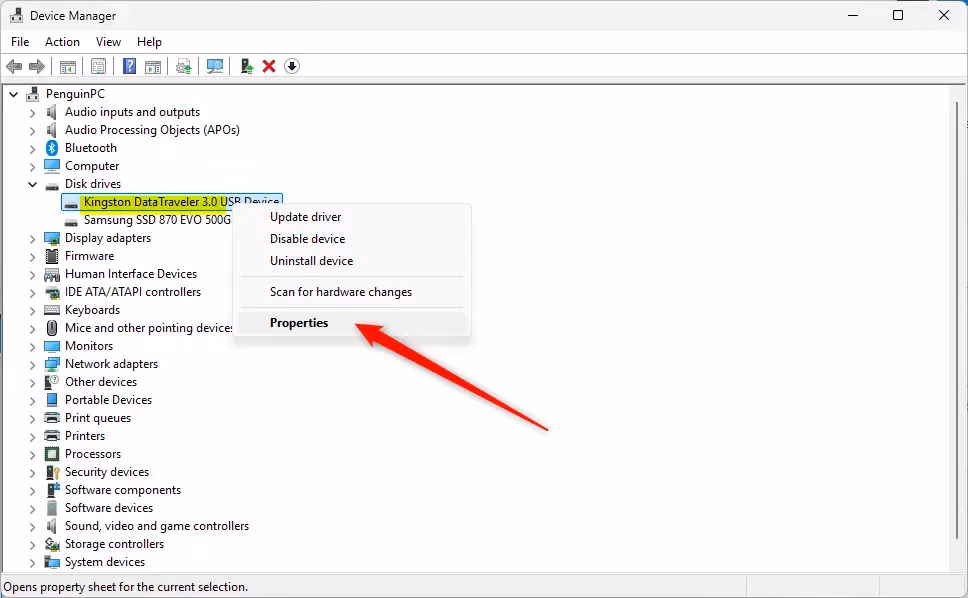
devmgmt.msc, and press Enter to open Device Manager. - Expand the Disk drives section.
- Double-click your removable drive.
- Go to the Policies tab.
- Select Quick removal or Better performance, then click OK.
- Close Device Manager.
Summary
- Quick removal: Unplug your USB or external drive anytime without extra steps. You get slightly slower performance.
- Better performance: You get faster data transfers, but you must always use “Safely Remove Hardware” before unplugging.
- You can change these settings anytime while your drive is plugged in.
- Three ways to change settings: Settings, Disk Management, or Device Manager.
- Administrator permission is needed to make changes.
- Changing this setting helps protect your data or improve speed, depending on what you need.


Leave a Reply