
This article describes how to change hard disk idle timeout in Windows 11.
Windows has a setting that automatically turns off the hard disk after a certain period of inactivity. This setting is helpful when you want to save energy and extend your device’s battery life.
One downside of this setting is that while the hard disk drive is turned off, apps and other services that need access will encounter a slight delay because the disk will have to leave its idle state to resume operation.
If a slight delay isn’t a big deal, you turn on this feature to serve energy and extend your device’s battery life in certain situations.
Below is how to change the disk idle timeout settings in Windows 11.
How to turn off the hard disk after a certain period of inactivity in Windows 11
As described above, Windows has a setting that automatically turns off the hard disk after a certain period of inactivity. This setting is helpful when you want to save energy and extend your device’s battery life.
Below is how to change the settings in Windows 11.
Note: This feature only applies to HDDs. It does not apply to SSDs or other NVMe drives.
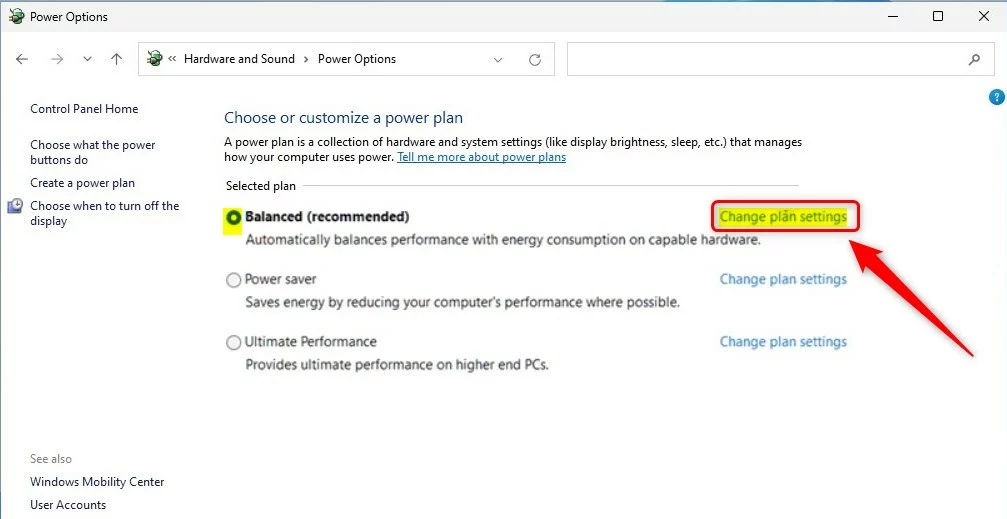
To change this setting, open the Control Panel.
Navigate to the Power Options category group when the Control Panel app opens.
Control Panel-> Hardware and Sound -> Power Options
There, locate the Active power plan. Then click on the Change plan settings link.
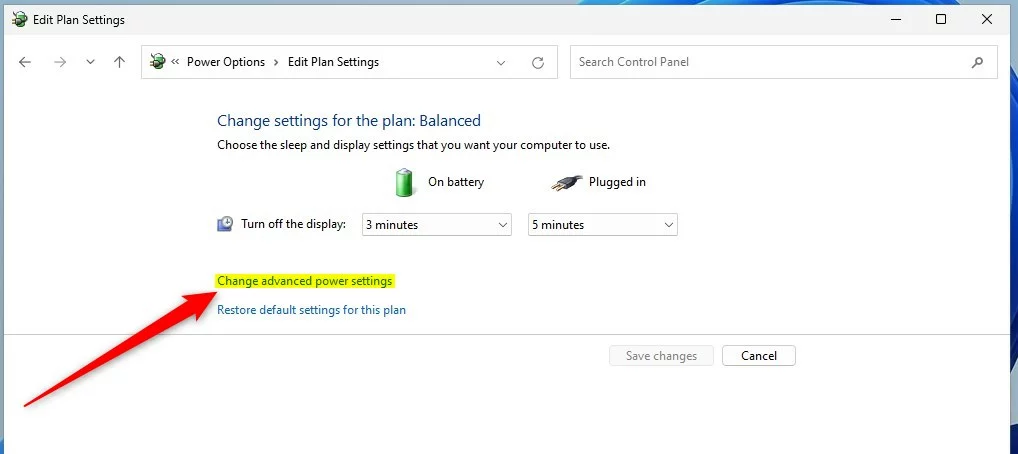
Click the Change advanced power settings link on the Control Panel -> Hardware and Sound -> Power Options -> Edit Plan Settings pane.
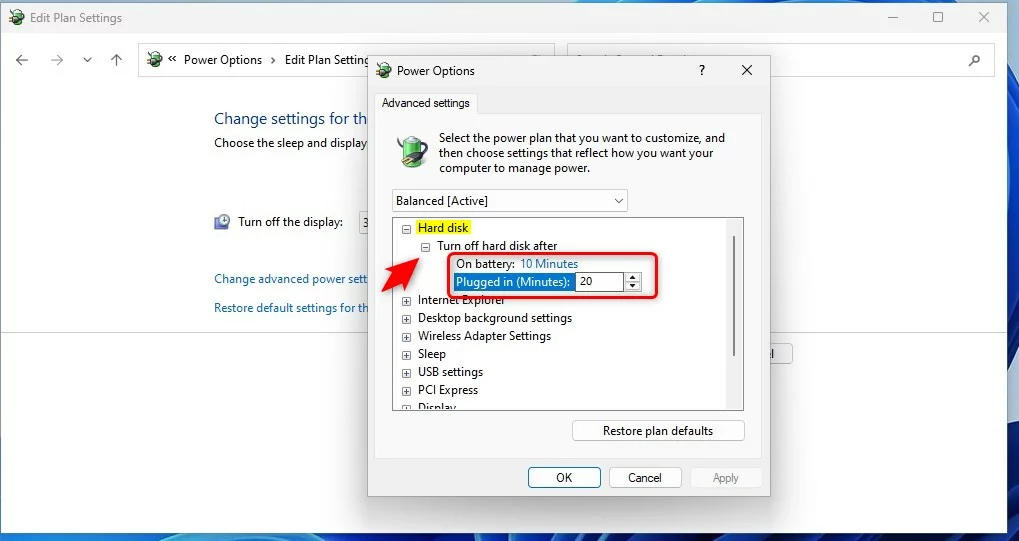
On the Power Options pop-up window, select Hard disk to expand. Then expand. Turn off the hard disk after:
- On battery: 10 Minutes
- Plugged in: 20 Minutes
Again, the changes below only apply to Hard Disk drives (HDDs). SSDs and non-HDD drives will turn on as defined in the image below.
That should do it! You can close the Settings app.
Reference:
Conclusion:
- Changing the hard disk idle timeout in Windows 11 can help save energy and extend the device’s battery life
- Remember that this feature only applies to HDDs and not to SSDs or other NVMe drives
- You can adjust the idle timeout settings by accessing the Control Panel and navigating to the Power Options category group
- After making the changes, ensure you close the Settings app
- For further details or contributions, feel free to use the comment form below the article


Leave a Reply Cancel reply