
This tutorial will show you how to change a drive letter in Windows 11.
A drive letter is a single letter (A through Z) that Windows assigns to a physical drive or drive partition. It helps your computer find and reference the drive.
If you don’t like your current drive letter, you can change it.
References:
Change a Drive Letter – Change or assign a Windows drive letter to a drive by using the Change Drive Letter and Paths feature with the Disk Management utility in Windows.
Restore system/boot drive letter – Windows Server – Describes how to change the system or boot drive letter in Windows.
Important: You must be signed in as an administrator to change a drive letter. [Admin Required]
Warning: If you change the drive letter of a drive where Windows or apps are installed, apps might have trouble running or finding that drive. For this reason, it is suggested that you don’t change the drive letter of a drive on which Windows or apps are installed.
Option One
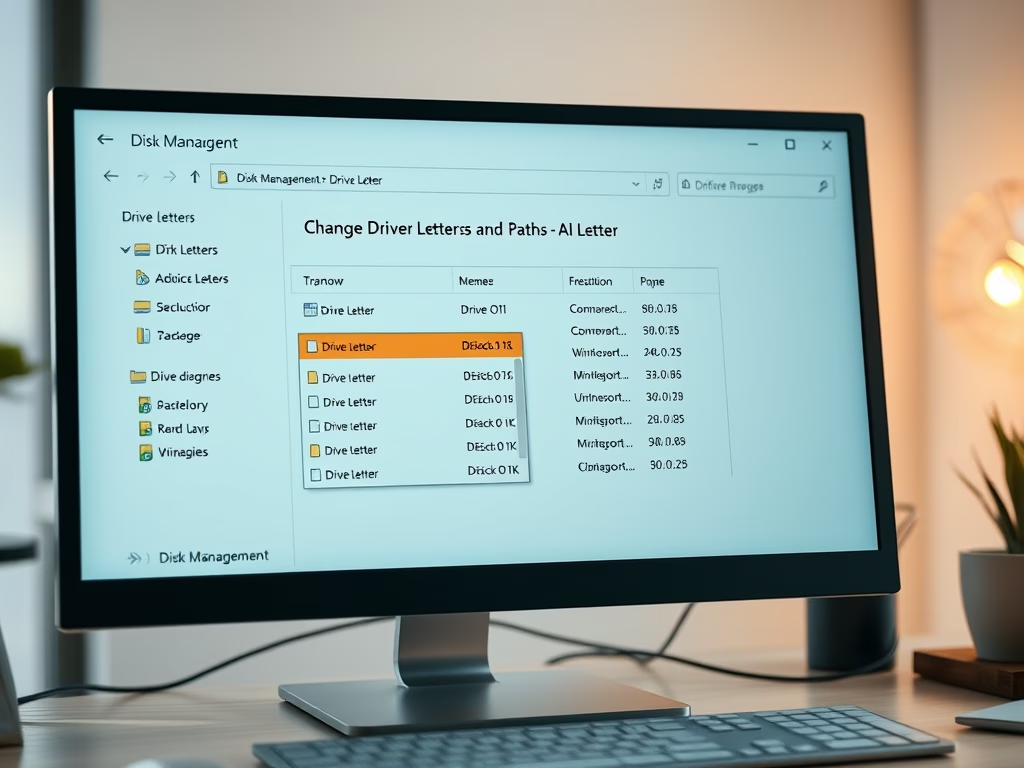
Change Drive Letter in Disk Management
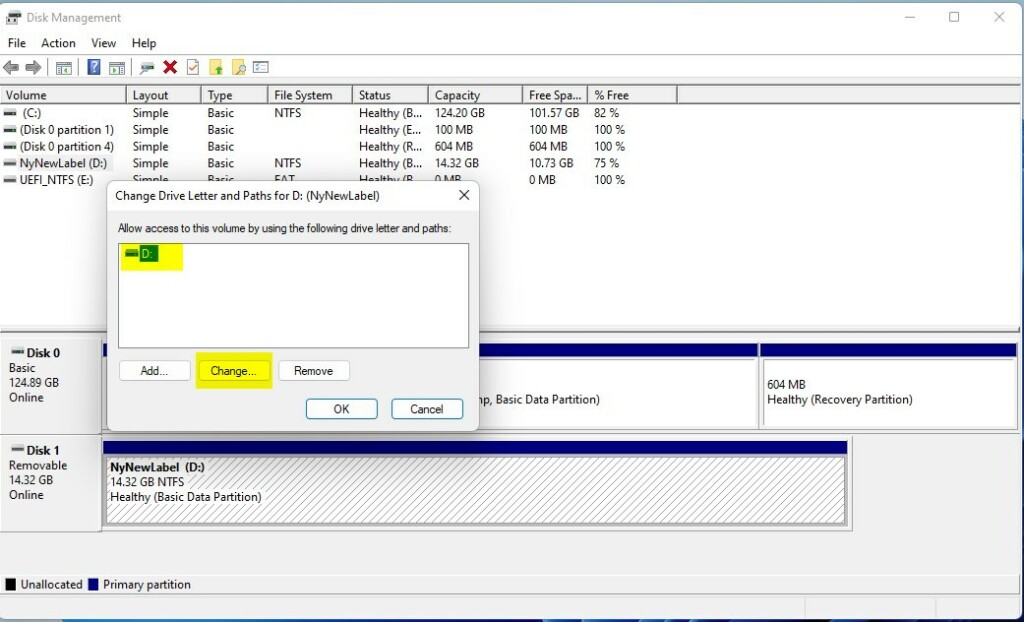
- Open Disk Management (
diskmgmt.msc). [Admin Required] - Right click or press and hold on the drive you want to change the drive letter for, and click/tap on Change Drive Letter and Paths.
- Click/tap on Change.
- Click/tap on the Add button instead if the drive doesn’t currently have a drive letter assigned to it.
- Select an available drive letter you want to assign to this drive in the drop menu, and click/tap on OK.
- Click/tap on Yes to confirm.
- If prompted the drive is in use, click/tap on Yes to confirm.
- You can now close Disk Management if you like.

Option Two
Change Drive Letter in Settings
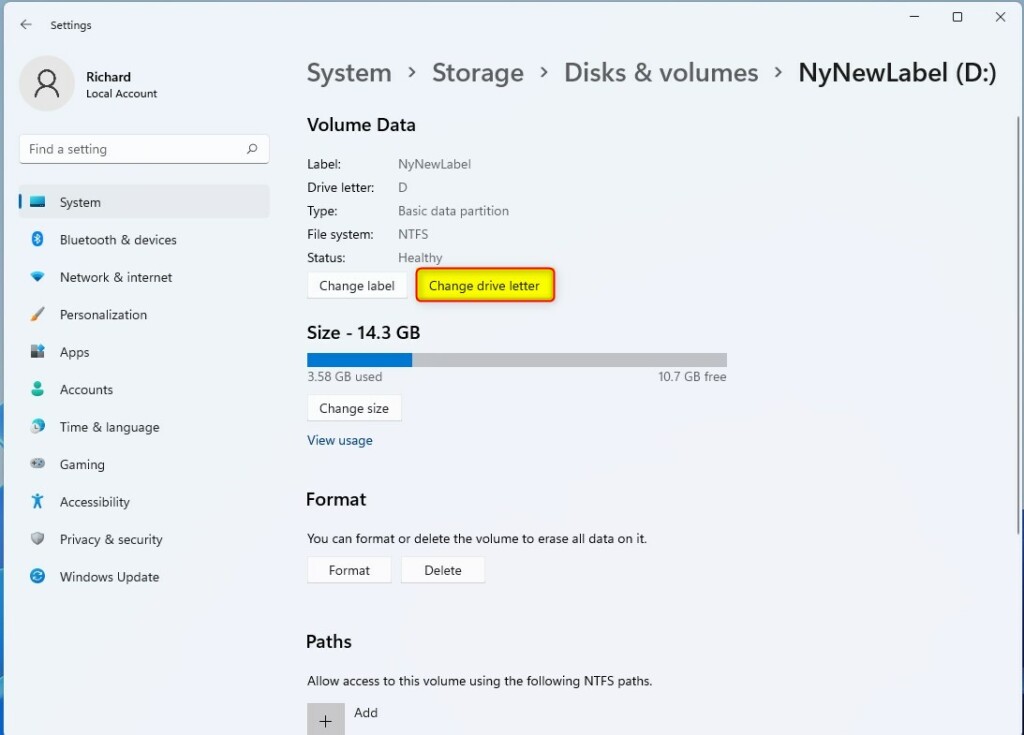
- Open Settings (Win+I).
- Click/tap on System on the left side, and click/tap on Storage on the right side.
- Click/tap on Yes if prompted by UAC. [Admin Required]
- Starting with Windows 11 build 26100.7705 (24H2) and build 26200.7705 (25H2), to help ensure that only authorized Windows users can access system files, Windows now displays a User Account Control (UAC) prompt when you open Storage settings (Settings > System > Storage).
- Click/tap on Advanced storage settings to expand it open, and click/tap on Disks & volumes.
- Click/tap on Properties for the drive (partition or volume) you want to change the drive letter for.
- Click/tap on the Change drive letter button.
- Select an available drive letter you want to assign to this drive in the drop menu, and click/tap on OK.
- You can now close Settings if you like.

Option Three
Change Drive Letter using “diskpart” Command
- Open Windows Terminal (Admin), and select either Windows PowerShell or Command Prompt. [Admin Required]
- Copy and paste the following into Windows Terminal (Admin), and press Enter:
diskpart
- Copy and paste the following into Windows Terminal (Admin), and press Enter:
list volume
- Make note of the volume number (ex: “1”) for the current drive letter (ex: “D”) of the drive (volume) you want to change.
- Type the command below into Windows Terminal (Admin), and press Enter:
select volume <volume number>- Substitute
<volume number>in the command above with the actual volume number (ex: “1”) from step 3 above for the drive you want to change the drive letter of. - For example:
select volume 16
- Type the command below into Windows Terminal (Admin), and press Enter:
assign letter=<new drive letter>- Substitute
<new drive letter>in the command above with the actual new drive letter (ex: “F”) you want to assign to this drive. - For example:
assign letter=F - If the new drive letter you assigned is not available, you will get an error message in Windows Terminal (Admin). You will just need to repeat this step to assign an available drive letter.
- You can now close Windows Terminal (Admin) if you like.
Option Four
Change Drive Letter using “Set-Partition” Command
- Open Windows Terminal (Admin), and select Windows PowerShell. [Admin Required]
- Copy and paste the following into Windows Terminal (Admin), and press Enter:
Get-Partition
- Make note of the current drive letter (ex: “D”) of the drive you want to change.
- Type the command below into Windows Terminal (Admin), and press Enter:
Get-Partition -DriveLetter <current drive letter> | Set-Partition -NewDriveLetter <new drive letter>- Substitute
<current drive letter>in the command above with the actual current drive letter (ex: “D”) from step 2 above of the drive you want to change. - Substitute
<new drive letter>in the command above with the actual new drive letter (ex: “F”) you want to assign to the drive. - For example:
Get-Partition -DriveLetter D | Set-Partition -NewDriveLetter F - If the new drive letter you assign is not available, you will get an error message in Windows Terminal (Admin). You will just need to repeat this step to assign an available drive letter.
- You can now close Windows Terminal (Admin) if you like.
Option Five
Change Drive Letter in Registry Editor
- Open Registry Editor (
regedit.exe). [Admin Required] - Navigate to the key below in the left pane of Registry Editor:
HKEY_LOCAL_MACHINE\SYSTEM\MountedDevices
- In the right pane of the MountedDevices key, right click or press and hold on the binary (REG_BINARY) value (ex: “\DosDevices\D:”) for the drive letter (ex: “D”) of the drive you want to change, and click/tap on Rename.
- Rename only the drive letter part of the binary (REG_BINARY) value (ex: “\DosDevices\D:”) name with an available drive letter (ex: “\DosDevices\F:”) you want for the drive instead, and press Enter to apply.
- If another drive is currently assigned the drive letter you want to assign to this drive, then you will need to change the drive letter of the other drive first.
- When finished, close Registry Editor.
Summary
Changing a drive letter in Windows 11 is easy and can be done in five different ways. The easiest methods are using Disk Management or the Settings app. For more advanced users, you can use command-line tools like diskpart or PowerShell commands, or edit the Windows Registry directly. Remember to be an administrator to make these changes, and avoid changing the drive letter of your main Windows drive to prevent app problems.
Leave a Reply