How to Change Default Distro in Windows Subsystem for Linux
You can change your default Linux distribution in Windows Subsystem for Linux (WSL) to quickly launch your preferred environment.
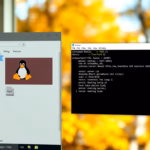
WSL allows you to run Linux command-line tools directly on Windows, effectively acting as a lightweight, built-in Linux environment without the overhead of a full virtual machine. When you first install a Linux distro, such as Ubuntu, it automatically becomes the default.
However, if you install multiple distros, like Debian or Fedora alongside your initial one, you’ll likely want to switch which one launches by default. This ensures that when you type the simple `wsl` command in your terminal, it opens your chosen Linux version instantly.
This quick change streamlines your command-line workflow, ensuring your preferred Linux environment is ready to go immediately. Importantly, altering your default distro does not impact any of your other installed Linux distributions or the data contained within them.
Open Windows Terminal or PowerShell as administrator and use wsl –set-default to change your default Linux distribution. Run wsl –list –verbose first to see your installed distro names.
Understanding WSL Versions
Windows Subsystem for Linux comes in two main versions, WSL 1 and WSL 2, with WSL 2 offering better speed and a full Linux kernel.
| Command Output | Meaning |
|---|---|
| (Default) | The distro that opens when you type wsl |
| Stopped | The distro is not currently running |
| Running | The distro is active in the background |
How to Change Your Default WSL Distro
You can change your default WSL distro using a simple command in Windows Terminal or PowerShell, making sure the correct Linux system starts automatically when you launch WSL.
- Open Windows Terminal or PowerShell.
- Right-click the icon and select Run as administrator.
- Type the following command to see your installed distros:
wsl --list --verbose - Identify the name of the distro you want to set as default.
- Run the following command to change it:
wsl --set-default <DistroName> - Replace <DistroName> with your chosen distro, for example:
wsl --set-default Ubuntu
Summary
Changing your default Linux distribution in WSL is a quick way to manage your development environment.
What happens to my files when I change the default WSL distro?
Your files stay safe when you change the default WSL distro; they aren’t deleted or moved and remain in their original distribution’s virtual disk.What happens to my files when I change the default WSL distro?
Changing your default WSL distribution does not delete or move your files. Your data remains stored within the virtual disk of each specific distribution. You can still access files in your non-default distributions by using the specific command for that distro or by navigating through the Windows file explorer network path.


No comments yet — be the first to share your thoughts!