

This article explains how to adjust or change the speed of Mouse Keys in Windows 11.
Mouse keys are a helpful feature in Windows. They let you control your mouse cursor using the numeric keypad on your keyboard. This can be useful if you have trouble using a traditional mouse or trackpad.
When turned on, you can use the 5 key to click. Use the + key to double-click. Use the other numeric keys to move the mouse cursor around.
Why adjust mouse key speed?
Mouse key speed matters. If it moves too slowly, navigating your screen feels frustrating. If it moves too fast, it becomes hard to control precisely. Finding the right speed makes using your computer easier and more comfortable.
Change the speed of Mouse Keys on Windows
Here’s how to adjust Mouse Keys speed using the Settings app.
- Open the Windows Settings app. Click the Start menu and select Settings. Or press Windows key + I to open it quickly.
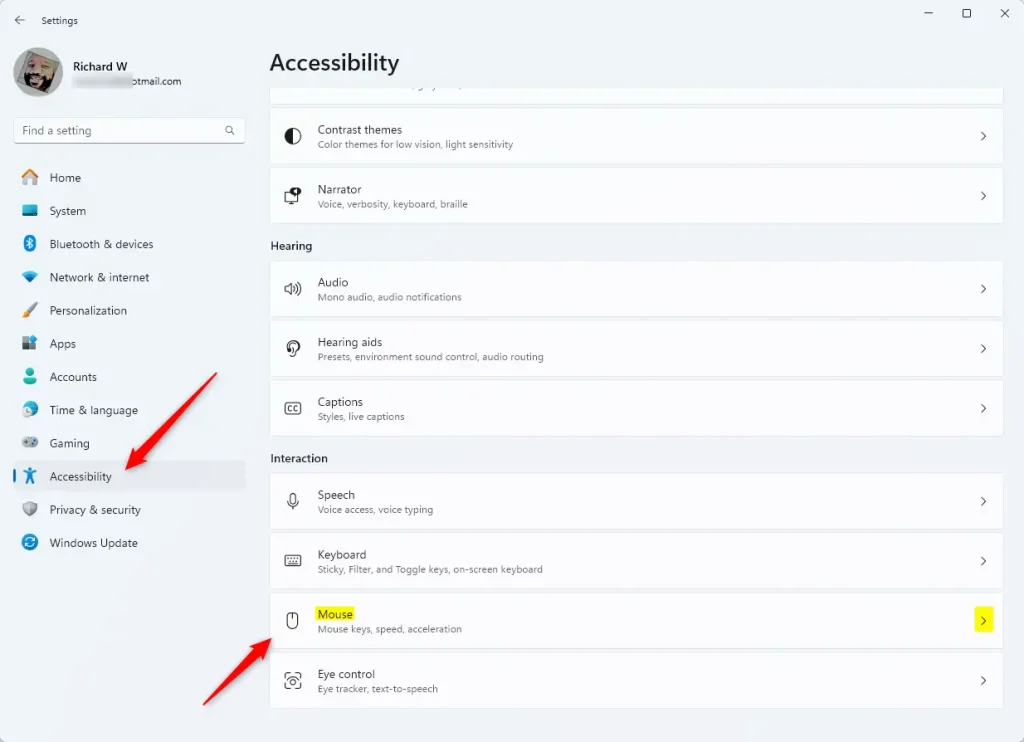
- Click the Accessibility button on the left side.
- Select the Mouse tile on the right to expand it.
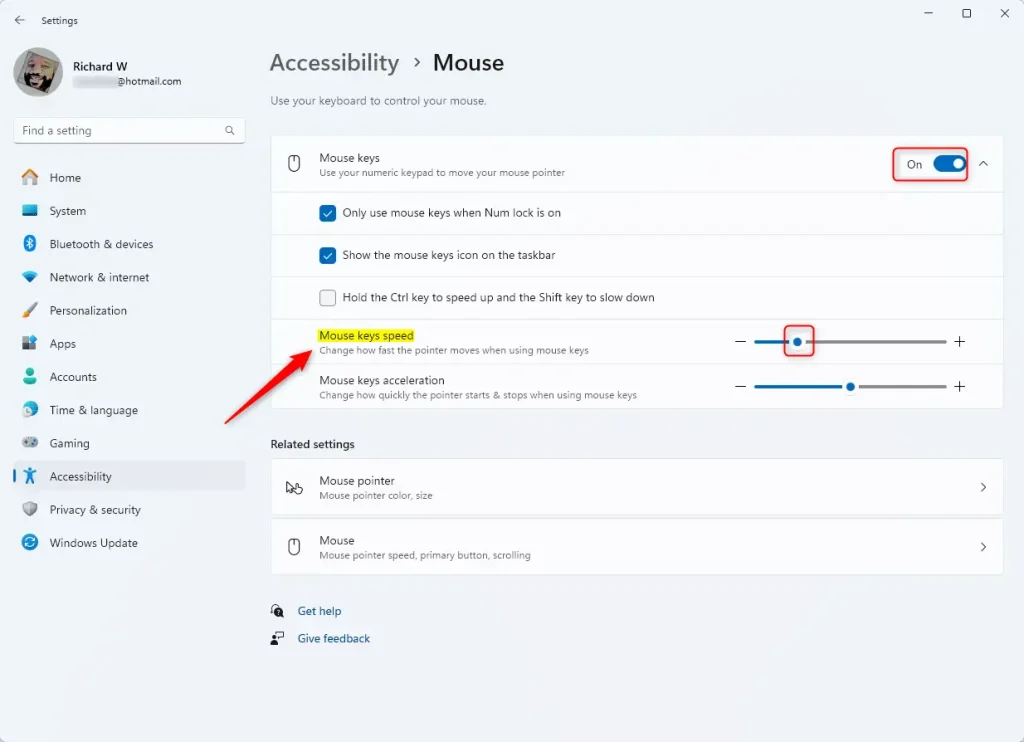
- Toggle the Mouse keys button to turn it On.
- Use the “Mouse pointer speed” slider to change how fast the pointer moves when using Mouse keys.
- Close the Settings app when you’re done.
Change Mouse keys speed using Windows Registry Editor
There’s another way to adjust Mouse keys speed. You can use the Windows Registry Editor. This method gives you more control over the exact speed value.
- ⚠️ Admin Privileges Required — Open Windows Registry editor as administrator.
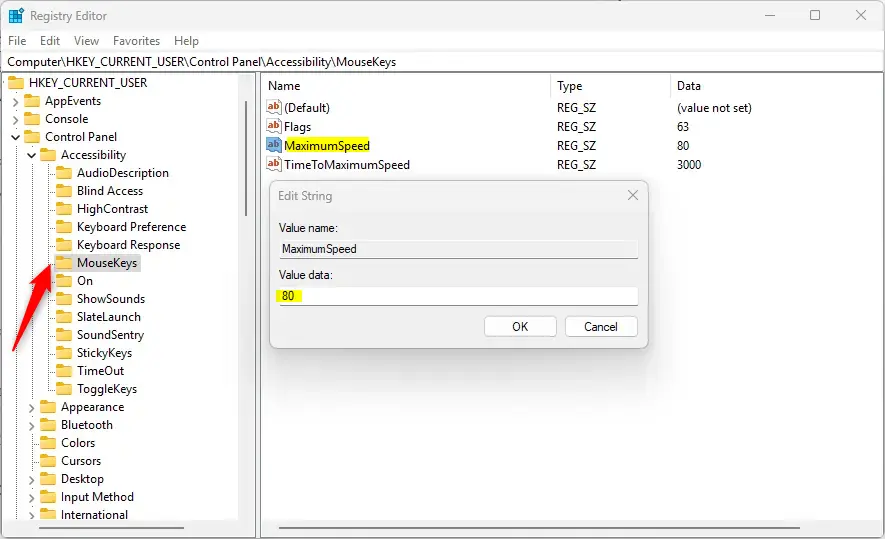
- Navigate to this registry path:
Computer\HKEY_CURRENT_USER\Control Panel\Accessibility\MouseKeys- Double-click the MaximumSpeed (REG_SZ) item in the right pane to open it.
- Enter a value between 10 (slower) and 358 (faster) to set your preferred pointer speed.
What if MaximumSpeed doesn’t exist? Right-click a blank area in the right pane. Select Create New, then String Value. Type “MaximumSpeed” as the name. Enter your value between 10 and 358.
- You may need to restart your computer to apply the changes.
Summary
Adjusting Mouse Keys speed improves navigation and control for users with accessibility needs. Windows offers two methods to make this change. The Settings app method is simpler and better for most users. The Registry Editor method gives advanced users more precise control over speed values. Choose the method that works best for you, and find a speed that feels comfortable and natural for your needs.
Leave a Reply