

This article explains how to add or remove the “Sign out” button from the Start menu, Alt+F4, and Power user (Win+X) menu in Windows 11.
The “Sign out” button in Windows is a feature that allows users to log out of their account and return to the login screen. It can be found in various locations, such as the Start menu, Alt+F4, and Power user (Win+X) menu.
When you click the “Sign out” button, Windows will close all your apps and return to the sign-in or login screen. You or another user can sign in by entering their password on the login screen to return to their desktop.
There could be a few reasons why someone might want to add or remove the “Sign out” button in Windows. For example, removing the option to prevent unauthorized access or data tampering in a shared computer or public setting might be desirable.
On the other hand, in a personal or work setting, having quick access to the “Sign out” button can be convenient for users who frequently switch between accounts or need to log out quickly.
Add or remove the “Sign out” button in Windows
As mentioned above, all users can use the “Sign out” button by default. Howerver, system admins can hide or display the button for users.
Here’s how to do it.
First, open the Local Group Policy Editor. (Search for ‘Edit group policy‘) on the Start menu.
Then, navigate the folders below:
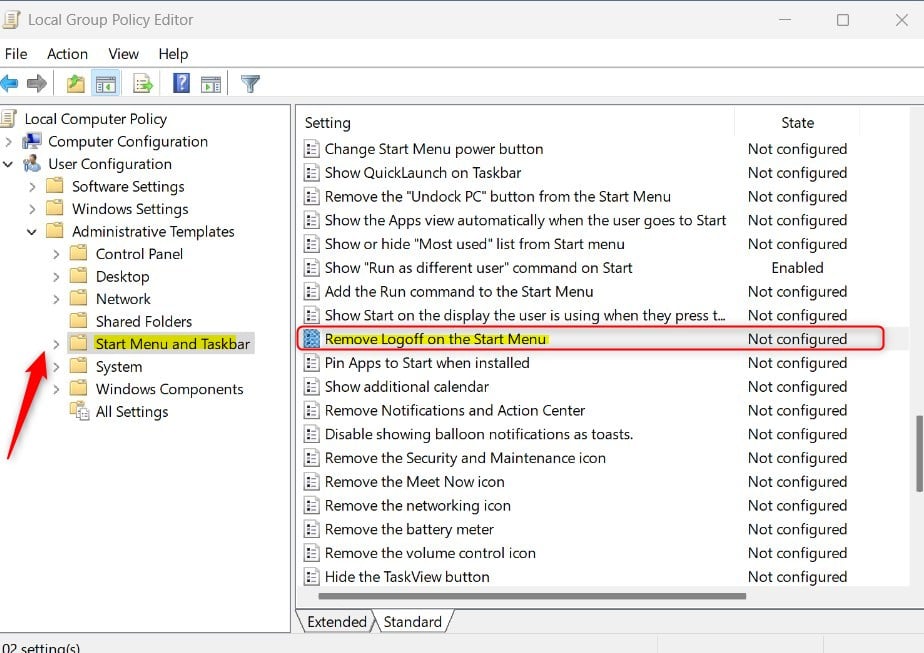
User Configuration -> Administrative Templates -> Start Menu and Taskbar
Then, in the Start Menu and Taskbar details pane on the right, locate and double-click the setting “Remove Logoff on the Start Menu. “
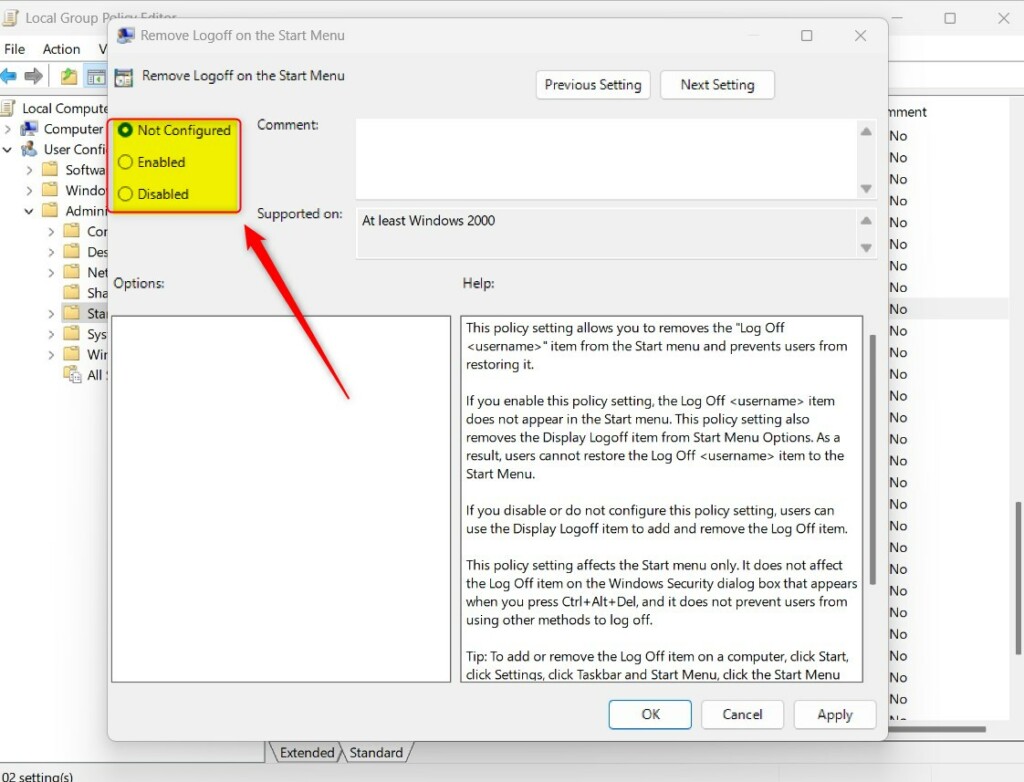
On the Remove Logoff on the Start Menu window, set the option to Not Configure, Enabled, or Disabled.
- Not Configured (default)
- Enabled – The Log Off <username> item does not appear in the Start menu.
- Disabled – Same as Not Configured – Users can use the Display Logoff item to add and remove the Log Off item.
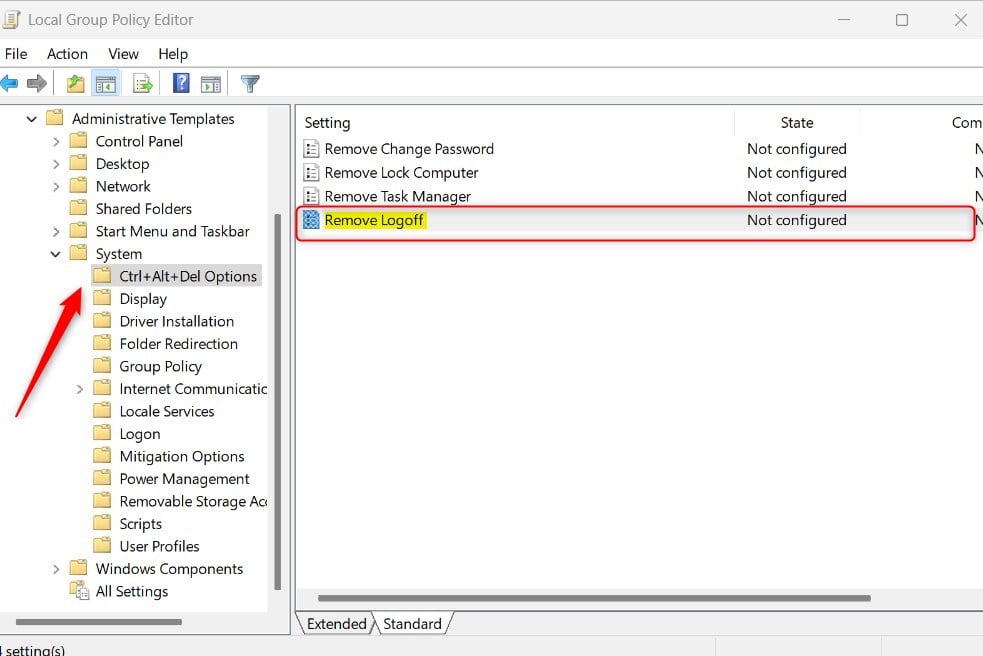
Next, expand the folders below.
User Configuration -> Administrative Templates -> System -> Ctrl+Alt+Del Options
Then, in the Ctrl+Alt+Del Options details pane on the right, locate and double-click the setting “Remove Logoff. “
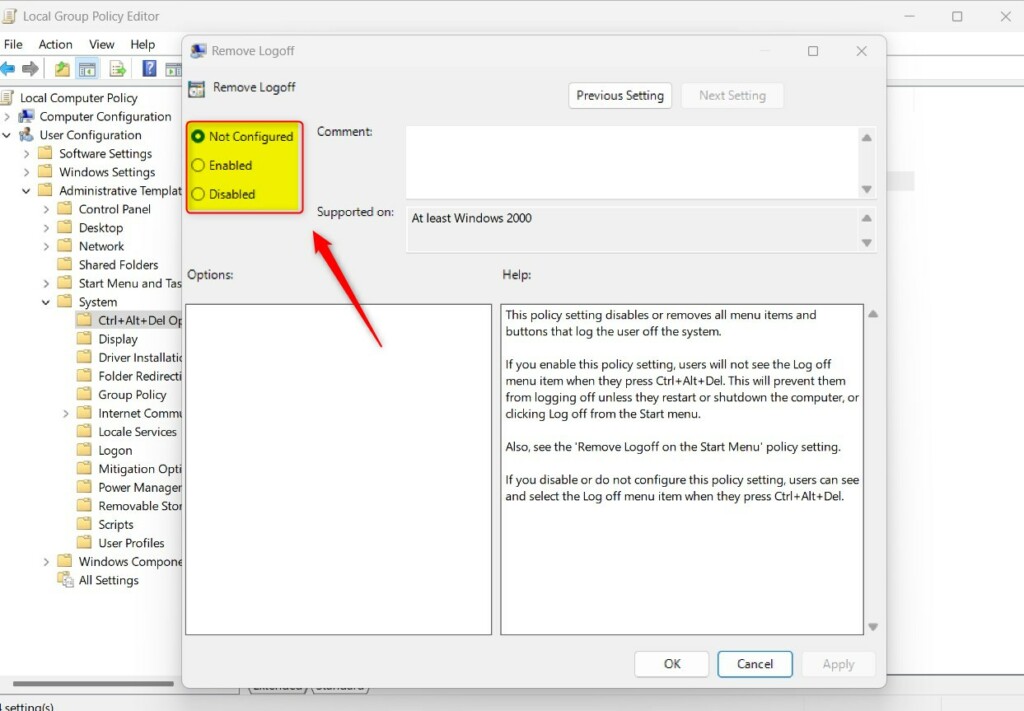
On the Remove Logoff window, select Not Configure, Enabled, or Disabled.
- Not Configured (default)
- Enabled – Users will not see the Log off menu item when they press Ctrl+Alt+Del.
- Disabled – Same as Not Configured – Users can see and select the Log off menu item when they press Ctrl+Alt+Del.
Add or remove the “Sign out” button using the Windows Registry Editor
Another way to add or remove the “Sign out’ button in Windows is to use the Windows Registry Editor.
To do that, navigate to the registry keys below. Perform the steps below for each key listed below.
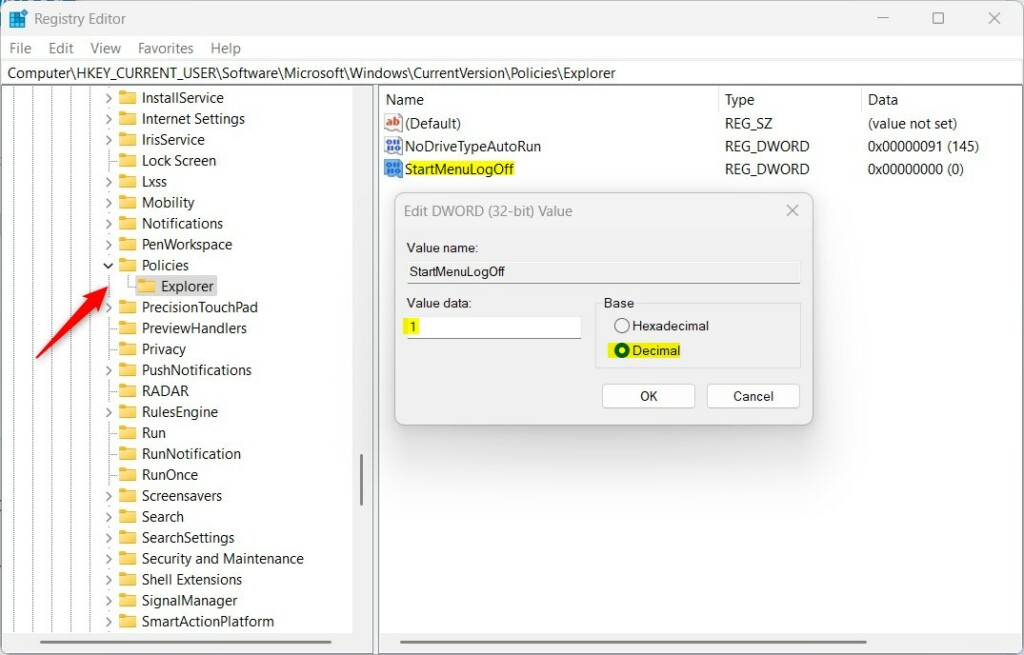
HKEY_CURRENT_USER\Software\Microsoft\Windows\CurrentVersion\Policies\Explorer
HKEY_LOCAL_MACHINE\SOFTWARE\Microsoft\Windows\CurrentVersion\Policies\Explorer
Next, double-click the StartMenuLogOff (REG_DWORD) name on the Explorer key’s right pane to open it. Then, enter a value 1 to disable or hide the “Sign out” button.
If you do not see the ‘StartMenuLogOff‘ item, simply right-click a blank area and create a new DWORD (32-bit) Value. Then, enter the name ‘StartMenuLogOff‘.
To add or display the “Sign out” button, simply delete the ‘StartMenuLogOff‘ item highlighted below.
Next, navigate to the folder key path below:
HKEY_CURRENT_USER\Software\Microsoft\Windows\CurrentVersion\Policies\Explorer
Then, double-click the NoLogoff (REG_DWORD) name on the Explorer key’s right pane to open it. Then, enter a value 1 to disable or hide the “Sign out” button.
If you do not see the ‘NoLogoff‘ item, simply right-click a blank area and create a new DWORD (32-bit) Value. Then, enter the name ‘NoLogoff.’
To add or display the “Sign out” button, simply delete the ‘NoLogoff‘ item highlighted below.

Save and restart your computer to apply the changes.
That should do it!
Conclusion:
- Adding or removing the “Sign out” button in Windows 11 can help control user access and convenience.
- System administrators can manage the “Sign out” button display using the Local Group Policy Editor or the Windows Registry Editor.
- Users can customize the availability of the “Sign out” option in different locations, such as the Start menu, Alt+F4, and Power user (Win+X) menu.
- It’s important to consider security and user experience when deciding whether to add or remove the “Sign out” button in a Windows 11 environment.
- Following these steps and considering the implications can help tailor the Windows 11 experience to specific user or organizational needs.

Leave a Reply