How to Connect a Wi-Fi Printer on Windows 11
You connect a Wi-Fi printer on Windows 11 by using the built-in Add Printer wizard in the Settings app.
A Wi-Fi printer is a device that links to your computer wirelessly through your network, ditching the clutter of USB cables. This convenience means any device on your network can print.
Imagine easily adding a Brother HL-L2390DW printer; everyone in your home can then print documents, reports, or even recipes without a second thought. Just ensure your printer and your Windows 11 PC are on the same network.
Once you’ve successfully added your printer, Windows 11 handles the connection automatically. It will then appear in your print dialog, ready for whatever you need to print next.
Connect your Wi-Fi printer by going to Settings > Bluetooth & devices > Printers & scanners, then click Add device. Windows 11 will search for available printers. Select your printer when it appears and follow the on-screen prompts to complete the connection.
How to connect a Wi-Fi printer on 🪟 Windows 11
Connecting a Wi-Fi printer on Windows 11 is straightforward using the built-in Settings app, and most modern printers will be found automatically.
- Open the Settings app. Press Windows key + I on your keyboard. %📂%LNK0%%
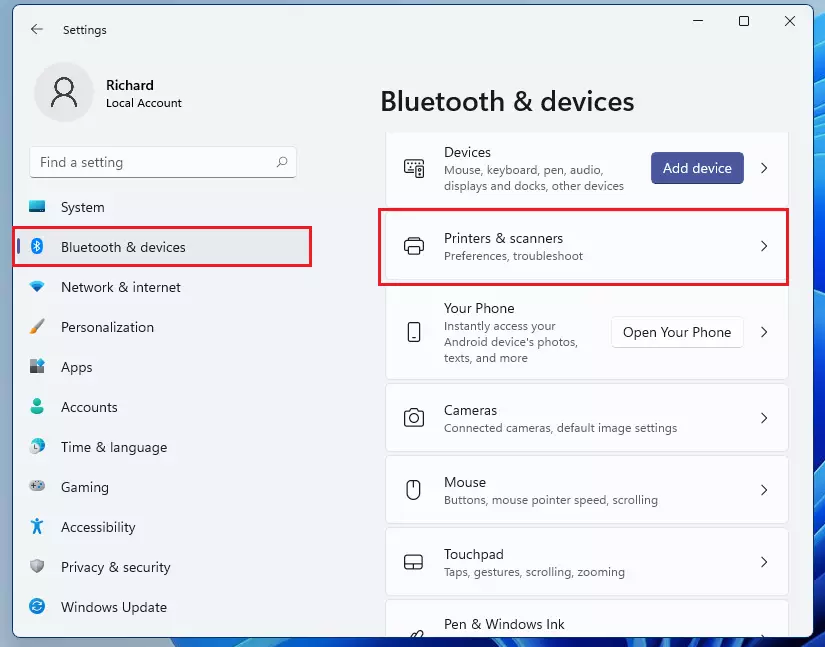
windows 11 settings button - In the menu on the left, click Bluetooth & devices.
- Select Printers & scanners on the right side of the screen.
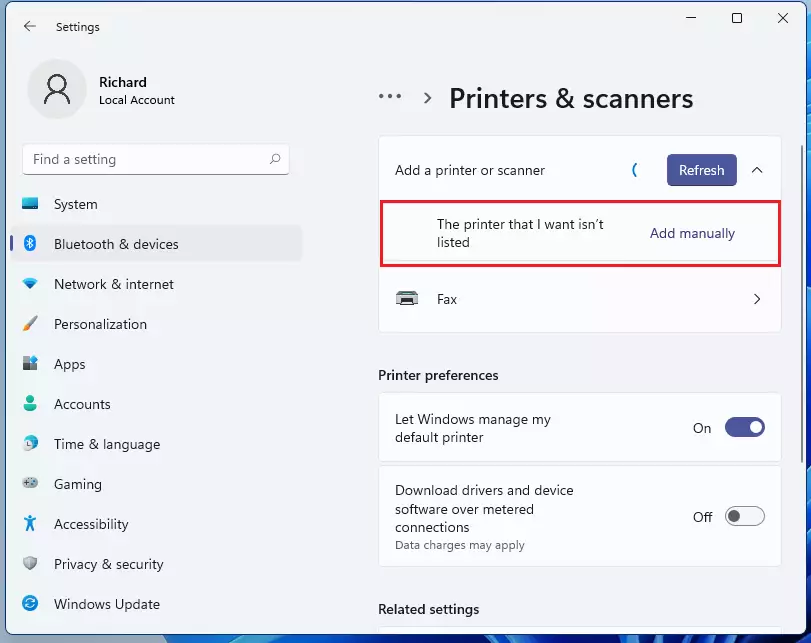
windows 11 add new scanners - Click the Add device button.

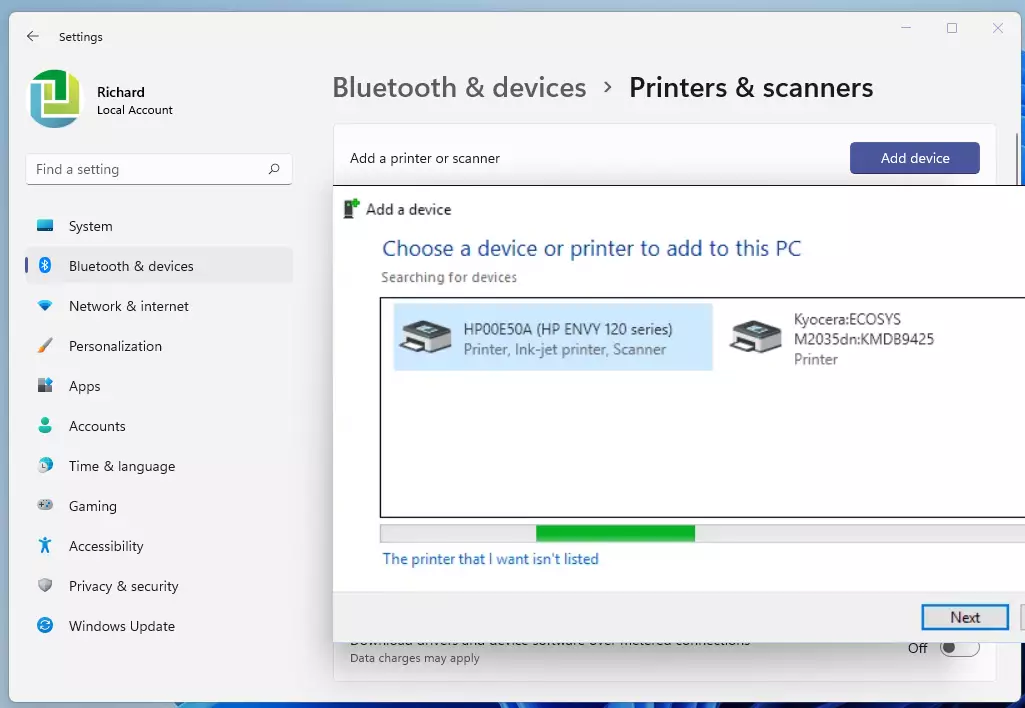
windows 11 add scanner - Wait for Windows to search for your printer. When it appears, click Add device.
Troubleshooting connectivity issues
If your printer shows as offline, check your network discovery settings. Ensure your network profile is set to Private rather than Public. You should also check the Print Spooler service. [Admin Privilege Required] Press Windows key + R, type services.msc, and ensure the Print Spooler is running.
Manual IP address configuration
When Windows can’t find your Wi-Fi printer automatically, you can connect it manually using its IP address, which you can usually find on the printer’s own screen or settings page.
- Click Add manually in the Printers & scanners menu.
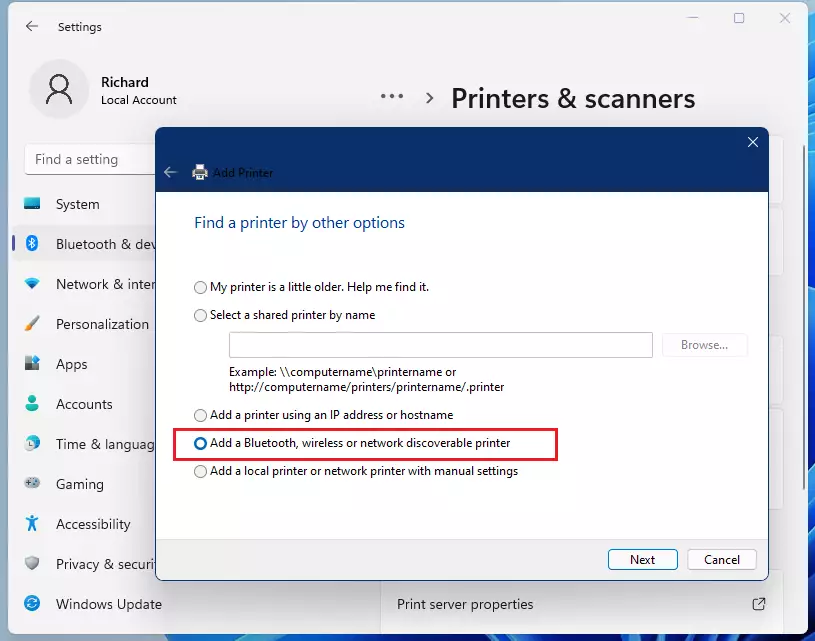
windows 11 manually add scanner - Select Add a printer using an IP address or hostname.
- Enter the IP address (e.g., 192.168.1.50) and the subnet mask if requested.
windows wireless scanner add - Follow the prompts to finish the setup.
windows 11 add wireless printer found
Driver installation vs. Plug-and-Play
While Windows Update often installs basic printer drivers automatically, downloading the official software from your printer maker’s website ensures you get all features, like scanning and ink monitoring.
Summary
To successfully connect your Wi-Fi printer on Windows 11, make sure both devices are on the same network, use the Settings app to add it, and try manual IP configuration if needed.Why does my printer show as offline in 🪟 Windows 11?
A printer often shows as offline if it has lost its connection to your Wi-Fi network or if the IP address has changed. Restart both your printer and your router to refresh the connection. Ensure your computer and printer are on the exact same network frequency, such as 2.4GHz.
How do I fix a printer not appearing on the same Wi-Fi network?
Check that Network Discovery is turned on in your Windows 11 Network and Sharing Center. Ensure your printer is not connected to a guest network that isolates devices. If the issue persists, manually enter the printer’s IP address using the ‘Add manually’ feature in the Printers & scanners menu.
Can I connect a printer via Wi-Fi Direct if I don’t have a router?
Yes, many modern printers support Wi-Fi Direct. This creates a direct wireless connection between your computer and the printer without needing a router. Enable Wi-Fi Direct on your printer’s control panel, then search for the printer’s network name in your Windows Wi-Fi settings to connect.


No comments yet — be the first to share your thoughts!