
This article explains how to add a drive to a Storage pool with Storage spaces on Windows 11.
Storage Spaces is a feature in Windows that allows you to combine multiple hard drives into a single virtual drive, also known as a storage pool. This feature enables you to create a more flexible and scalable storage solution for your computer.
With Storage spaces, you can create a Storage pool, rename a Storage pool, and more.
Using Storage spaces, you can add new drives to an existing Storage pool to provide more resiliency.
Adding additional drives to a storage pool on Windows can provide some benefits. For one, it can increase the pool’s capacity, allowing you to store more data. Additionally, it can enhance the pool’s redundancy so that if one drive fails, you still have a copy of your data on another drive.
This can help protect valuable data and prevent data loss. Finally, adding new drives to a storage pool can also improve the pool’s performance since more drives can work together to read and write data.
Add drive to a Storage pool with Storage spaces on Windows
As mentioned, users can add additional drives to an existing storage pool to enhance the pool’s redundancy.
Here’s how to do it.
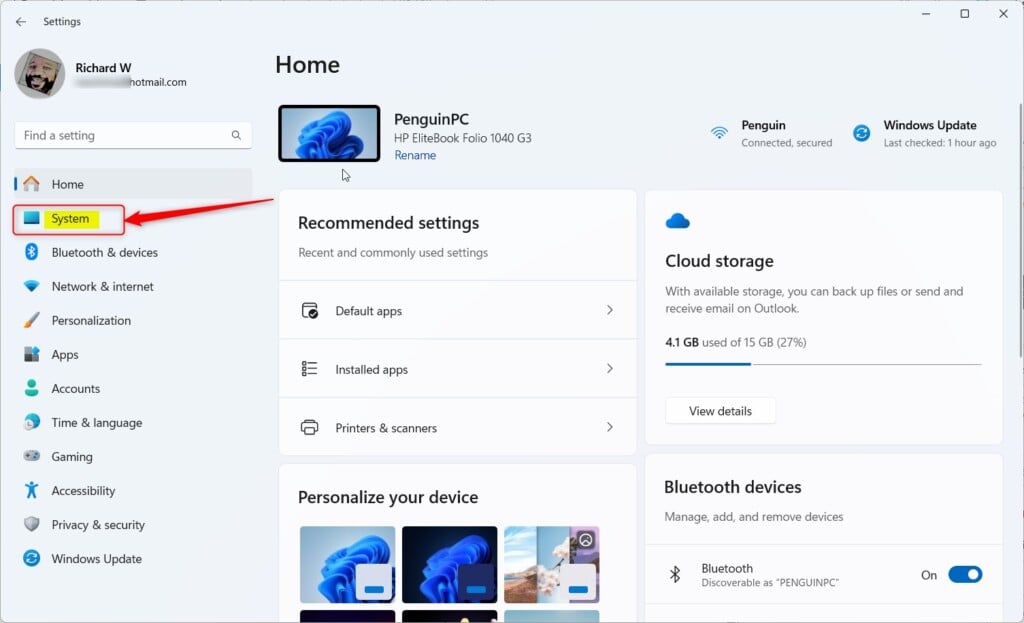
First, open the Windows Settings app.
You can do that by clicking on the Start menu and selecting Settings. Or press the keyboard shortcut (Windows key + I) to launch the Settings app.
When the Setting app opens, click the System button on the left.
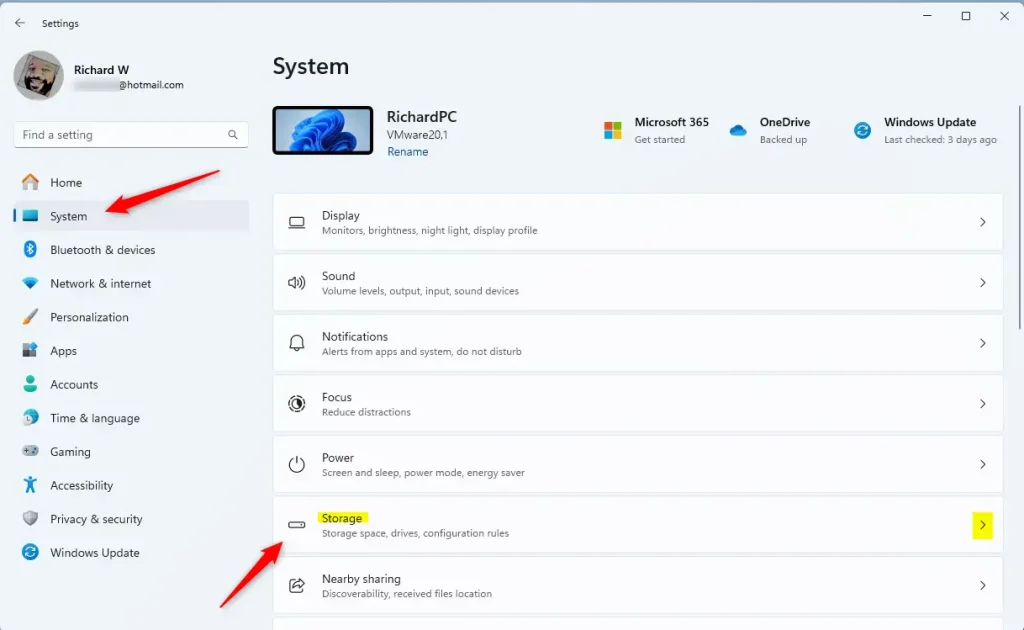
Select the Storage tile on the right to expand it.
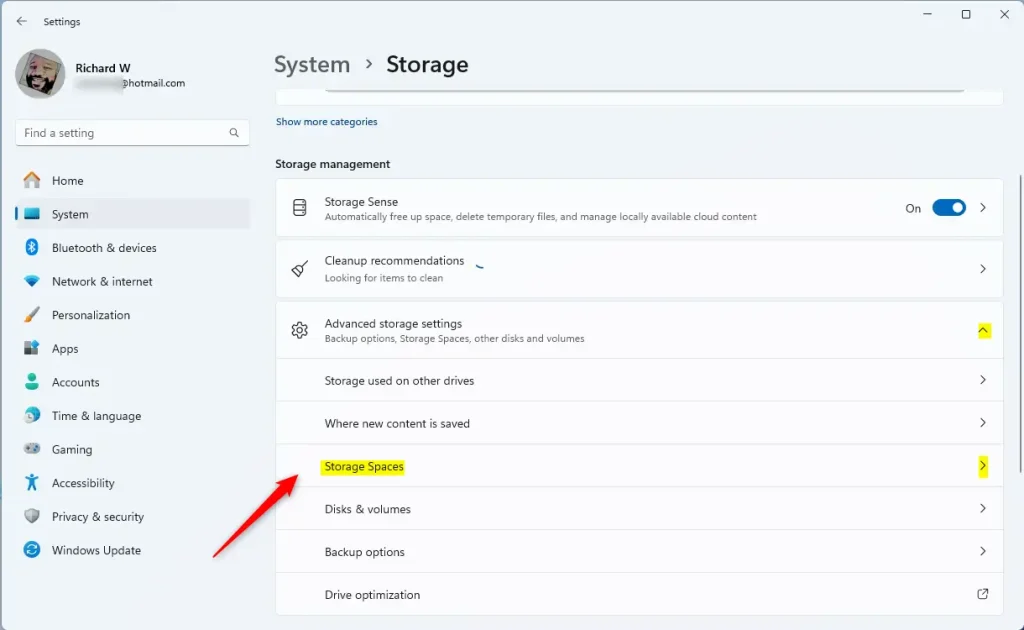
On the System -> Storage settings page, select and expand the “Advanced storage settings tile, and click the “Storage Spaces” tile to expand it.
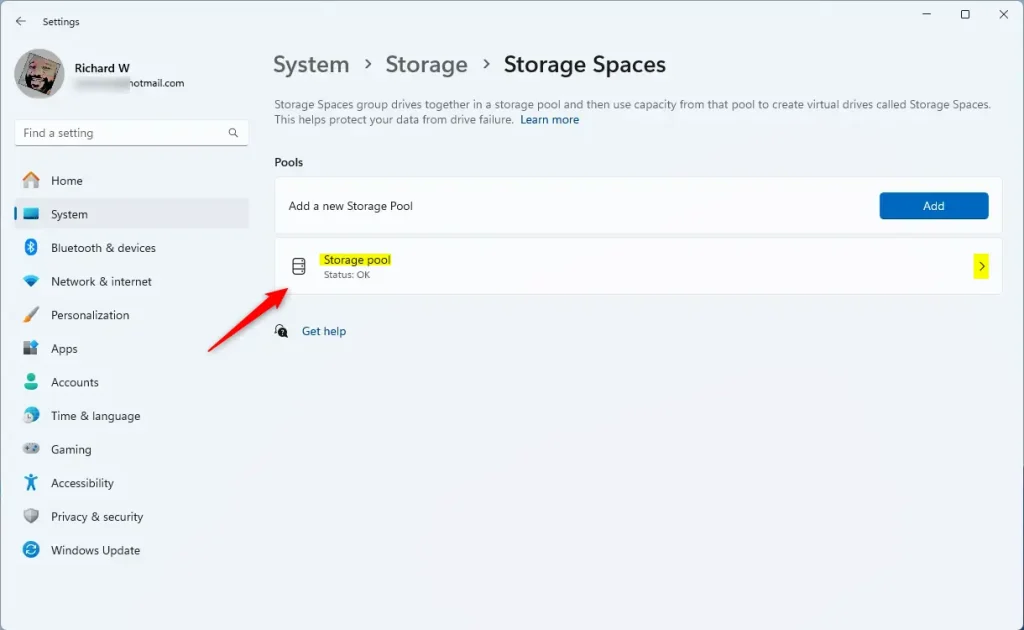
Next, select the “Storage pool” tile to expand it.
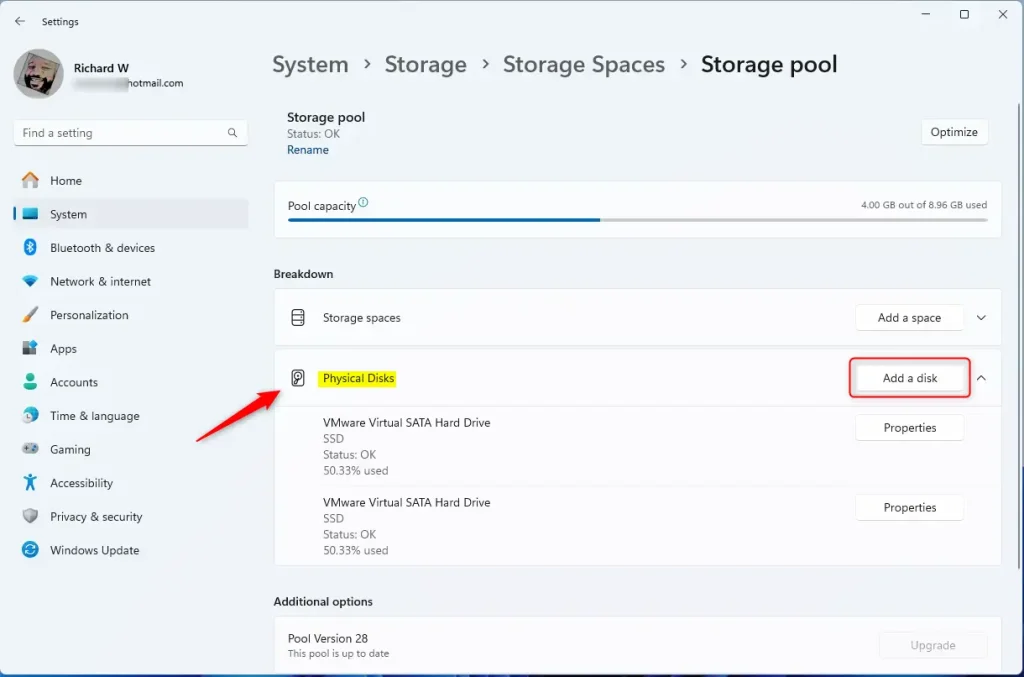
Next, select the “Physical Disk” tile, then click the “Add a disk” button to add a new disk drive to the pool.
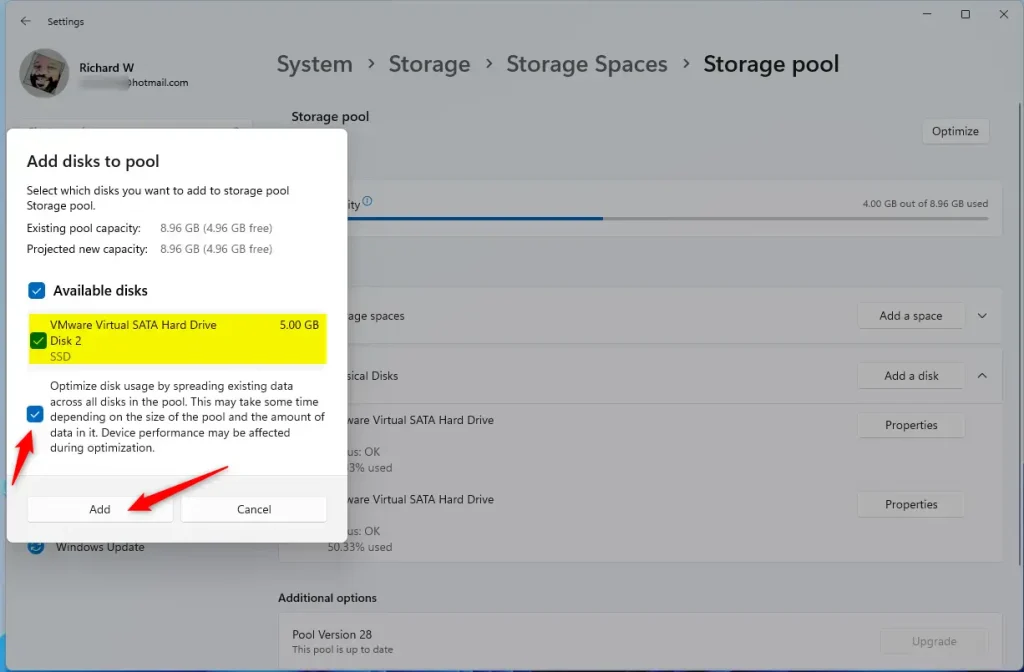
Select the disk to add to the pool and click the Add button.
The disk you select will be formatted and added to the pool.
You can close the Settings app when you are done.
That should do it!
Conclusion:
- Adding a drive to a Storage pool with Storage Spaces on Windows 11 can enhance redundancy and storage capacity.
- The process involves accessing the Windows Settings app, navigating the Storage and Storage Spaces settings, and adding a physical disk to the pool.
- By following these steps, users can create a more flexible and scalable storage solution for their computers, ultimately improving data protection and performance.


Leave a Reply