How to Enable PUA Protection in Microsoft Edge
You enable PUA (Potentially Unwanted Application) Protection in Microsoft Edge to block unwanted software that could negatively impact your PC.
PUA Protection is a security setting in Microsoft Edge that prevents the download and running of programs identified as Potentially Unwanted Applications. These are often not outright viruses but can slow down your computer, show annoying ads, or install unwanted browser extensions.
This feature scans files against a curated list of known PUAs. For example, Microsoft Edge version 91 and later includes significant improvements to its PUA blocking capabilities. You can easily check or enable this setting yourself.
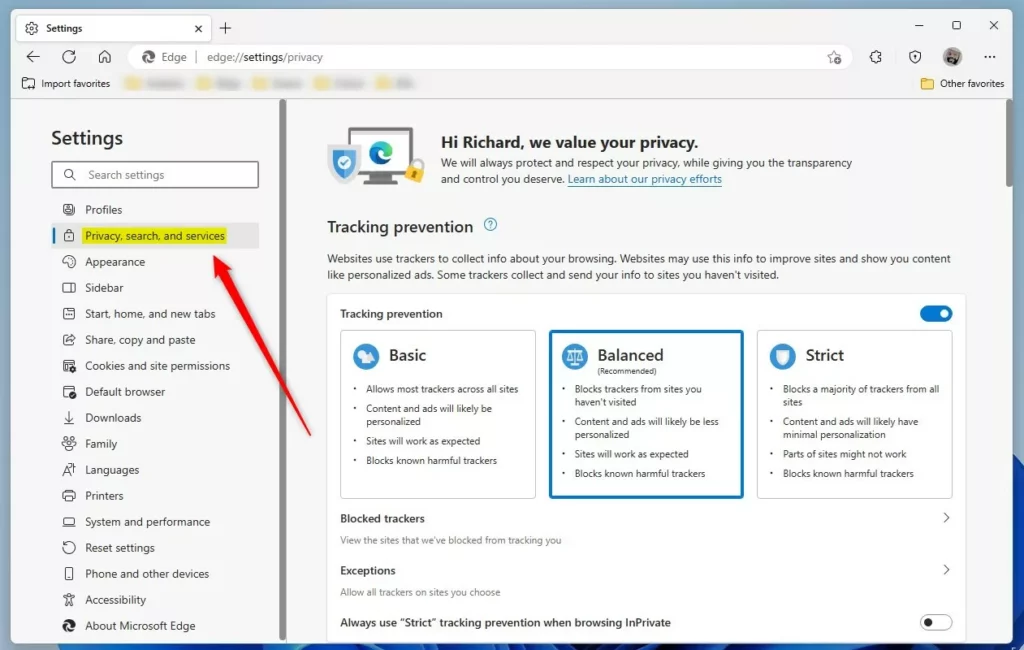
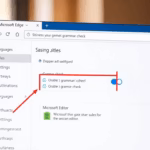
Navigate to Edge Settings, then Privacy, search, and services. Scroll down to the Security section and toggle the “Block potentially unwanted apps” switch to On or Off. This setting protects your PC from unwanted software.
How to Turn PUA Protection On or Off in Edge
Step 1Open Microsoft Edge
Start the Edge browser on your computer.
Step 2 Go to Settings
Look at the top right corner. Click the three horizontal dots button (labeled “Settings and more”). Then click Settings. You can also press Ctrl+comma to open Settings directly.
Step 3Find Privacy Settings
On the left side panel, click Privacy, search, and services.
Step 4Change PUA Protection
Turning PUA Protection on in Microsoft Edge stops unwanted apps from installing on your PC. You can easily switch PUA Protection on or off in the Edge settings menu under the Security section by toggling the ‘Block potentially unwanted apps’ option. This feature works with SmartScreen for better security.
Note: PUA Protection works alongside Edge’s SmartScreen feature. Both should remain enabled for comprehensive protection.
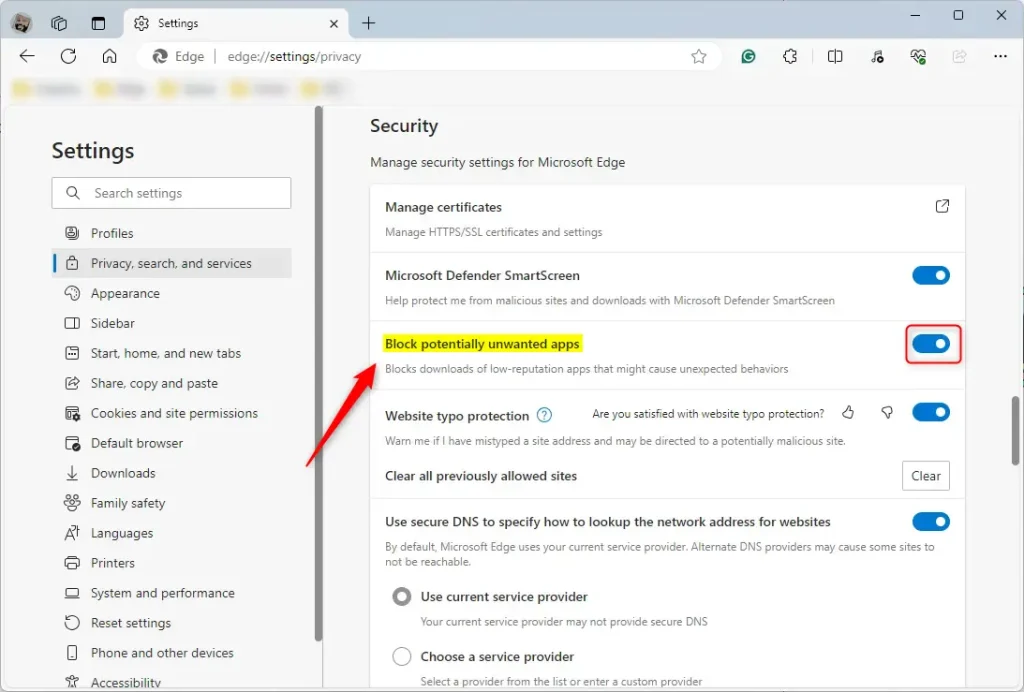
What happens? When you turn it on, Edge blocks unwanted programs. When you turn it off, Edge allows them.
Step 5Close Settings
You are done. Close the Settings page.
How to Control PUA Using Windows Registry
There is another way to manage PUA Protection. You can use the Windows Registry Editor. This method works for all users on your computer.
Step 1Open Registry Editor (Admin Required) %📂%SC0%copy%
Press ⊞ Win+R, type regedit and press Enter. Click Yes to run as administrator. You need admin rights for this step.
Step 2Navigate to the Edge Folder
Go to this location in the registry:
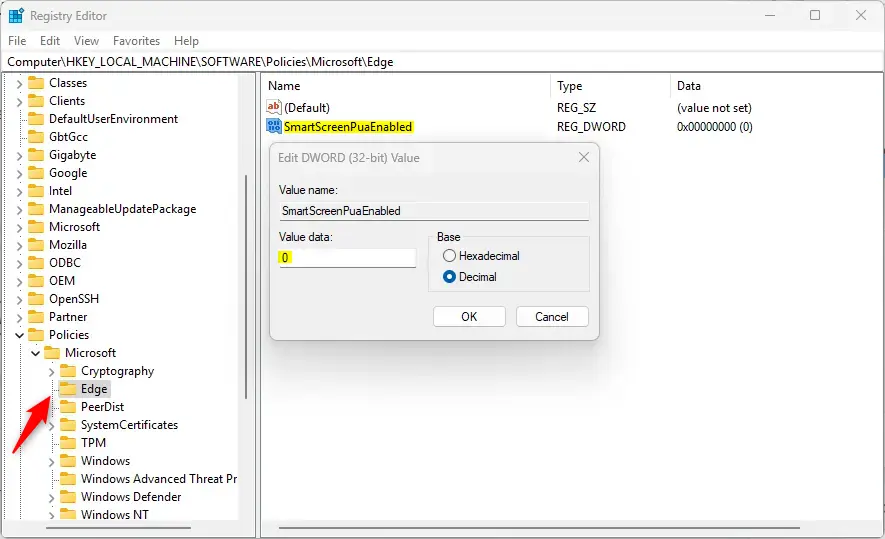
Computer\🗝️HKEY_LOCAL_MACHINE\SOFTWARE\Policies\Microsoft\Edge
Step 3Find or Create SmartScreenPuaEnabled
To control PUA Protection using the Windows Registry, you need to find or create the SmartScreenPuaEnabled setting. Look in the right-hand panel for SmartScreenPuaEnabled (it’s a REG_DWORD type). If it’s not there, right-click an empty space, select New, then DWORD (32-bit) Value, and name it SmartScreenPuaEnabled.
Look at the right side panel. Find the item called SmartScreenPuaEnabled (REG_DWORD). Double-click it to open it.
If you do not see it: Right-click a blank area on the right side. Click New and then DWORD (32-bit) Value. Name it SmartScreenPuaEnabled.
Step 4Set the Value
Type 1 to turn PUA blocking on for everyone. Type 0 to turn PUA blocking off for everyone.
Step 5 Restart Your Computer
You may need to restart your computer for the changes to take effect.
What happens? These changes affect all users on your computer. The registry method is stronger than the browser settings.
To Go Back to Normal
Delete the SmartScreenPuaEnabled item you created. This restores the default setting.
General
For managed devices or organizations: PUA Protection can also be controlled via Group Policy. Check gpedit.msc under Computer Configuration > Administrative Templates > Microsoft Edge for centralized management.
Summary
PUA Protection in Microsoft Edge is a handy tool that stops unwanted programs from getting onto your computer. You can turn it on or off easily using the Edge settings, or if you’re comfortable with advanced settings, you can use the Windows Registry Editor to change the SmartScreenPuaEnabled value.
- Easy way: Use the Edge Settings menu under Privacy, search, and services.
- Advanced way: Use the Windows Registry Editor to change the SmartScreenPuaEnabled value (requires admin rights).
Most people should leave PUA Protection turned on. Turn it off only if you need to install a specific program that is blocked. Always be careful when disabling security features on your computer.
Additional security: Consider enabling Edge’s Enhanced tracking prevention and Tracking prevention features for comprehensive protection against unwanted content and tracking.
Is pua a malware?
PUA isn't considered a virus, malware, or other type of threat, but it might perform actions on endpoints that adversely affect endpoint performance or use.
How to prevent pua?
Enable Security Features: Use built-in security features that block PUAs, like Microsoft Defender SmartScreen for Windows. Install Antivirus or Antimalware Software: Choose tools that can actively detect and remove PUAs. Perform Regular Scans: Routine scans help catch PUAs and maintain your system's integrity.
How to remove pua virus?
So the virus won't be active. Now that we're in safe mode let's track down and delete the virus files. Open file explorer and head to this location. See into users into your username.
Was this guide helpful?

About the Author
Richard
Tech Writer, IT Professional
Richard, a writer for Geek Rewind, is a tech enthusiast who loves breaking down complex IT topics into simple, easy-to-understand ideas. With years of hands-on experience in system administration and enterprise IT operations, he’s developed a knack for offering practical tips and solutions. Richard aims to make technology more accessible and actionable. He's deeply committed to the Geek Rewind community, always ready to answer questions and engage in discussions.

No comments yet — be the first to share your thoughts!