
This guide shows you how to turn on or turn off Virtual Machine Platform in Windows 11.
Windows Hypervisor Platform (WHP) lets programs like VirtualBox or QEMU use the virtualization features built into Windows. It helps developers create virtual machines and emulators by giving direct access to the hypervisor layer.
Why enable Virtual Machine Platform? It unlocks virtualization support in Windows so you can run virtual machines and test different operating systems.
Enable Virtual Machine Platform Using Settings
This is the easiest way to turn on Virtual Machine Platform.
- Open the Windows Settings app. Click the Start menu and select Settings. Or press Windows key + I.
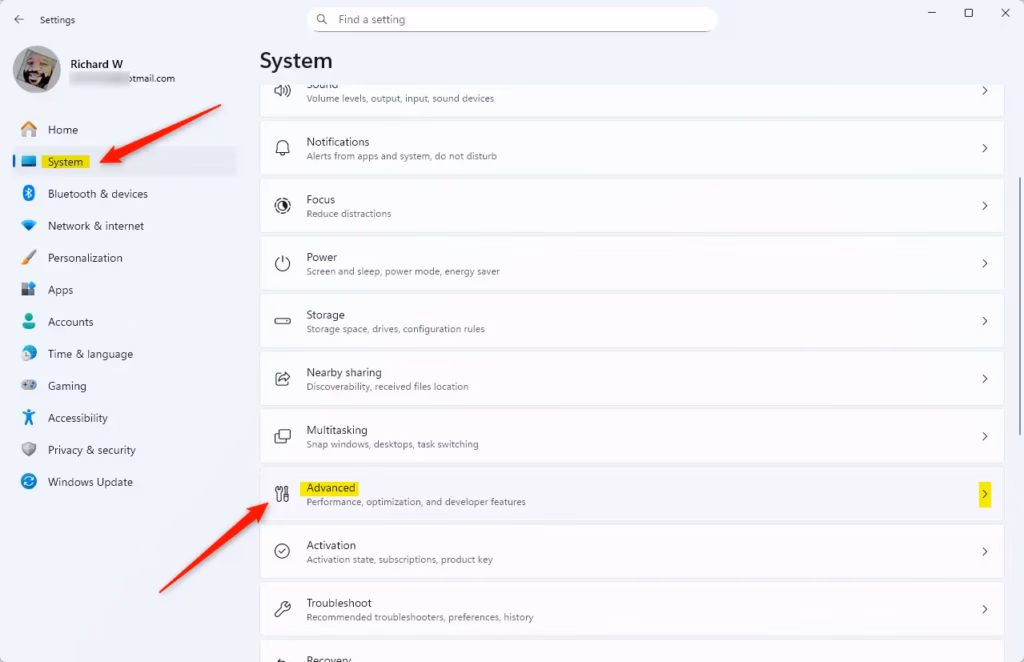
- Click System on the left side.
- Select Advanced on the right to expand it.
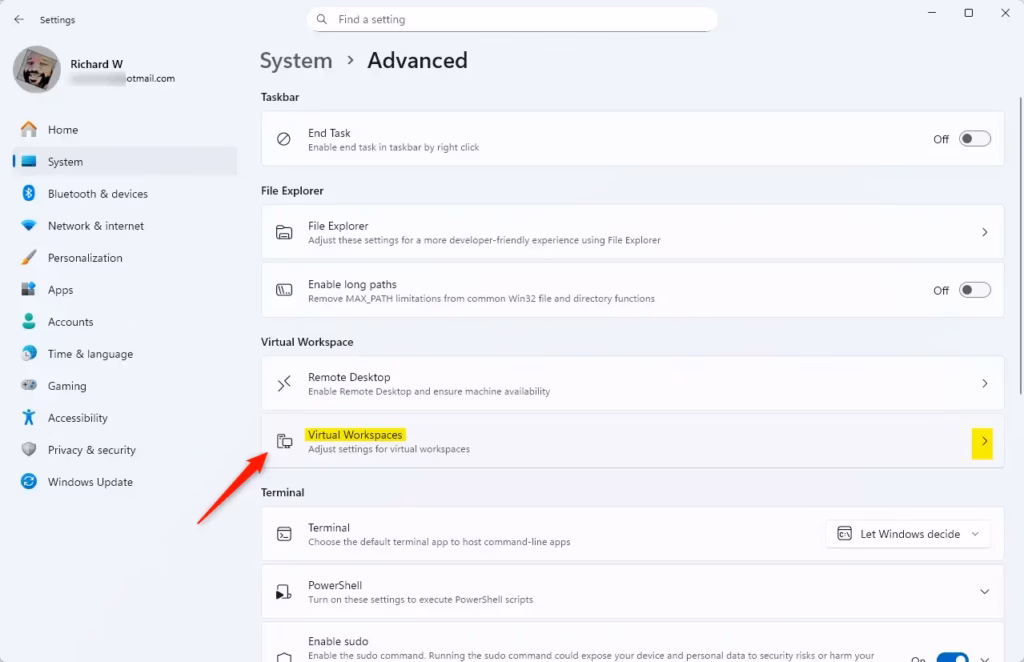
- Click on Virtual Workspaces to expand it.
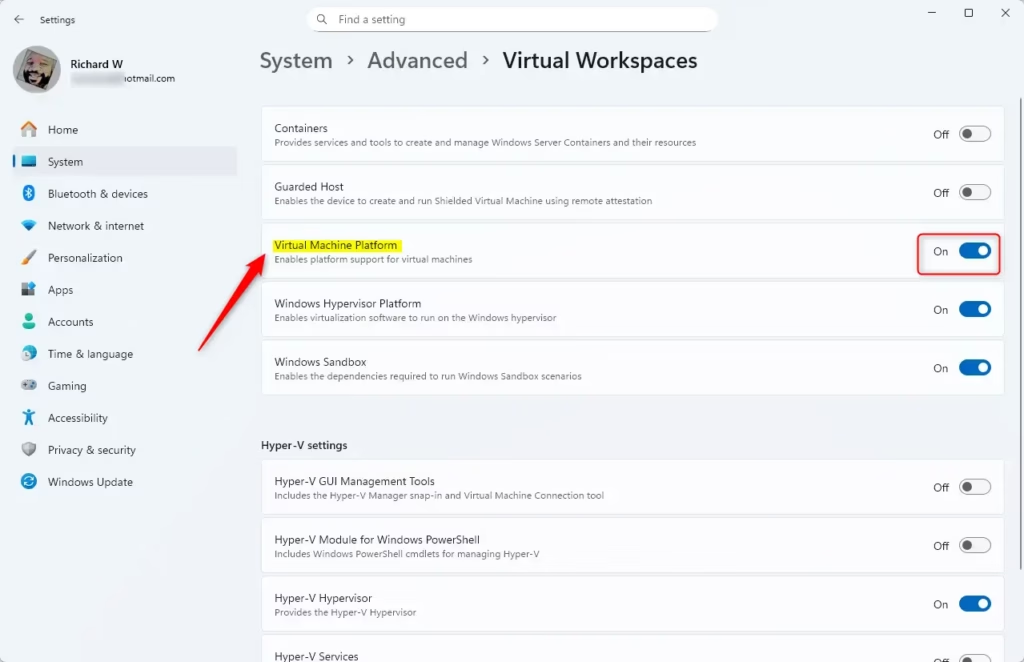
- Toggle the Virtual Machine Platform button on or off.
- Close the Settings app.
Enable Virtual Machine Platform Using Control Panel
This method uses the older Control Panel app.
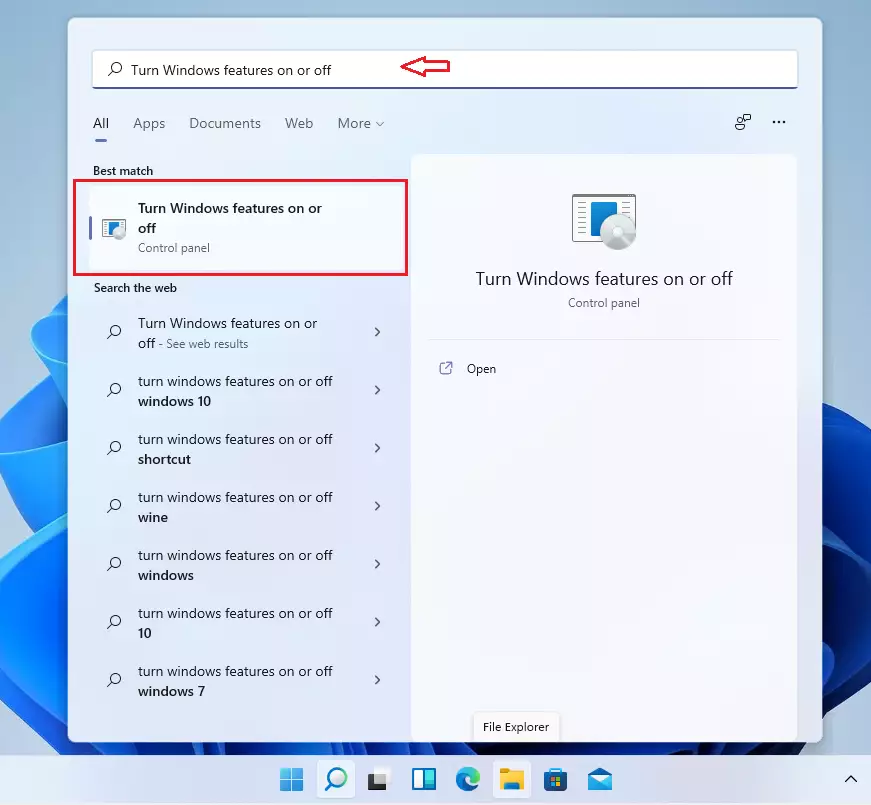
- Click Start and type “Turn Windows features on or off” in the search bar.
- Select the result to open the Windows Features pane.
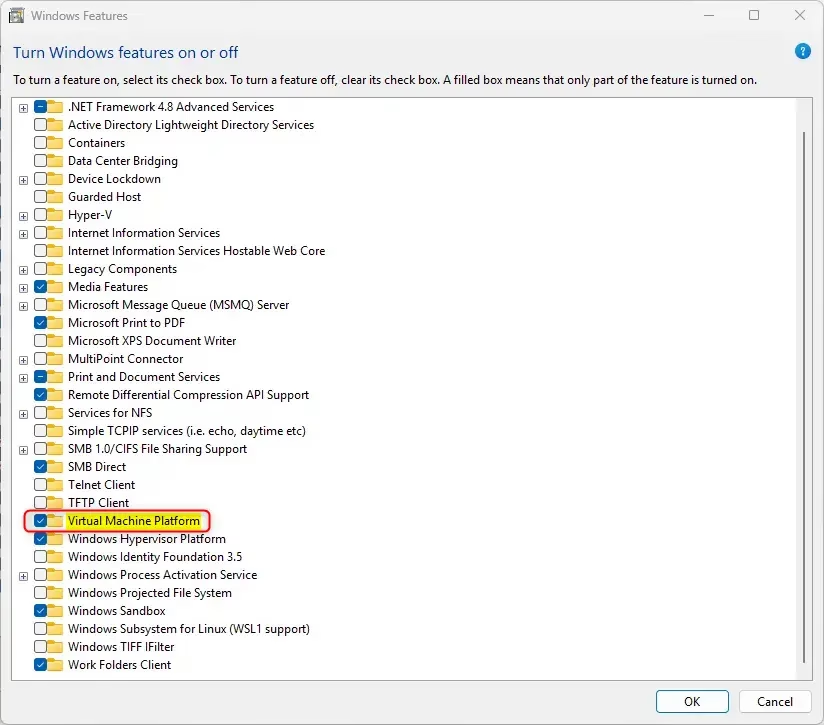
- Scroll down and check the box next to Virtual Machine Platform to turn it on.
- To turn it off, uncheck the box.
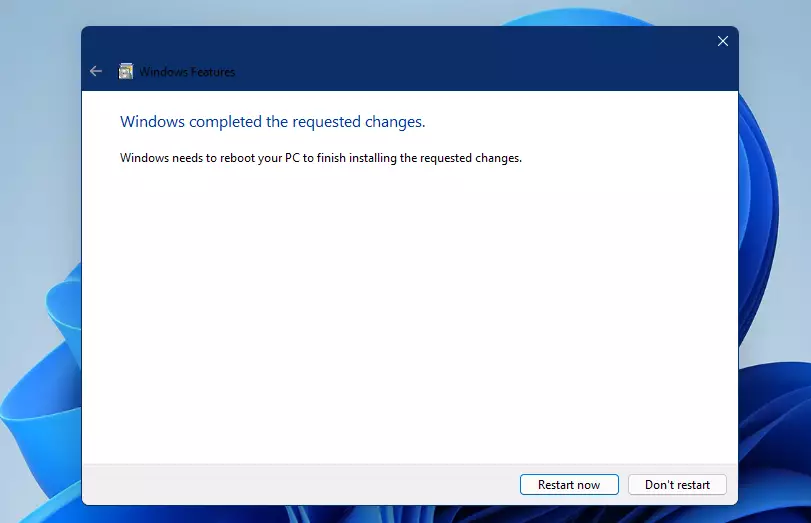
What happens next? You’ll see a message asking you to restart your computer to complete the process.
- Restart your computer.
After restarting, Virtual Machine Platform will be active. You can now create virtual machines and run different operating systems.
Enable Virtual Machine Platform Using Command Prompt
You can also enable this feature through the Command Prompt.
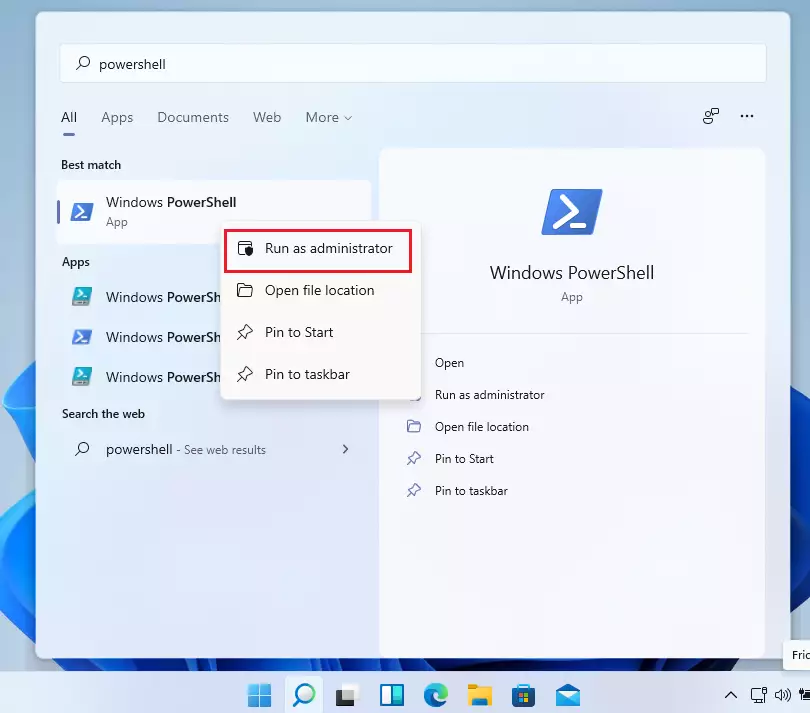
- [REQUIRES ADMIN PRIVILEGES] Click Start, search for Command Prompt, right-click on it, and select Run as administrator.

- Copy and paste this command, then press Enter:
DISM /Online /Enable-Feature /FeatureName:"VirtualMachinePlatform"To turn it off, run this command instead:
DISM /Online /Disable-Feature /FeatureName:"VirtualMachinePlatform"- Restart your computer.
Virtual Machine Platform should now be installed and enabled.
Enable Virtual Machine Platform Using PowerShell
If you prefer PowerShell, you can use it to turn the feature on or off.
- [REQUIRES ADMIN PRIVILEGES] Open the Start menu and search for PowerShell.
- Type this command to enable Virtual Machine Platform:
Enable-WindowsOptionalFeature -Online -FeatureName "VirtualMachinePlatform"To disable it, run this command instead:
Disable-WindowsOptionalFeature -Online -FeatureName "VirtualMachinePlatform"- Restart your computer for the changes to take effect.
Summary
Virtual Machine Platform is a Windows 11 feature that lets you create and run virtual machines on your computer. You have four ways to enable or disable it:
- Settings app — The easiest method for most users
- Control Panel — Uses the older Windows features panel
- Command Prompt — Requires admin privileges; use the DISM command
- PowerShell — Requires admin privileges; use the Enable-WindowsOptionalFeature command
No matter which method you choose, always restart your computer after enabling or disabling the feature. Once enabled, you can create virtual machines and test different operating systems for development and testing purposes.
Leave a Reply Cancel reply