
This article describes the steps to create shares with full access in Windows 10.
When Windows shares are created, everyone has full access, and everybody can access the shared location without prompting for passwords or logins.
Windows shares with full access, enabling everyone to access the shared location without prompting for passwords or logins. This allows users to create, delete, and modify folders and files. This setup is perfect for locations where users are granted access to temporary store content and quickly remove it to a secure location.
However, it is essential to note that since everyone has the right to delete, create, and modify, it is not a suitable place to store content for a long time.
In part two of this post, I’ll show you how to configure a Linux machine to mount the shares created on the Windows machine.
To get started with creating Windows Share for everyone to have full access, follow the steps below:
Create the Folder you Want to Share
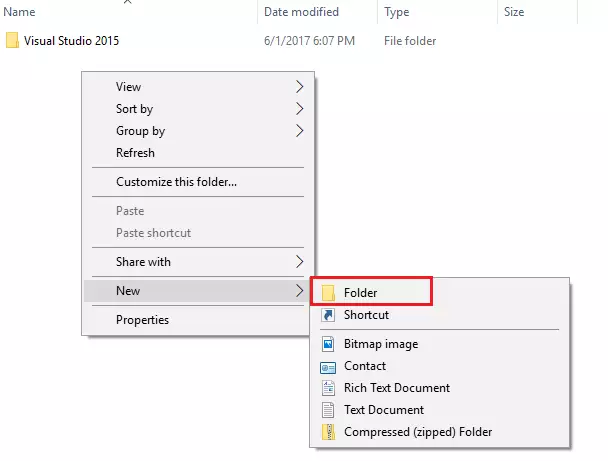
To share a folder, you must create or use existing folders. To make a folder, open Windows File Explorer, right-click a blank area, select New –> Folder, and give the share a name.
For this post, we’re creating a folder called PublicShare.
Create a share
Now that you’ve created the folder, please continue with the steps below to share it.
Right-click the Start button and select Computer Management or search for it.

Then, expand Shared Folders, right-click Shares, and select New Share.

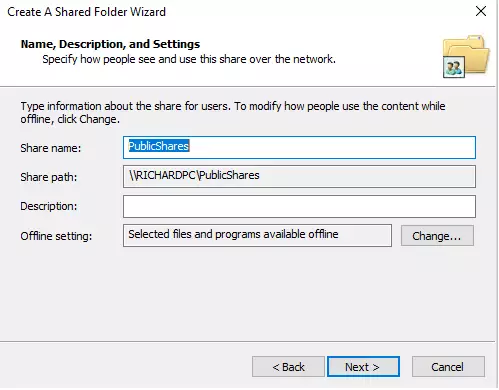
Follow the wizard, browse the Folder you created, and select it. Then click Next.

Then, provide a name for the share or keep the folder name as the share name. You should also see the shared path. You type this line in the file browser to access the share.
When you’re done, click Next to continue.
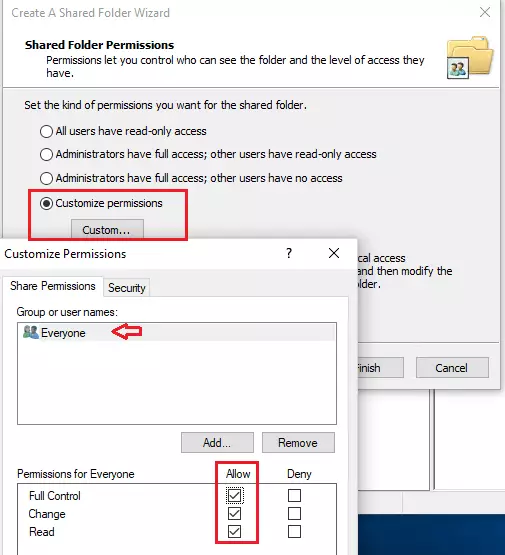
After that, select Customize permissions on the shared folder permissions dialog box. Then select Everyone and check the allow box for Full Control.
Click OK and click Finish.
Click Finish to complete the wizard.
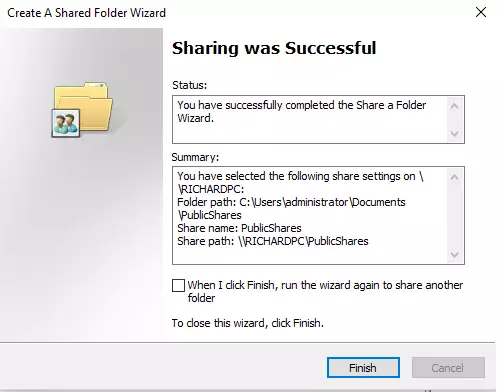
You’re done.
To access the share, type \\COMPUTERNAME\SharedName
This is how to create shares on Windows computers. It should apply to Windows XP through 10.
In our next post, we’ll show you how to mount the shared location on Linux machines, including Ubuntu.
Enjoy!
Leave a Reply