How to Change Text Size in Windows 11
If the words on your screen look too small or too big, you can fix it! Windows 11 lets you change text size easily. Make the text bigger or smaller to match what works best for you.
Why Change Your Text Size?
- Small letters are hard to read.
- Bigger text reduces eye strain. You can work longer without discomfort.
- It makes your computer easier to use for everyone.
- You can always change it back anytime.
How to Change Text Size in Windows 11
Follow these simple steps:
- Open Settings. Click the Start button (Windows icon) in the bottom-left corner. Then click the Settings gear icon. Or press
Windows key + Ion your keyboard. - Go to Accessibility. Look at the left side menu in the Settings window. Click on Accessibility.
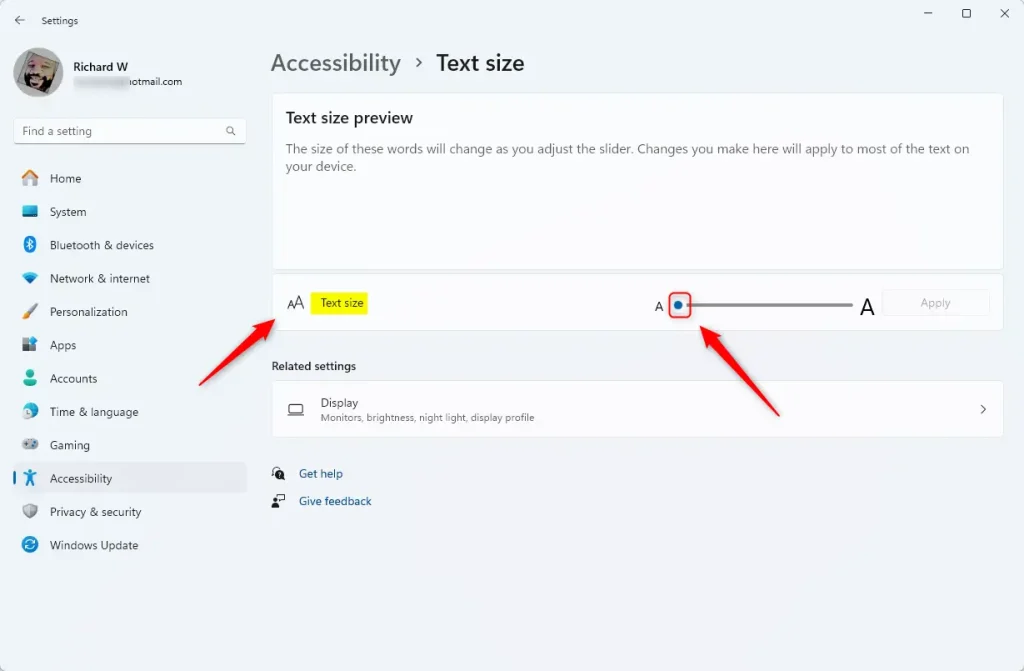
- Find Text size. On the right side, click on the Text size option.
- Use the slider. You will see a slider bar. Move it to the right to make text bigger. Move it to the left to make text smaller.
- See a preview. Just below the slider, you’ll see a preview box. This shows you how the text will look with your new size.
- Apply your changes. When you are happy with the size, click the Apply button to save your new text size.
Here is what the Accessibility > Text size screen looks like:
And here is the slider you use to change the text size:
What Happens When You Change Text Size?
Your Windows 11 text gets bigger or smaller right away. Menus, buttons, and words in programs will all change size. The preview box shows you exactly what it will look like before you click Apply.
For more tips on using Windows 11, visit the Windows Settings guide.
Summary
Changing text size in Windows 11 is quick and easy. Open Settings, go to Accessibility, and find the Text size option. Use the slider to make text bigger or smaller, preview your choice, and click Apply. This helps you read better and reduces eye strain. You can change it back anytime you want.
Was this guide helpful?

About the Author
Richard
Tech Writer, IT Professional
Richard, a writer for Geek Rewind, is a tech enthusiast who loves breaking down complex IT topics into simple, easy-to-understand ideas. With years of hands-on experience in system administration and enterprise IT operations, he’s developed a knack for offering practical tips and solutions. Richard aims to make technology more accessible and actionable. He's deeply committed to the Geek Rewind community, always ready to answer questions and engage in discussions.

No comments yet — be the first to share your thoughts!