
This article explains how to install ProFTPD on Ubuntu 24.04.
ProFTPD is an open-source FTP server software that provides a secure and efficient way to transfer files over the Internet. It supports secure connections through TLS/SSL, which helps protect data during transmission.
ProFTPD is known for its stability and performance, making it a reliable choice for serving files.
Installing ProFTPD on Ubuntu is a breeze, giving you robust and secure FTP capabilities with many customizable options.
Install ProFTPD
On Ubuntu, you can install ProFTPD using the command below. There are no additional packages to install since ProFTPD packages are included in Ubuntu’s default repositories.
sudo apt update
sudo apt install proftpd-core
Once installed, its default configuration file is at [/etc/proftpd/proftpd.conf].
Configure basic settings
To get started, run the command below to open its configuration file.
sudo nano /etc/proftpd/proftpd.conf
Then, adjust the server settings based on your environment.
# Set off to disable IPv6 support which is annoying on IPv4 only boxes.
# Comment out to turn off IPv6 if you don't need it

#UseIPv6 on

#
#Change the server name to match your environment

ServerName "proftpd.example.com"

# Use this to jail all users in their homes
# line 39 : uncomment (specify root directory for chroot)

DefaultRoot ~

#
..........
..........
Save the file and exit.
Next, run the command below to open the ftpusers file. This file contains all accounts you do not want access to the FTP server.
sudo nano /etc/ftpusers
Add your account name to the file to prohibit access. Add other accounts on separate lines to prevent more users from accessing FTP.
root
Save and exit the file, then restart Pro-FTPD.
sudo systemctl restart proftpd
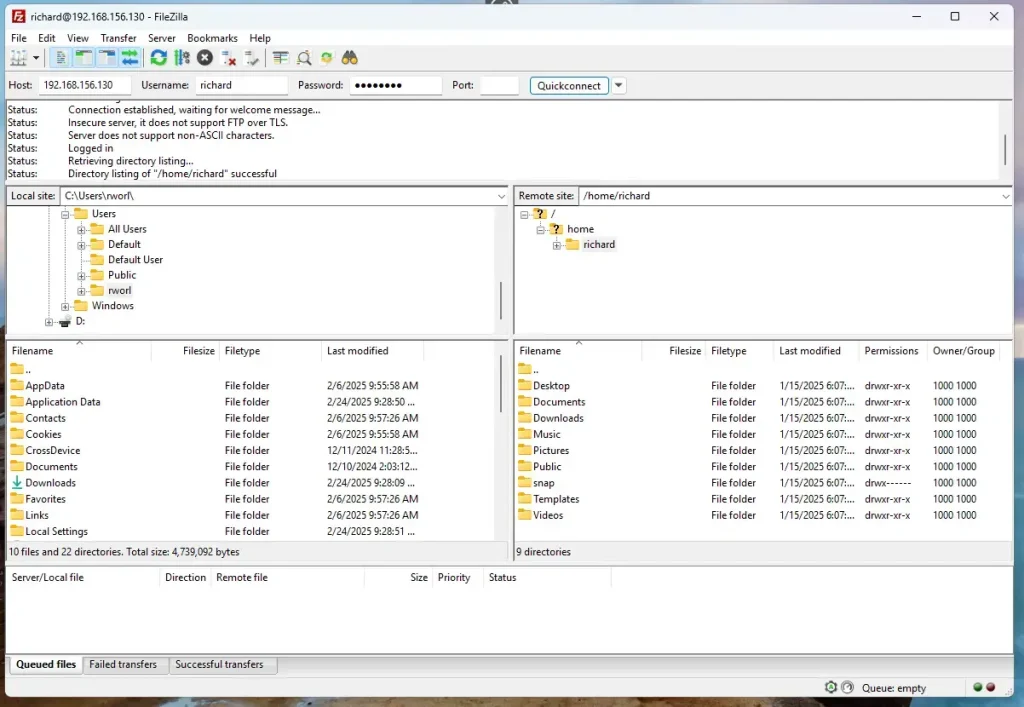
At this point, you should be able to access Pro-FTPD using any FTP client. All user accounts not included in the ftpusers file will be granted access.
Access ProFTPD over SSL/TLS
Although ProFTPD is accessible, it’s not secured. You should configure Pro-FTPD communication over SSL/TLS.
Use a public certificate like Let’s Encrypt or a self-signed on your server.
For this post, we’ll be creating a self-signed certificate for ProFTPD.
Run the command below to generate a self-signed certificate to use with ProFTPD.
sudo openssl req -x509 -nodes -newkey rsa:3072 -keyout proftpd.pem -out proftpd.pem -days 3650
When prompted, enter the certificate details.
Country Name (2 letter code) [AU]:US
State or Province Name (full name) [Some-State]:NY
Locality Name (eg, city) []:Brooklyn
Organization Name (eg, company) [Internet Widgits Pty Ltd]:GeekRewind
Organizational Unit Name (eg, section) []:IT
Common Name (e.g. server FQDN or YOUR name) []:proftpd.example.com
Email Address []:
After generating the certificates, copy them into the [/etc/ssl/private] directory.
sudo cp proftpd.* /etc/ssl/private
sudo chmod 600 /etc/ssl/private/proftpd.pem
Next, install the Pro-FTPD SSL module by running the command below.
sudo apt install proftpd-mod-crypto
After installing the module, run the command below to open its configuration file.
sudo nano /etc/proftpd/modules.conf
Update the lines below in the file to reference the new certificates.
# Install proftpd-mod-crypto to use this module for TLS/SSL support.
# Uncomment to enable SSL/TLS

LoadModule mod_tls.c

........
........
Save the exit the file.
Next, reopen the Pro-FTPD configuration file.
sudo nano /etc/proftpd/proftpd.conf
Then, uncomment line #143 to include the TLS configuration.
# This is used for FTPS connections
#

Include /etc/proftpd/tls.conf

#
Save the file and exit.
Next, open the Pro-FTPD TLS configuration file.
sudo nano /etc/proftpd/tls.conf
Uncomment
#Uncomment the lines below and update the TLS protocol.

TLSEngine                               on
TLSLog                                  /var/log/proftpd/tls.log
TLSProtocol                             TLSv1.3

#
#

#Uncomment lines 27/8 and specify the certificates created above.

TLSRSACertificateFile                   /etc/ssl/private/proftpd.pem
TLSRSACertificateKeyFile                /etc/ssl/private/proftpd.pem

#
#
Exit and save the file, then restart Pro-FTPD services by running the command below.
sudo systemctl restart proftpd
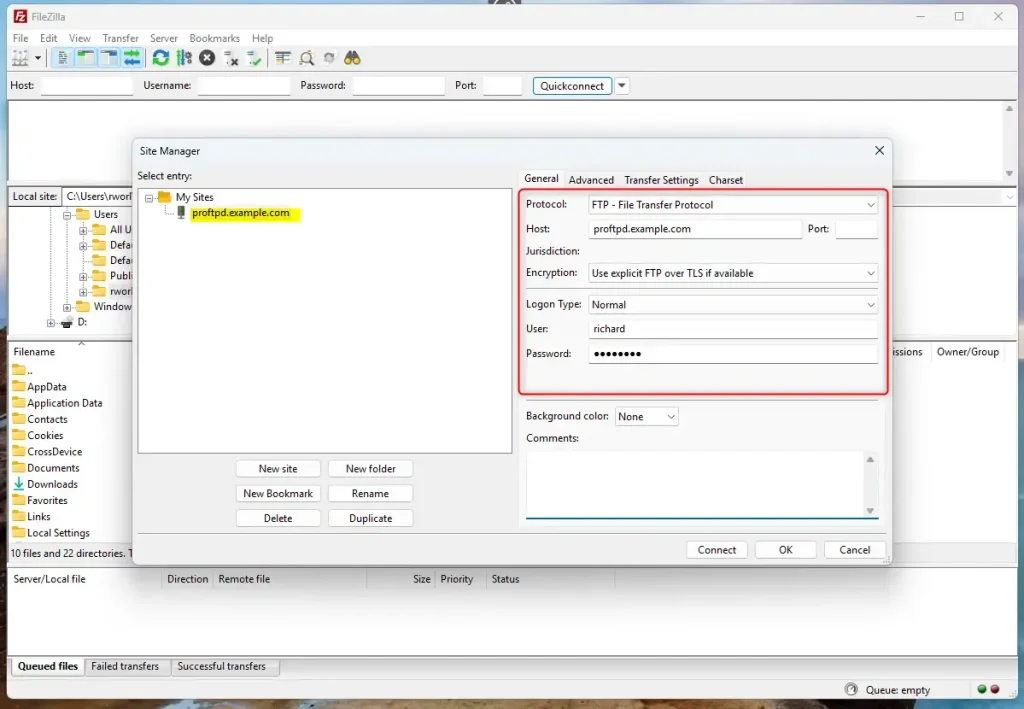
With SSL/TLS configured, open your FTP client and set up the sites to use SSL/TLs.
Since we used a self-signed certificate when prompted to trust it, OK.
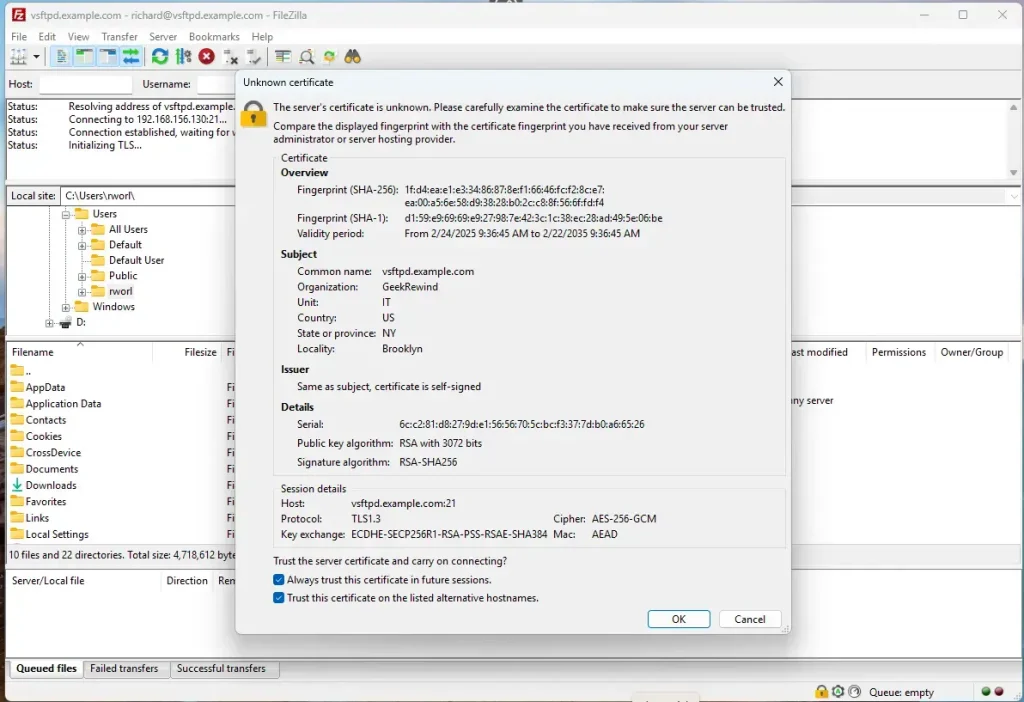
Now, Pro-FTPD is communicating over SSL/TLS.
That should do it!
Conclusion:
- ProFTPD Installation: Installing ProFTPD on Ubuntu 24.04 is straightforward, requiring minimal setup.
- Secure Communication: Configuring SSL/TLS enhances security, ensuring safe data transmission.
- Customization: ProFTPD allows customization of server settings to fit specific user needs.
- Reliable Performance: Known for its stability, ProFTPD is a trusted choice for file transfers.
- User Access Control: Utilizing the
ftpusersfile helps manage which users can access the FTP server. - Self-Signed Certificates: A self-signed certificate can provide an immediate solution for secure connections.
With these steps, you can effectively set up and secure your ProFTPD server for efficient file management.
Leave a Reply