This article describes the steps to install the Elgg social network engine on Ubuntu Linux with Nginx support.
Elgg is an open-source social networking engine framework that makes building and maintaining social networking websites easy.
Setting up Elgg with Nginx on Ubuntu Linux provides a reliable and efficient platform for building and maintaining social networking websites. Nginx is a fast and lightweight web server that can handle many concurrent connections with low resource usage. Ubuntu Linux is a popular open-source operating system that provides a stable and secure environment for web development.
Elgg is an open-source social networking engine framework that simplifies the process of building and managing social networking websites. By combining these technologies, you can create a powerful and flexible platform for your school, company, or any group looking to collaborate around the same ideas or issues.
For more on Elgg’s social platform, please visit its home page
How to install the Elgg social networking engine on Ubuntu Linux with Nginx
As described above, Elgg is an open-source social networking engine framework that makes building and maintaining social networking websites for any purpose easy.
Below is how to install it on Ubuntu Linux with Nginx support.
Install Nginx HTTP Server on Ubuntu
Nginx HTTP Server is the most popular web server. Install it since Elgg CMS needs it.
To install Nginx HTTP on the Ubuntu server, run the commands below.
sudo apt update
sudo apt install nginx
After installing Nginx, the commands below can be used to stop, start, and enable the Nginx service to always start up with the server boots.
sudo systemctl stop nginx.service
sudo systemctl start nginx.service
sudo systemctl enable nginx.service
To test the Nginx setup, open your browser and browse to the server hostname or IP address. You should see the Nginx default test page below. When you see that, then Nginx is working as expected.
http://localhost
Install MariaDB Database Server
MariaDB database server is a great place to start when looking at open-source database servers for Magento. To install MariaDB, run the commands below.
sudo apt-get install mariadb-server mariadb-client
After installing MariaDB, the commands below can stop, start, and enable the service to start when the server boots.
Run these on Ubuntu 16.04 LTS
sudo systemctl stop mysql.service
sudo systemctl start mysql.service
sudo systemctl enable mysql.service
Run these on Ubuntu 17.10 and 18.04 LTS
sudo systemctl stop mariadb.service
sudo systemctl start mariadb.service
sudo systemctl enable mariadb.service
After that, run the commands below to secure the MariaDB server by creating a root password and disallowing remote root access.
sudo mysql_secure_installation
When prompted, answer the questions below by following the guide.
- Enter current password for root (enter for none): Just press the Enter
- Set root password? [Y/n]: Y
- New password: Enter password
- Re-enter new password: Repeat password
- Remove anonymous users? [Y/n]: Y
- Disallow root login remotely? [Y/n]: Y
- Remove test database and access to it? [Y/n]: Y
- Reload privilege tables now? [Y/n]: Y
Restart MariaDB server
Type the commands below to log on to the MariaDB server to test if MariaDB is installed.
sudo mysql -u root -p
Then, type the password you created above to sign on. If successful, you should see a MariaDB welcome message.

Install PHP 7.2-FPM and Related Modules.
PHP 7.2 may not be available in Ubuntu default repositories. To install it, you will have to get it from third-party repositories.
Run the commands below to add the below third party repository to upgrade to PHP 7.2-FPM
sudo apt-get install software-properties-common
sudo add-apt-repository ppa:ondrej/php
Then update and upgrade to PHP 7.2-FPM
sudo apt update
Next, run the commands below to install PHP 7.2 and related modules.
sudo apt install php7.2-fpm php7.2-common php7.2-sqlite3 php7.2-curl php7.2-intl php7.2-mbstring php7.2-xmlrpc php7.2-mysql php7.2-gd php7.2-xml php7.2-cli php7.2-zip
After installing PHP 7.2, run the commands below to open Nginx’s PHP default config file.
sudo nano /etc/php/7.2/fpm/php.ini
Then, save the changes on the following lines below in the file. The value below is an ideal setting to apply in your environment.
file_uploads = On
allow_url_fopen = On
short_open_tag = On
memory_limit = 256M
upload_max_filesize = 100M
cgi.fix_pathinfo = 0
max_execution_time = 360
date.timezone = America/Chicago
After making the change above, please save the file and close it.
After installing PHP and related modules, you must restart Nginx to reload PHP configurations.
To restart Nginx, run the commands below
sudo systemctl restart nginx.service
Create Elgg Database
Once you’ve installed all the packages required for Elgg CMS to function, continue below to start configuring the servers.
First, run the commands below to create a blank Elgg database.
To log on to the MariaDB database server, run the commands below.
sudo mysql -u root -p
Then, create a database called elgg
CREATE DATABASE elgg;
Create a database user called elgguser with a new password
CREATE USER 'elgguser'@'localhost' IDENTIFIED BY 'new_password_here';
Then, grant the user full access to the database.
GRANT ALL ON elgg.* TO 'elgguser'@'localhost' IDENTIFIED BY 'user_password_here' WITH GRANT OPTION;
Finally, save your changes and exit.
FLUSH PRIVILEGES;
EXIT;
Download and Install Elgg CMS
Run the commands below to download Elgg CMS’s latest content. Then, unzip the download file and move the content to the Nginx default root directory.
cd /tmp && wget https://elgg.org/download/elgg-2.3.7.zip
unzip elgg-2.3.7.zip
sudo mv elgg-2.3.7 /var/www/html/elgg
Next, create an Elgg data directory to store data content.
sudo mkdir -p /var/www/html/elgg/data
Next, run the commands below to change the root folder permissions.
sudo chown -R www-data:www-data /var/www/html/elgg/
sudo chmod -R 755 /var/www/html/elgg/
Configure Nginx Elgg CMS Site
Finally, configure the Nginx configuration file for Elgg CMS. This file will control how users access Elgg CMS content. Run the commands below to create a new configuration file called elgg
sudo nano /etc/nginx/sites-available/elgg
Then copy and paste the content below into the file and save it. Replace the highlighted line with your domain name and directory root location.
server {
    listen 80;
    listen [::]:80;
    root /var/www/html/elgg;
    index  index.php index.html index.htm;
    server_name  example.com www.example.com;

    client_max_body_size 100M;

    location = /rewrite.php {
        rewrite ^(.*)$ /install.php;
    }

    location / {
        try_files $uri $uri/ /index.php?__elgg_uri=$uri&$query_string;
       }

    location ~ \.php$ {
    include snippets/fastcgi-php.conf;
    fastcgi_pass           unix:/var/run/php/php7.2-fpm.sock;
    fastcgi_param   SCRIPT_FILENAME $document_root$fastcgi_script_name;
     }

}
Save the file and exit.
After configuring the VirtualHost above, please enable it by running the commands below.
Enable the Elgg CMS Site
After configuring the VirtualHost above, please enable it by running the commands below, then restart the Nginx server.
sudo ln -s /etc/nginx/sites-available/elgg /etc/nginx/sites-enabled/
sudo systemctl restart nginx.service
Next, open your browser, go to the URL, and continue with the installation.
http://example.com
You should see the Elgg installation wizard page. Click Next to continue.

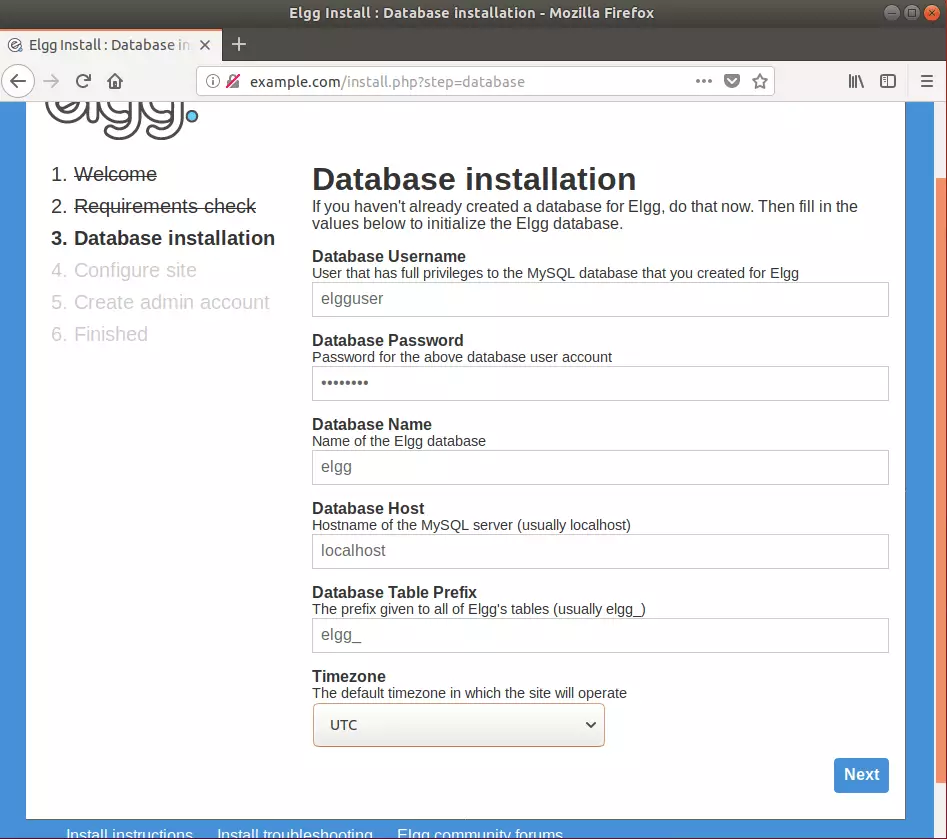
Validate that PHP requirements are met, enter the database connection info you created above, and continue.
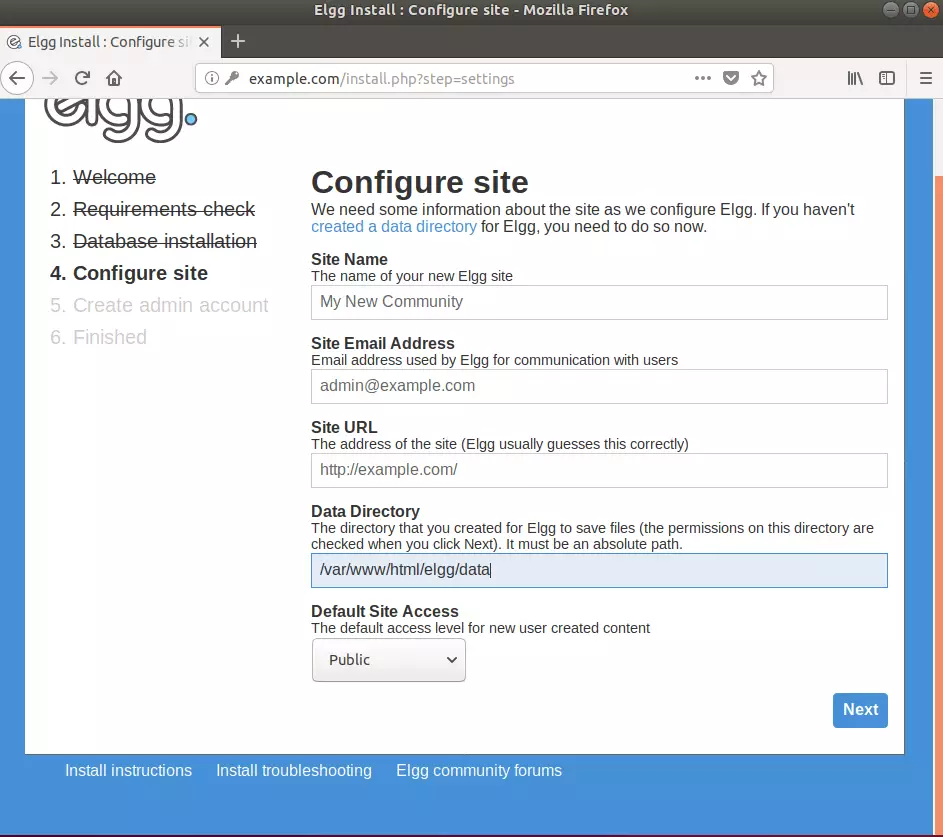
Next, type in the site info, specify the database directory you created above, and continue.
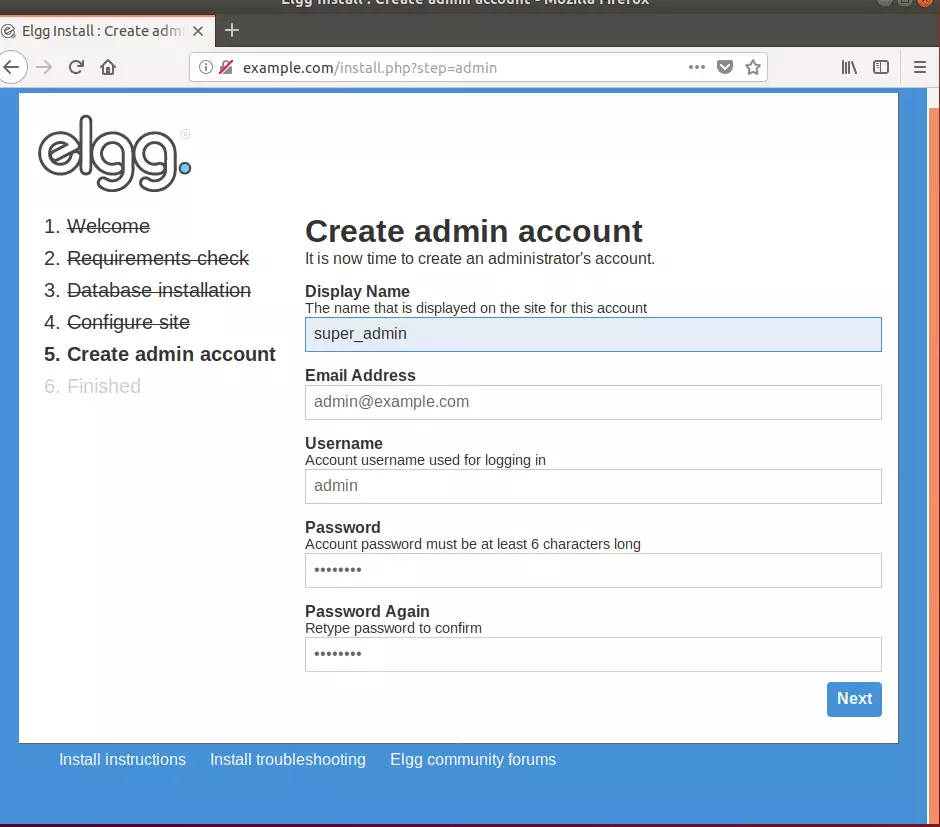
Next, create the admin password and complete the wizard.
After that, Elggshould is installed and ready to use.
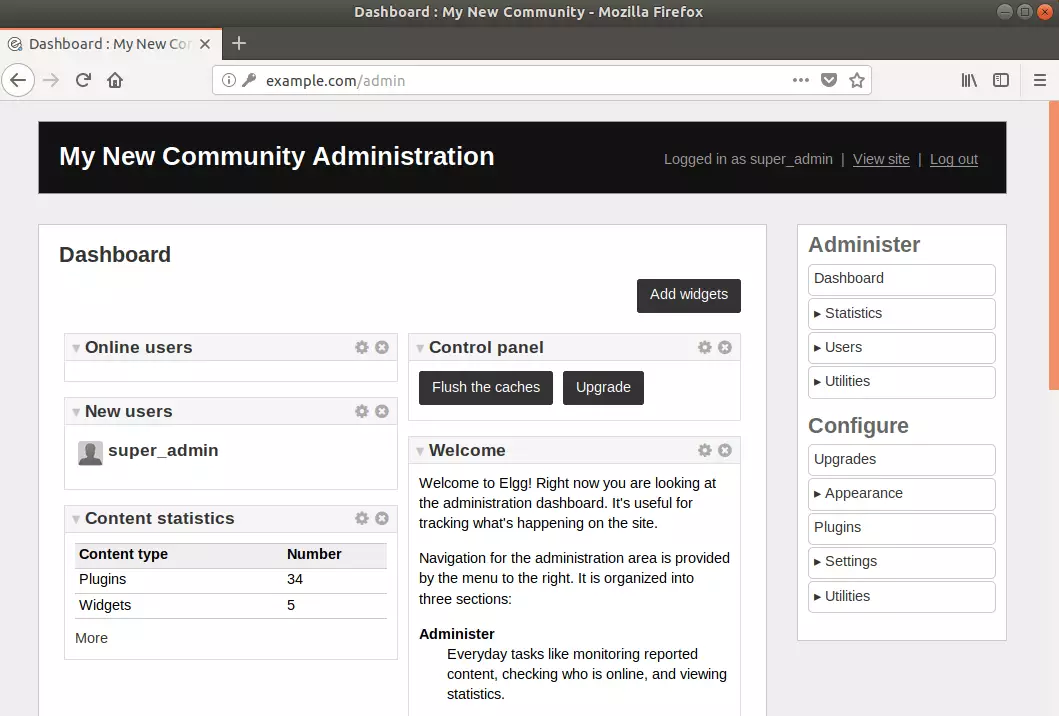
To login to the backend, type the URL below:
http://example.com/admin

Leave a Reply Cancel reply