
This article explains how to install WordPress locally with XAMPP on Windows 11.
XAMPP is a free and open-source cross-platform web server solution stack package developed by Apache Friends. It consists primarily of the Apache HTTP Server, MariaDB, and interpreters for scripts written in the PHP and Perl programming languages.
You can install XAMPP on Windows or Ubuntu to run PHP apps locally on your computer.
The following steps guide installing WordPress with XAMPP on a Windows machine.
Install XAMPP
XAMPP is a single package with Apache, MariaDB, and PHP components. After installing XAMPP app on Windows or Ubuntu, you can install and manage other PHP-based apps like WordPress, Drupal, and Joomla.
If you haven’t already installed XAMPP on your machine, read the post below to learn how to install it.
Create a WordPress database
As part of the XAMPP installation, a MariaDB database server was installed along with Apache and PHP.
Now, create a blank database to store WordPress content.
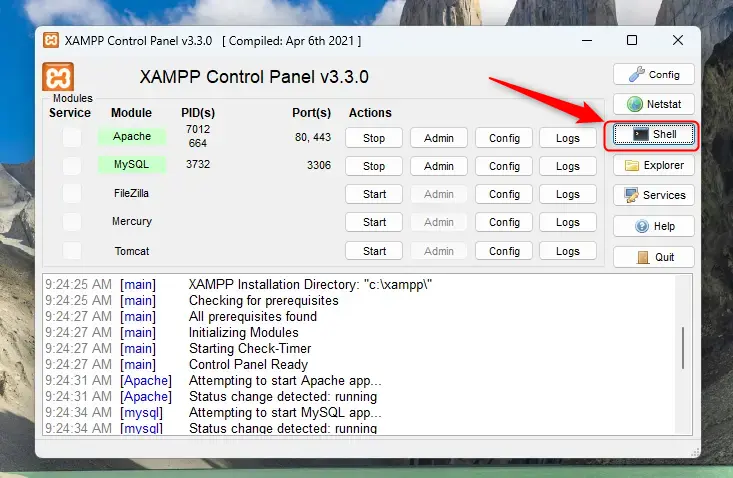
First, click the ‘Shell‘ button on the Control Panel on the left to launch the XAMPP command shell.
For this setup, we will create a database named ‘wordpressdb ‘. Additionally, we will create a corresponding user account called ‘wordpressdbuser ‘.
Finally, we’ll grant the wordpressdbuser full access to the wordpressdb database.
All the database steps above can be done using the commands below:
But first, log on to the MariaDB database server:
mysql -u root
Then run the commands below to complete the steps:
CREATE DATABASE wordpressdb CHARACTER SET utf8mb4 COLLATE utf8mb4_general_ci;
CREATE USER wordpressdbuser@localhost IDENTIFIED BY 'type_your_password_here';
GRANT ALL ON wordpressdb.* TO wordpressdbuser@localhost;
FLUSH PRIVILEGES;
exit
Ensure to replace ‘type_your_password_here‘ with your password.
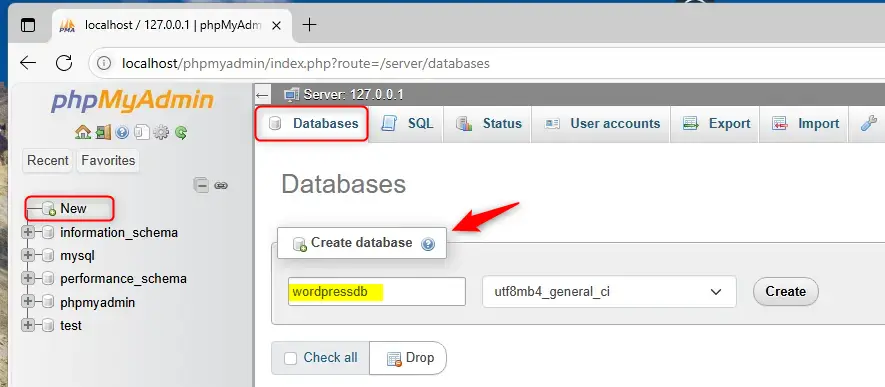
If you cannot use the command line, click the phpMyAdmin [Admin button] next to MySQL in the Control Panel.
Create a new database. Create a new user. Then, give (grant) the user full access to the database.
Continue below to download WordPress files.
Download WordPress files
Let’s begin the straightforward process of downloading and configuring the WordPress files on Ubuntu Linux.
First, navigate to the C:xampphtdocs directory and create a folder for WordPress called [wordpress].

Download the WordPress files from the official download page and extract them into the wordpress folder created earlier.
Extract the downloaded files and copy all the contents into the WordPress folder created earlier [C:xampphtdocswordpress].
After copying the WordPress content to the folder, navigate to the root directory [C:xampphtdocs] and edit the index.html file.
By default, all requests to the server hostname are redirected to the [/Dashboard/]. This file is responsible for that.
You can change it to [/wordpress/] to bring up your WordPress site instead of the dashboard.
<?php
	if (!empty($_SERVER['HTTPS']) && ('on' == $_SERVER['HTTPS'])) {
		$uri = 'https://';
	} else {
		$uri = 'http://';
	}
	$uri .= $_SERVER['HTTP_HOST'];
	header('Location: '.$uri.'/wordpress/');
	exit;
?>
Something is wrong with the XAMPP installation :-(
Save the file and exit.
Return to the XAMPP Control Panel and stop and start Apache to apply the changes.
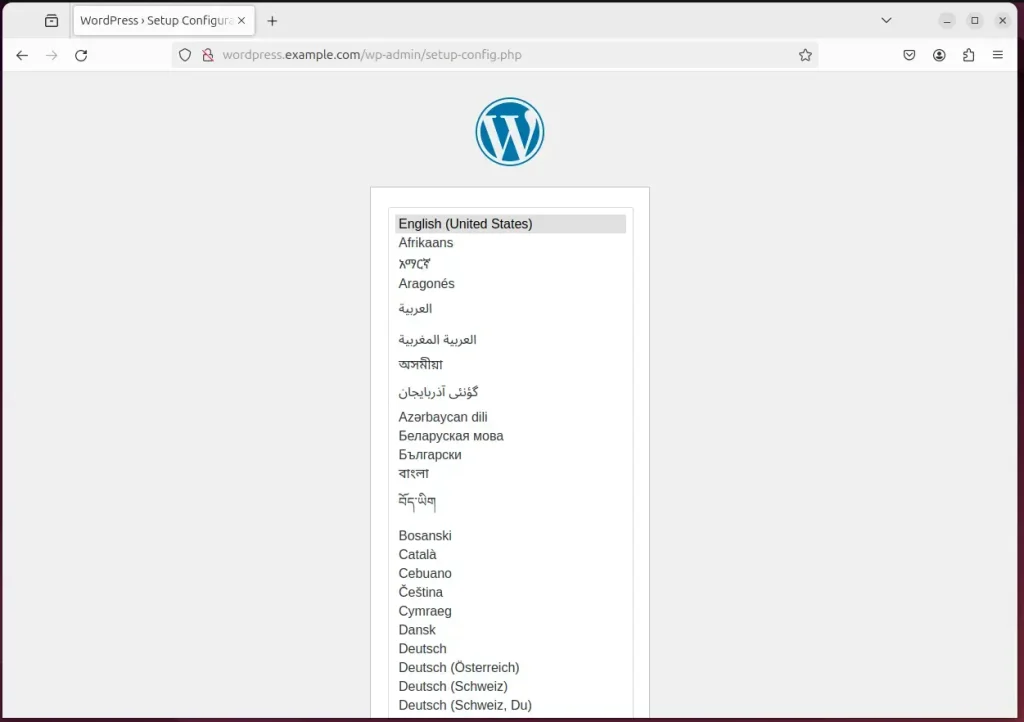
After restarting the Apache web server, open your browser and navigate to the server hostname or IP address specified in the Apache server block.
http://wordpress.example.com
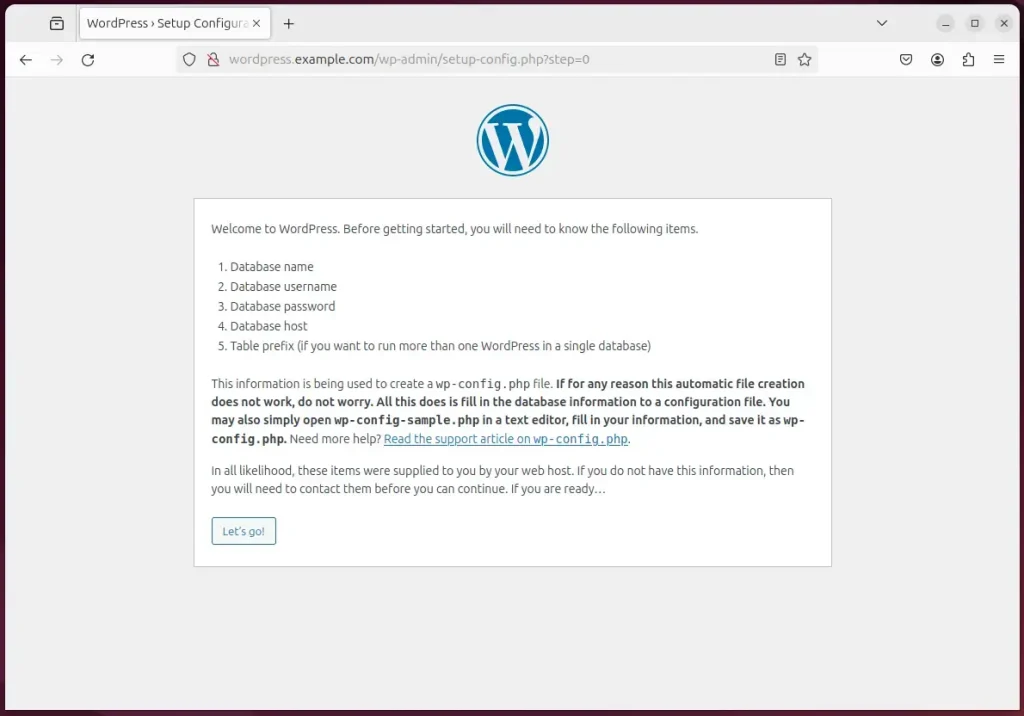
A WordPress installation wizard page should appear. Select the installation language and continue to the next page.
Next, click the Let’s go button to begin the installation process.
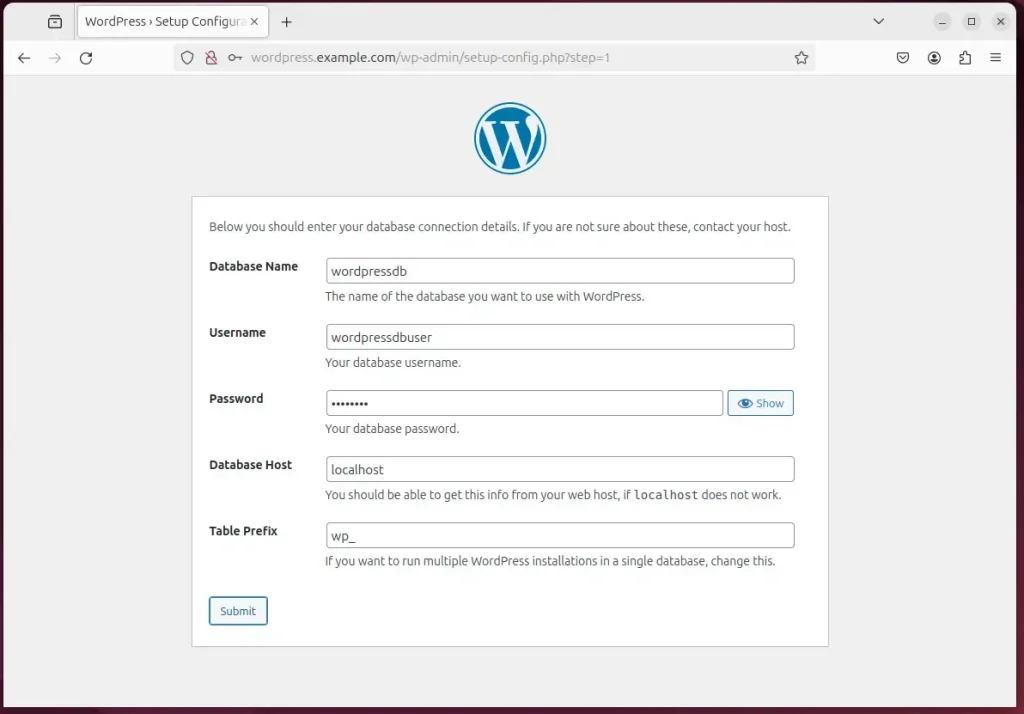
Type the database name, account name, and password on the next screen. Then, click Submit.
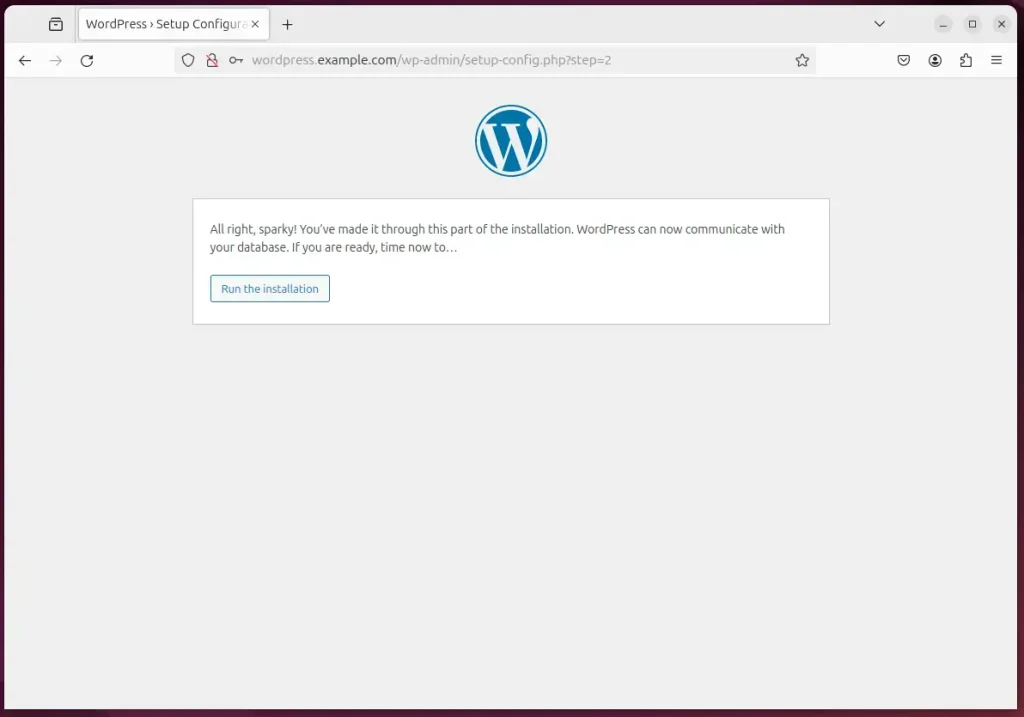
Next, click the “Run the installation” button to install WordPress files.
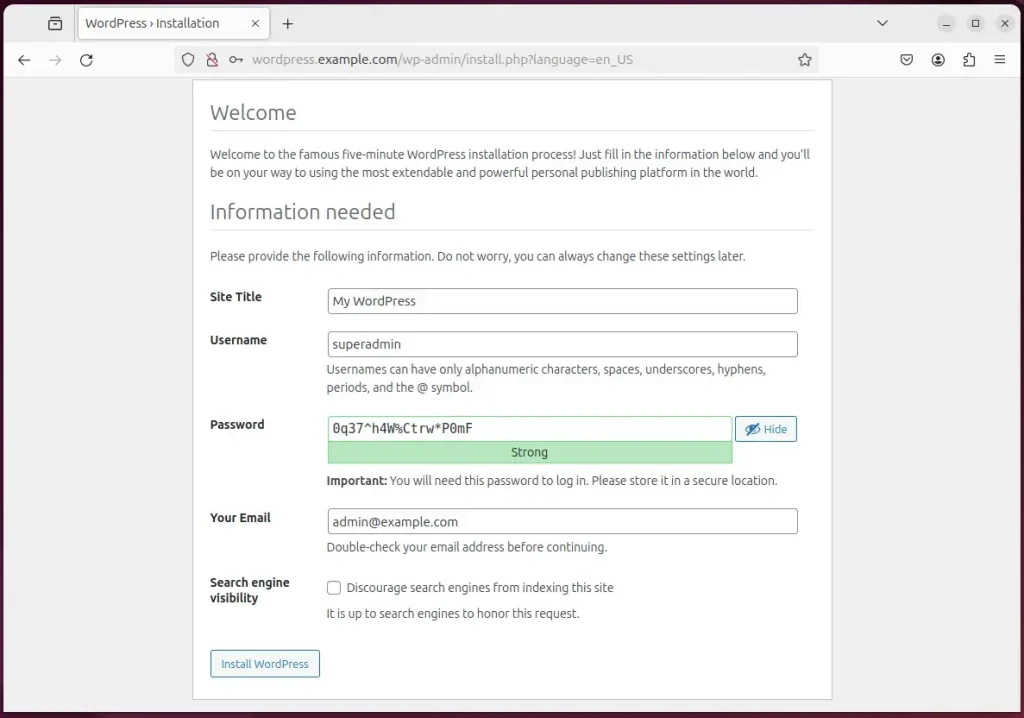
Next, type in the site title, admin account, email address, and password. Then, click “Install WordPress.”
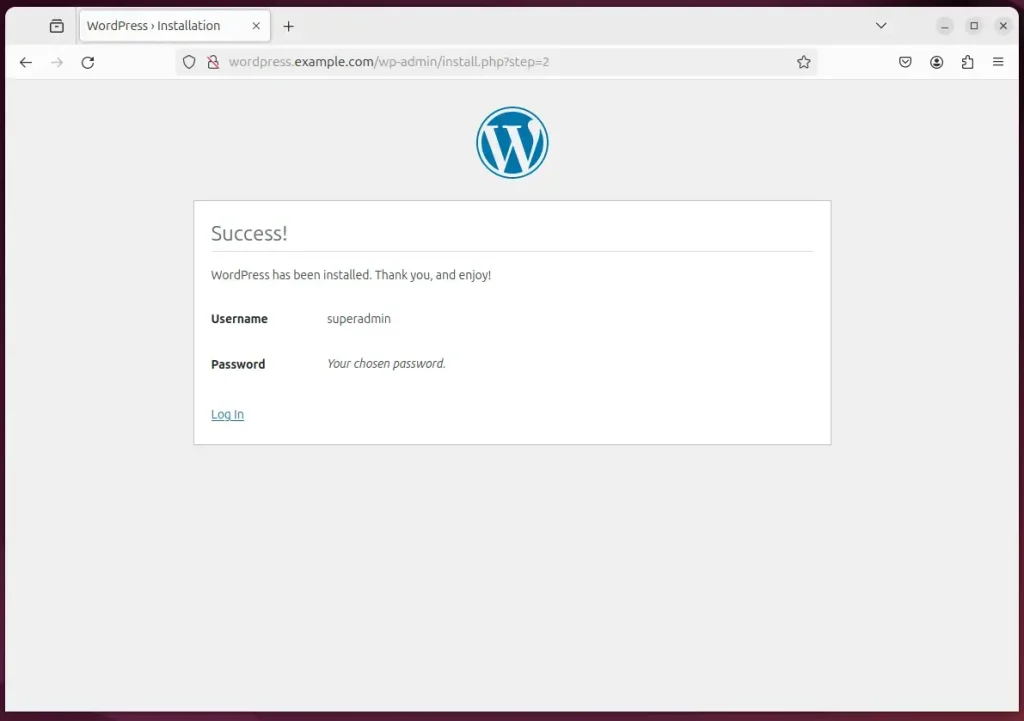
Your WordPress site should be set up and ready to use.
That should do it!
Conclusion:
- Installing WordPress on XAMPP allows for a local development environment, making testing and developing your site easy.
- Ensure you follow each step carefully to set up the database correctly and configure WordPress files.
- Remember to restart the Apache server after making changes to see the effects.
- With your local WordPress site set up, you can start exploring themes, plugins, and customizing your website.
- Enjoy the flexibility of working offline and experimenting freely before going live!


Leave a Reply