

This article explains how to install OpenSSH server with password authentication on Ubuntu 24.04.
OpenSSH (Open Secure Shell) provides secure access to servers and devices through encrypted channels. OpenSSH includes SSH (Secure Shell), SCP (Secure Copy Protocol), and SFTP (Secure File Transfer Protocol), all of which allow secure connections and file transfers.
When you install OpenSSH, password authentication is enabled by default on Ubuntu, which lets you log in to the server without changing anything. By default, the root account is also prohibited from logging on to the server with the [PermitRootLogin prohibit-password] setting.
The steps below walk you through installing OpenSSH server on Ubuntu.
Install OpenSSH server
OpenSSH packages are available in Ubuntu default repositories so there’s no need to install additional packages.
Run the command below to install OpenSSH server.
sudo apt update
sudo apt install openssh-server
Once installed, access is granted to users on the computer. User accounts with valid credentials will be allowed to log on.
Configure OpenSSH
After installing OpenSSH server, its default configuration file is located at [/etc/ssh/sshd_config].
You can improve your device security by adjusting the settings in the configuration file. An example would be denying the root account login without password authentication.
As mentioned, the root user can not logon by default when you install OpenSSH server using a password with the [PermitRootLogin prohibit-password] setting. However, you can further enhance your device security by prohibiting the root account from logging in via other means.
To do that, open the OpenSSH configuration file by running the command below.
sudo nano /etc/ssh/sshd_config
Then, uncomment and change the highlighted line to [no] to prevent the root user logging on.
#line 33
PermitRootLogin no
Save and exit.
Then, restart OpenSSH server.
sudo systemctl restart ssh
Access OpenSSH server
With the set up above, OpenSSH can be accessed from remote systems using the server’s IP address or hostname.
On Windows 11, open the Terminal app and run the ssh command.
ssh [email protected]
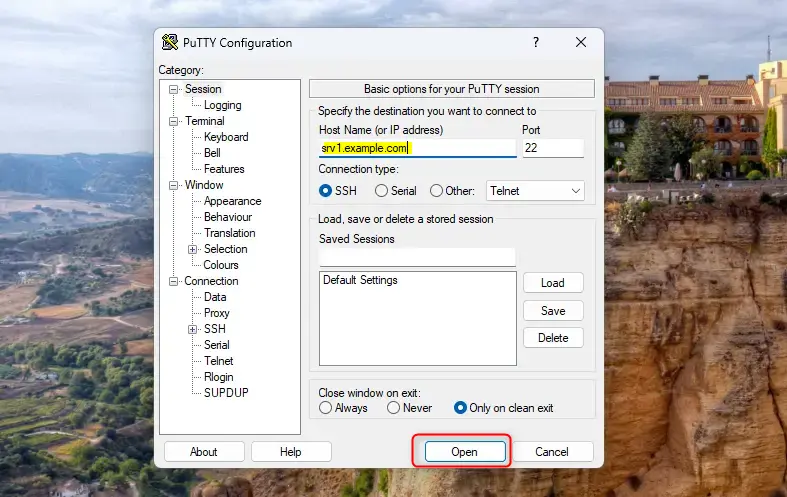
Using PuTTY, enter the server hostname and click Open.
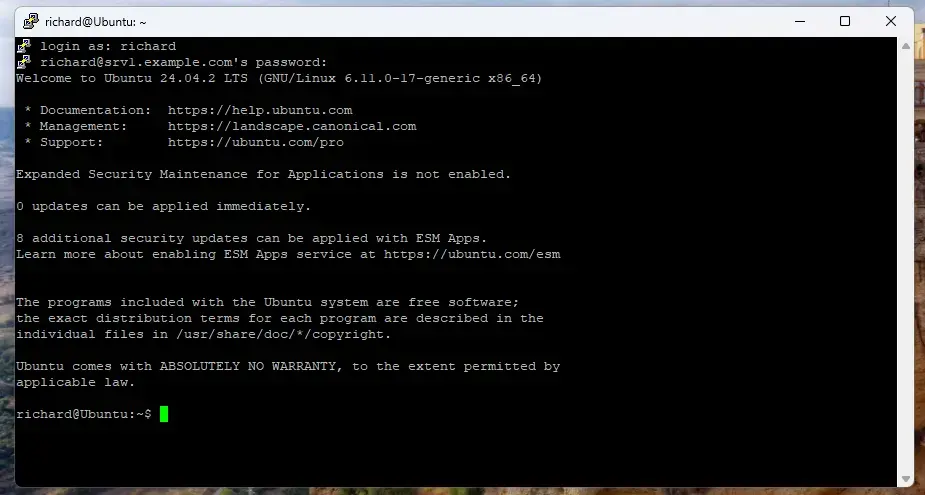
Access should be granted after entering the correct username and password.
That should do it!
Conclusion:
In summary, installing and configuring the OpenSSH server on Ubuntu 24.04 is a straightforward process that enhances the security of your server. Here are the key points to remember:
- OpenSSH provides secure access to servers through encrypted connections.
- Password authentication is enabled by default upon installation, simplifying the login process.
- For improved security, the root account is prohibited from logging in with password authentication.
- Configuration adjustments in the
/etc/ssh/sshd_configfile can further enhance security. - Remote access is possible using SSH commands or tools like PuTTY.
- Ensuring you manage your user accounts and authentication methods is crucial for maintaining a secure server environment.
Following these steps, you can set up a robust and secure OpenSSH server that meets your needs.


Leave a Reply