
AWStats uses log file analysis to analyze log files from Apache2, IIS, and other popular web servers today. It’s a convenient tool for analyzing your traffic and other data.
Installing AWStats on Ubuntu Linux allows you to generate advanced graphics for your web, FTP, or mail servers. AWStats is a log file analysis tool that can analyze log files from Apache2, IIS, and other popular web servers today.
It enables you to monitor your server’s traffic and other data and generate reports based on that data. Following the steps outlined in the tutorial, you can install and configure AWStats on your Ubuntu 16.04, 17.10, or 18.04 LTS server and start using this powerful tool to monitor and analyze your server’s performance.
For more about AWStats, please visit its homepage.
Install Apache
Before installing AWStats server packages, ensure the Apache2 HTTP server is installed. To do that on Ubuntu, run the commands below.
sudo apt update
sudo apt install apache2
Install AWStats
To install AWStats on the Ubuntu server, run the commands below. The command will fetch and install the current stable AWStats version in Ubuntu repositories.
sudo apt install awstats
Configure AWStats
Now that AWStats has been installed run the commands below to open its default configuration file.
sudo nano /etc/awstats/awstats.conf
Then, change the highlighted lines below to add your server name and save the file.
# Examples for Apache combined logs (following two examples are equivalent):
# LogFormat = 1
# LogFormat = "%host %other %logname %time1 %methodurl %code %bytesd %refererqu$
# Example for IIS:
# LogFormat = 2
#
LogFormat=1

# But for multi hosting a better solution is to have one log file for each
# virtual web server. In this case, this parameter is only used to generate
# full URL's links when ShowLinksOnUrl option is set to 1.
# If analyzing mail log, enter here the domain name of mail server.
#
SiteDomain="example.com"
After that, run the commands below to create the AWStats web configuration file.
sudo cp /usr/share/doc/awstats/examples/apache.conf /etc/apache2/conf-available/awstats.conf
Next, run the commands below to open the configuration file you just created and make the highlighted changes below:
sudo nano /etc/apache2/conf-available/awstats.conf
Then, make the highlighted changes and save the file.
# This provides worldwide access to everything below the directory
# Security concerns:
#  * Raw log processing data is accessible too for everyone
#  * The directory is by default writable by the httpd daemon, so if
#    any PHP, CGI or other script can be tricked into copying or
#    symlinking stuff here, you have a looking glass into your server,
#    and if stuff can be uploaded to here, you have a public warez site!
<Directory /var/lib/awstats>
        Options None
        AllowOverride None
        Order allow,deny
        Allow from all
</Directory>

# This provides worldwide access to everything below the directory
# Security concerns: none known
<Directory /usr/share/awstats/icon>
        Options None
        AllowOverride None
        Order allow,deny
        Allow from all
</Directory>
# This provides worldwide access to everything below the directory
# Security concerns: none known
<Directory /usr/share/java/awstats>
        Options FollowSymLinks
        AllowOverride None
        Order allow,deny
        Allow from all
</Directory>

# This provides worldwide access to everything in the directory
# Security concerns: none known
Alias /awstats-icon/ /usr/share/awstats/icon/

# This provides worldwide access to everything in the directory
# Security concerns: none known
Alias /awstatsclasses/ /usr/share/java/awstats

# This provides worldwide access to everything in the directory
# Security concerns: none known
Alias /awstatsclasses/ /usr/share/java/awstats

# This (hopefully) enables _all_ CGI scripts in the default directory
# Security concerns: Are you sure _all_ CGI scripts are safe?
ScriptAlias /cgi-bin/ /usr/lib/cgi-bin/
Alias /awstatsclasses "/usr/share/awstats/lib/"
Alias /awstats-icon/ "/usr/share/awstats/icon/"
Alias /awstatscss "/usr/share/doc/awstats/examples/css"
ScriptAlias /cgi-bin/ /usr/lib/cgi-bin/
ScriptAlias /awstats/ /usr/lib/cgi-bin/
Options +ExecCGI -MultiViews +SymLinksIfOwnerMatch
After that, run the commands below to enable the AWStats module.
sudo a2enconf awstats serve-cgi-bin
sudo a2enmod cgi
Next, restart Apache2 for the changes to apply.
sudo systemctl restart apache2
Finally, run the commands below to adjust AWStats permissions and update.
sudo sed -i -e "s/www-data/root/g" /etc/cron.d/awstats
sudo /usr/share/awstats/tools/update.sh
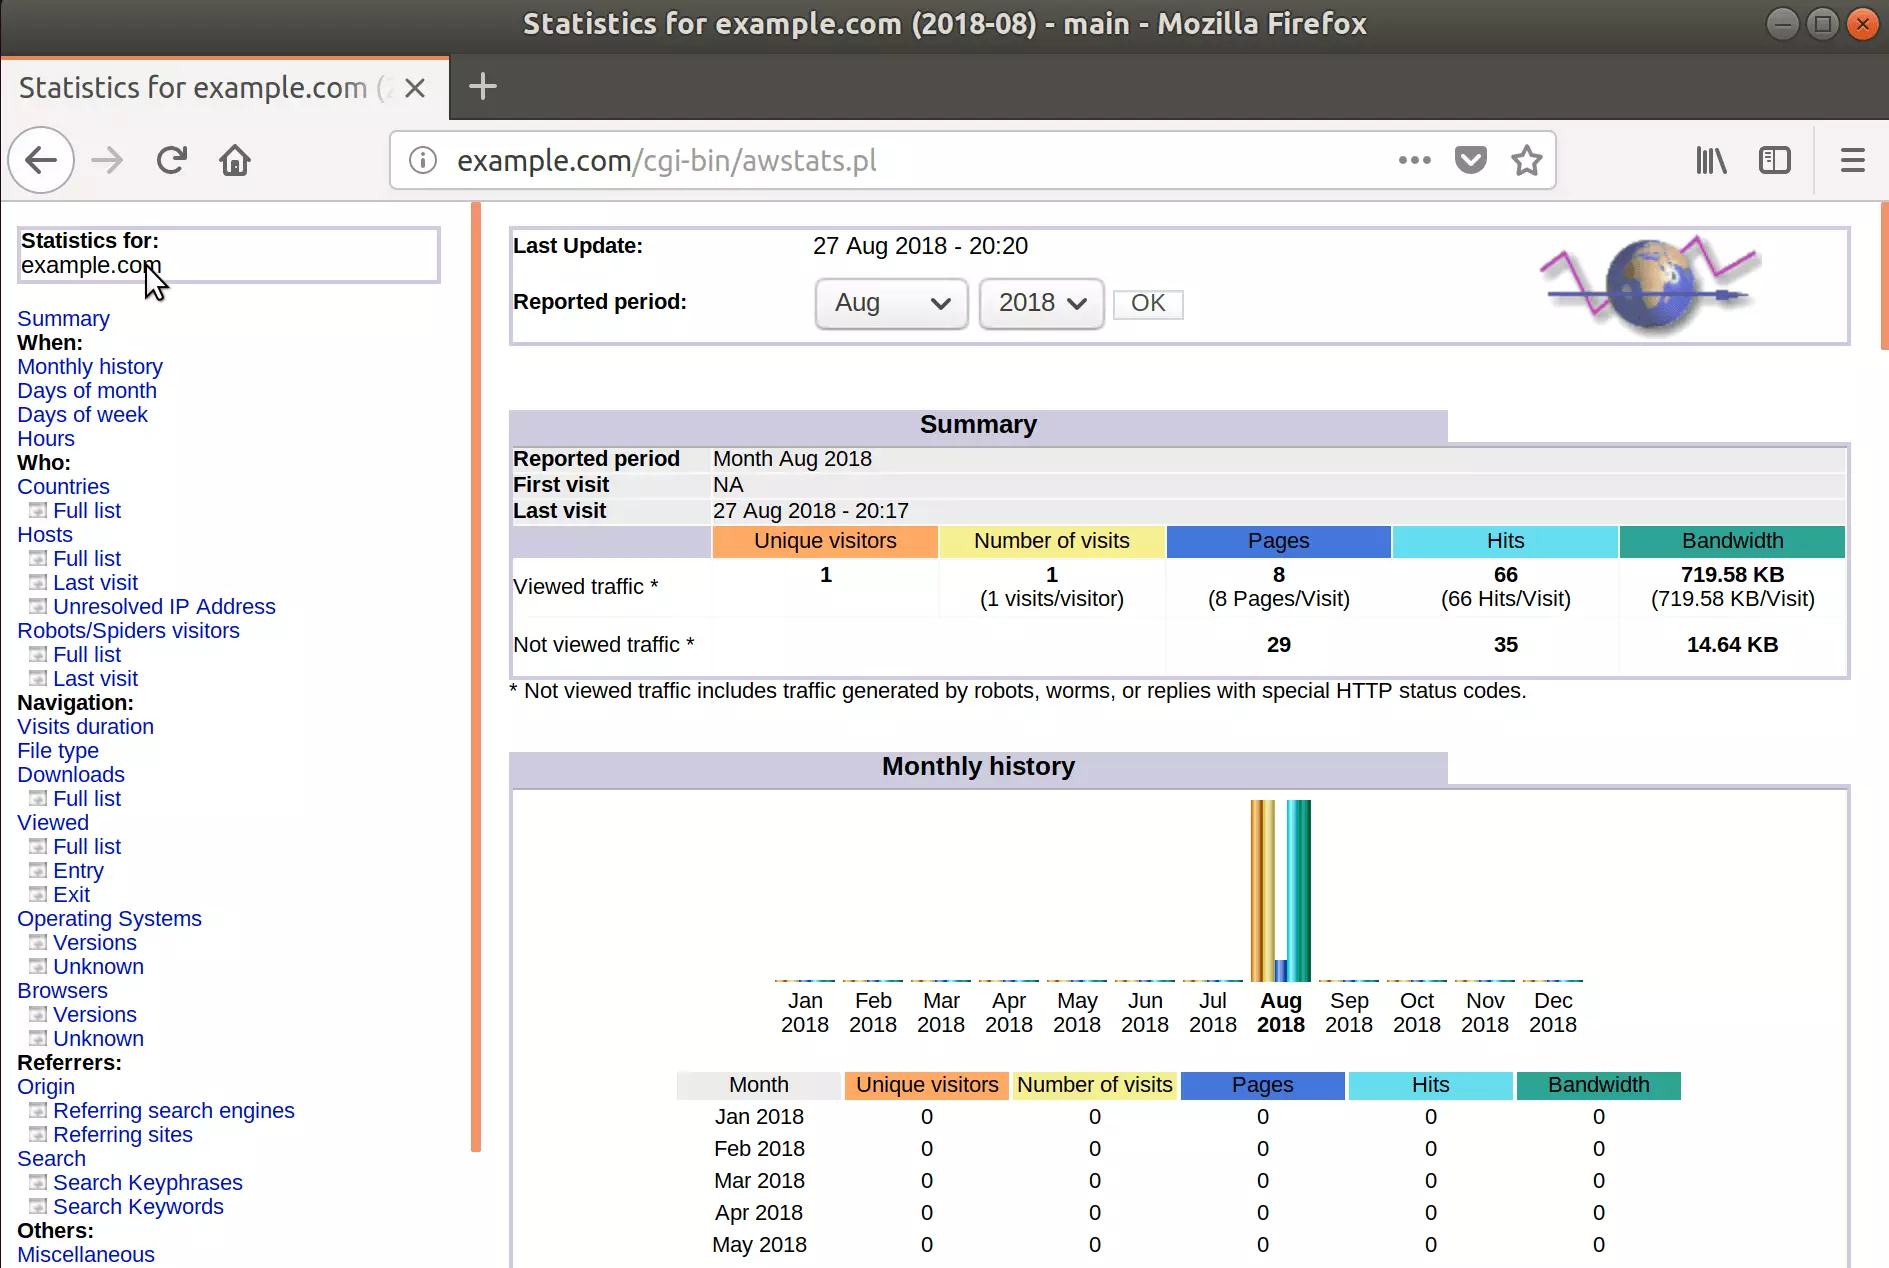
Finally, open your browser and browse to the server IP or hostname followed by the URI (/cgi-bin/Awstats.pl )
http://example.com/cgi-bin/awstats.pl
You should see the AWStats page.
That’s it! You have successfully installed and configured AWStats on the Ubuntu 16.04 | 18.04 LTS server.
You may also like the post below:
Leave a Reply