
BitLocker is a tool in Windows 11 that helps keep your files safe by locking your computer’s main drive. This means only you (or someone with the right info) can open your computer and see your data.
By default, if your computer has a special chip called TPM (Trusted Platform Module), BitLocker will unlock your computer automatically when it starts. But for extra safety, you can set it up so you need to enter a PIN and plug in a USB drive with a special key before your PC will start.
This guide will show you simple steps to set this up.
Step 1: Turn On BitLocker
If you haven’t turned on BitLocker yet, you can follow this easy guide first:
How to turn on BitLocker in Windows 11
Step 2: Set Up a PIN to Unlock BitLocker
- Open the Control Panel. You can do this by typing Control Panel in the search box on the taskbar.
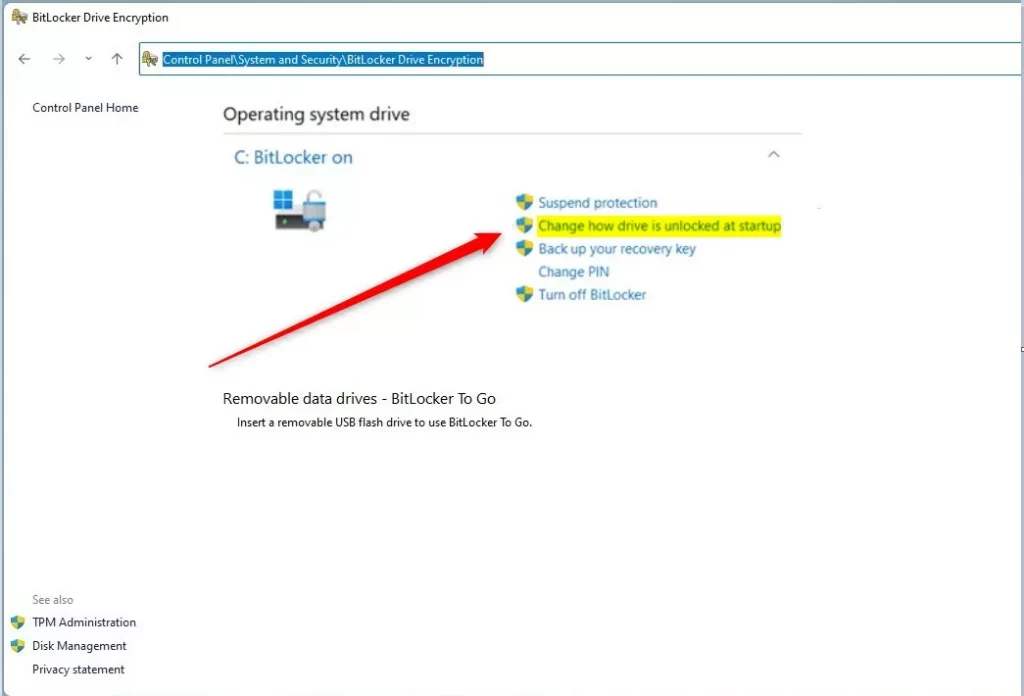
- Go to System and Security > BitLocker Drive Encryption.
- Click on Change how drive is unlocked at startup.
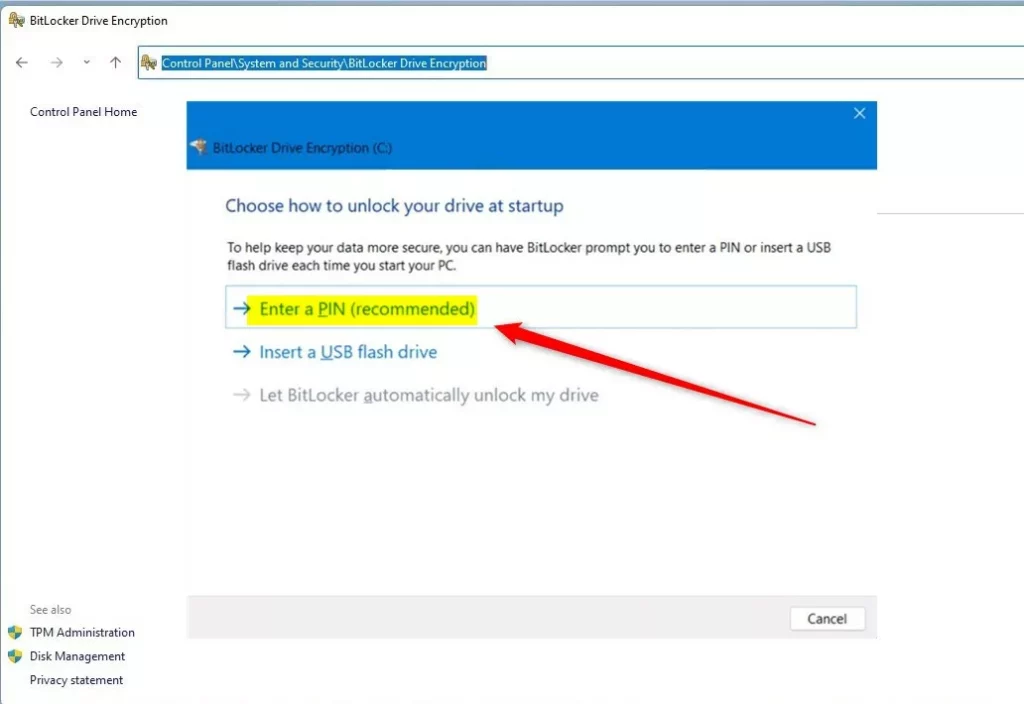
- Click Enter a PIN (recommended).
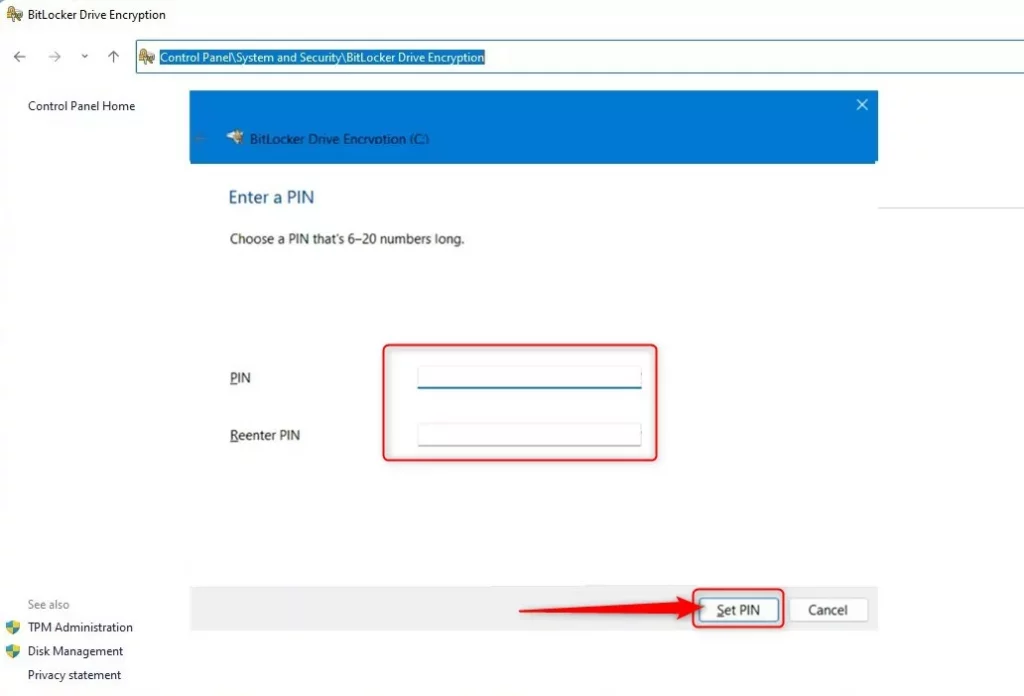
- Type a PIN with 6 to 20 numbers, then confirm it by typing it again.
- Click Set PIN.
Step 3: Require a USB Drive to Unlock BitLocker
- Open the Control Panel again if it’s closed.
- Go to System and Security > BitLocker Drive Encryption.
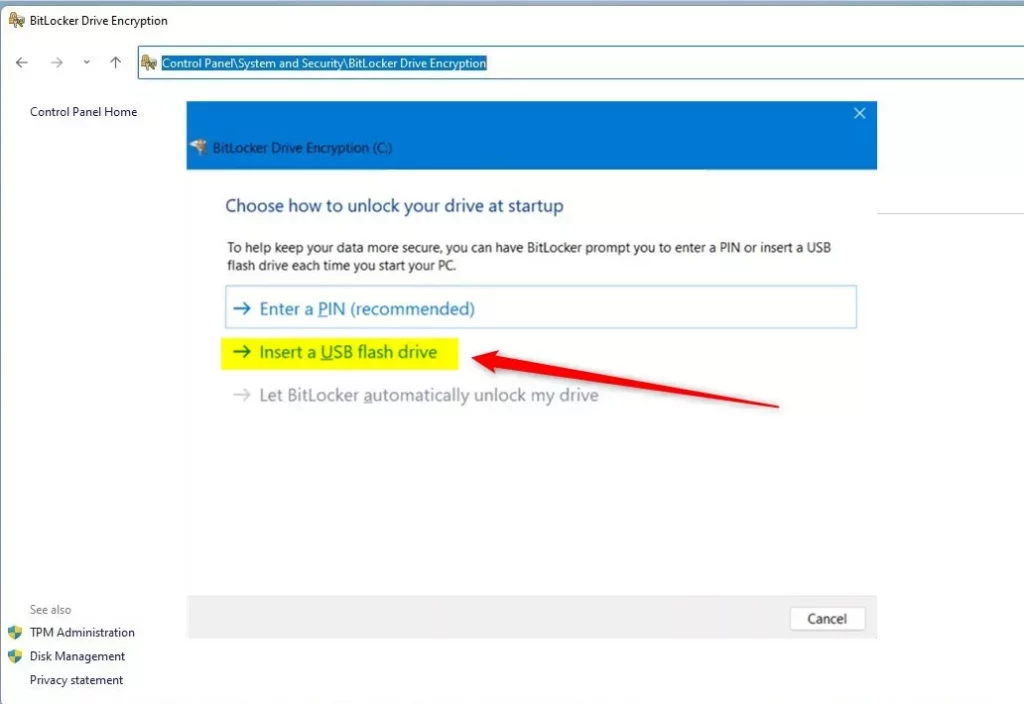
- Click Change how drive is unlocked at startup.
- Click Insert a USB flash drive.
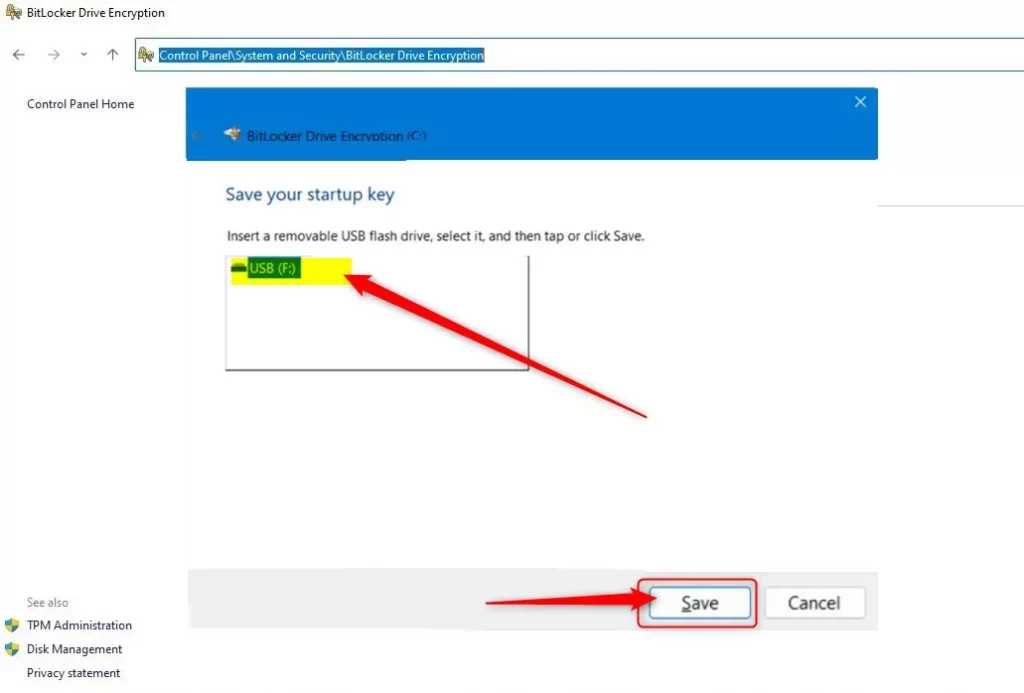
- Plug in a USB flash drive. This will save a special key on your USB.
- Click Save.
What If You Want to Stop Using PIN or USB to Unlock?
If you decide later that you don’t want to use the PIN or USB key, you can change BitLocker back to unlock automatically with TPM only. Check out this guide:
How to make BitLocker unlock your PC automatically using TPM in Windows 11
Summary
- BitLocker keeps your important files safe by locking your drive.
- You can add extra security by requiring a PIN and a USB drive to unlock your PC when it starts.
- It’s easy to set up through the Control Panel in Windows 11.
With these extra steps, your computer will be much safer against unauthorized access!


Leave a Reply Cancel reply