This article discusses how to use Windows Security to safeguard your sensitive data from ransomware in Windows 11.
Microsoft Security offers ransomware protection that helps users prevent ransomware from taking control of their sensitive files and locking them up for ransom. You have likely seen numerous news stories about both large and small organizations having their data held ransom, often requiring payment to regain access to their files.
We recently shared a guide on how to secure and protect your computer using Microsoft Security. We highlighted that when you start Windows 11, Microsoft Security actively protects your machine by continuously scanning for malware, viruses, and other security threats in real time.
Without controlled folder access enabled in Windows 11, your files and folders could be at risk of ransomware attacks.
How to enable controlled folder access in Windows 11
To prevent ransomware on Windows 11, enable controlled folder access. Follow these steps:
Windows 11 features a centralized location for most of its settings. Users can configure the system, create new accounts, and update Windows from the System Settings pane.
To get to System Settings, you can use the Windows key + I shortcut or click on Start ==> Settings, as shown in the image below:

Alternatively, you can use the search box on the taskbar and search for Settings. Then select to open it.
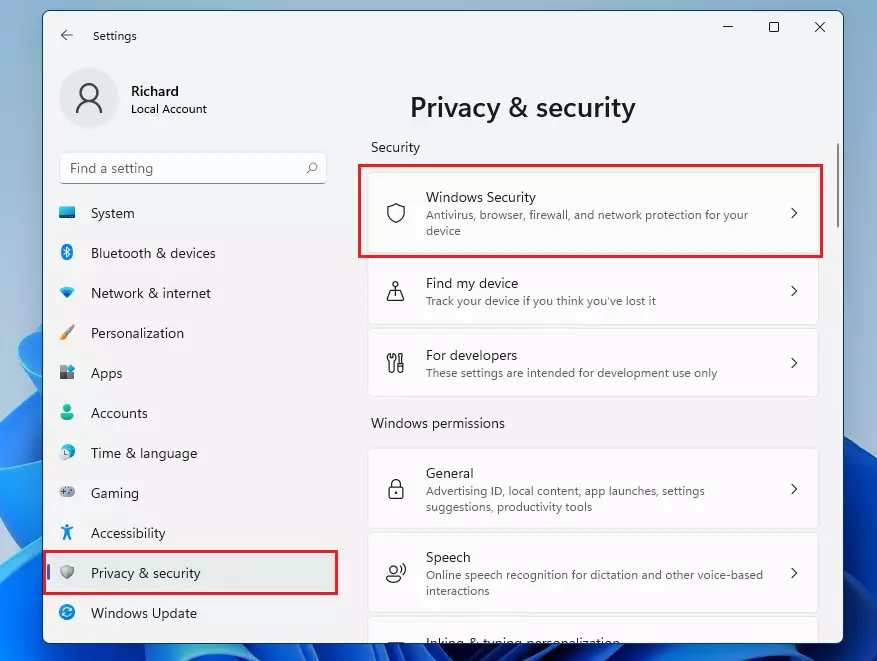
In Windows Settings, navigate to Privacy & Security, then select Windows Security from the right pane of your screen.
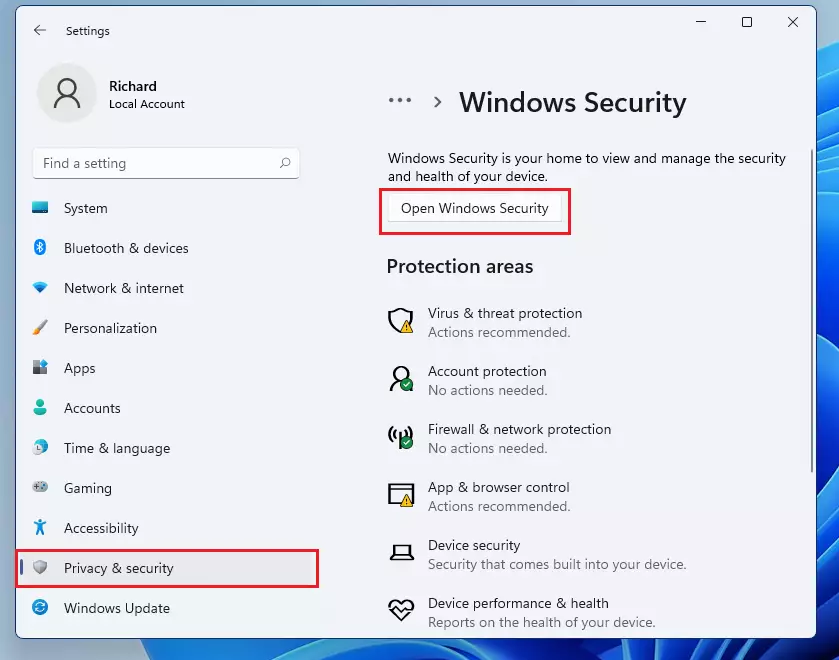
On the Windows Security settings pane, click on the button “Open Windows Security,” as highlighted below.
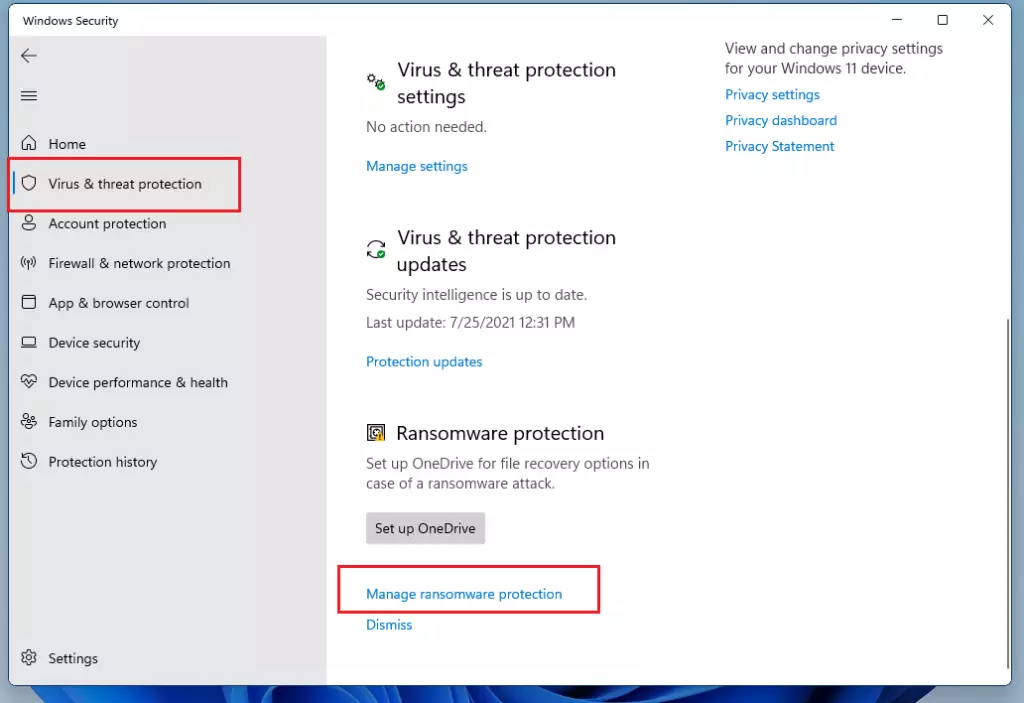
When the Windows Security app opens, click Virus & Threat Protection on the left menu items, then scroll down and click the highlighted link to “Manage ransomware protection.“
Toggle the button to the On position on the ransomware protection settings pane to enable ransomware protection.
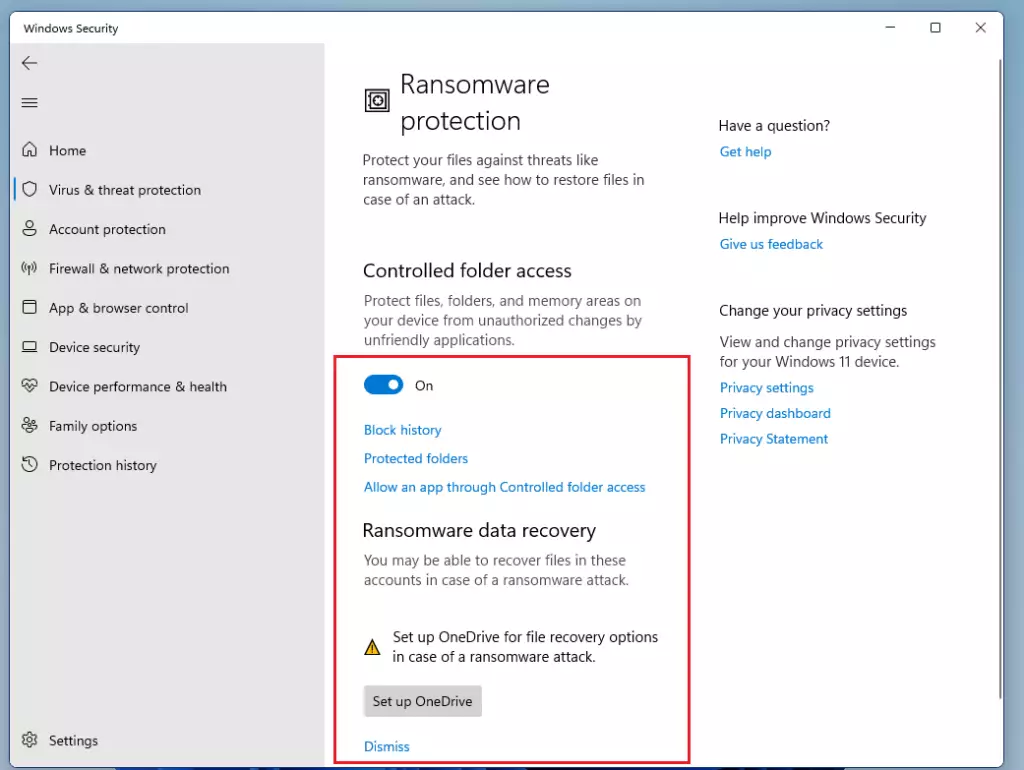
By default, folders in your home directory are added to the protected folder’s list. Click on the Protected Folders link under Controlled folder access to view the protected folder list.
You can add more folders to the list by clicking the Add a protected folder button below.
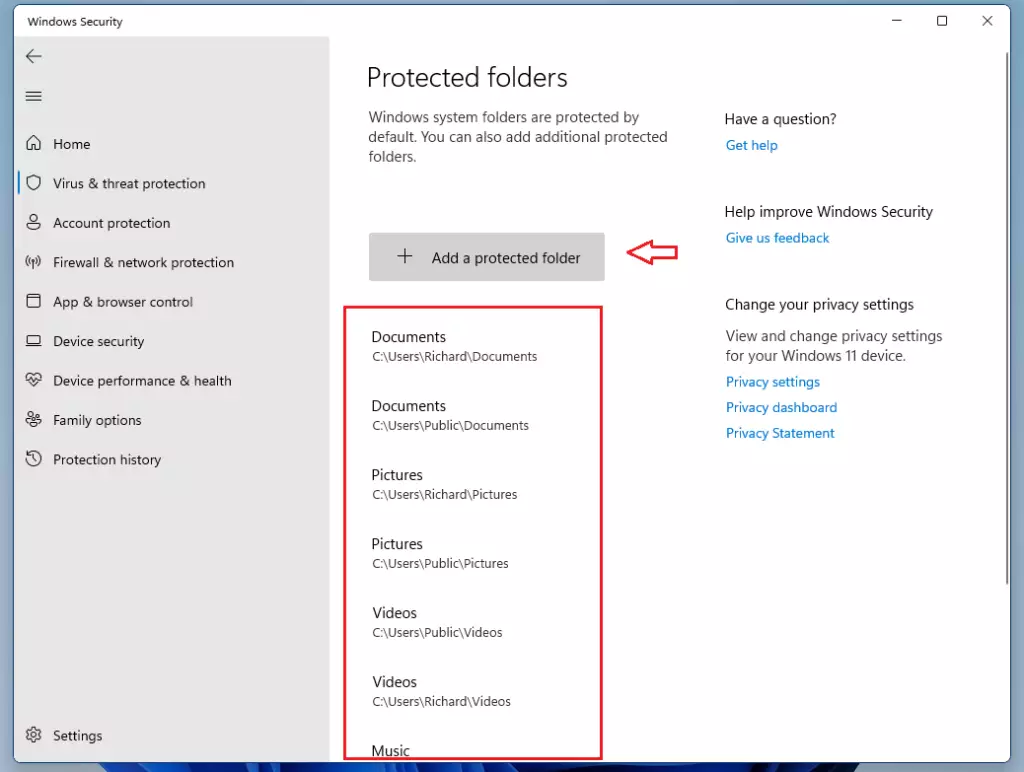
This will help prevent these folders from being compromised and held ransom.
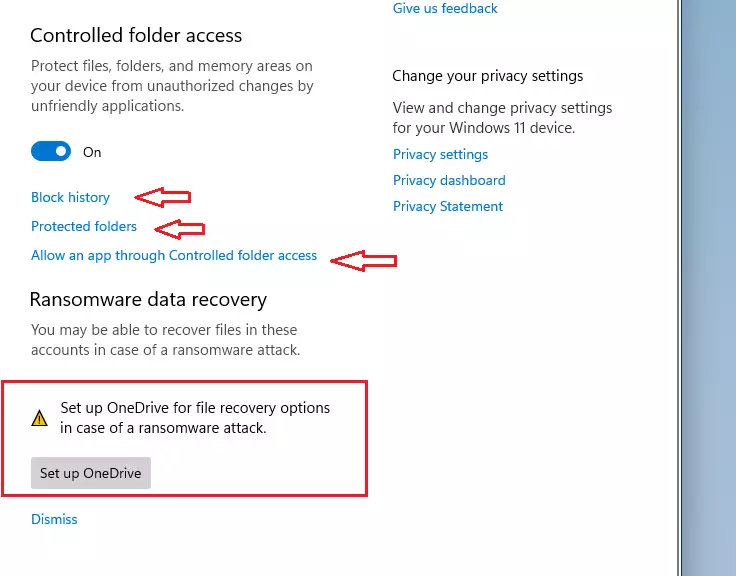
At times, it may interfere with legitimate applications and prevent access. You can check the block history under Controlled folder access to see which programs were blocked and allow legitimate applications to access those locations.
You can also proactively grant access to a legitimate program to these protected folders.
How to use OneDrive to restore folders in Windows 11
Configuring OneDrive as your backup location can assist in restoring a ransomware-infected folder if you become a victim of ransomware. Click the link to set up OneDrive to back up your folder.
For more about setting up OneDrive backup in Windows 11, read the post below:
That should do it!
Conclusion
Enabling controlled folder access in Windows 11 is crucial in protecting sensitive data from ransomware attacks. You can significantly enhance your system’s security by following the steps outlined above. Here are the key takeaways:
- Enable Ransomware Protection: Activate controlled folder access through Windows Security to safeguard your files.
- Manage Protected Folders: Add additional folders to the protected list to ensure they are not compromised.
- Monitor Blocked Programs: Check the block history to manage access for legitimate programs that may be unintentionally blocked.
- Use OneDrive for Backup: Set up OneDrive as a backup solution to restore files in case of a ransomware attack.
- Stay Informed: Regularly update your security settings and be vigilant about potential threats.
Taking these steps will help secure your data against ransomware, giving you peace of mind while using Windows 11.


Leave a Reply to How to Safeguard Your Windows 11 PC Against Viruses - Geek Rewind Cancel reply